Maintenance

tumble dryer

A Maintenance Guide For Your Tumble Dryer

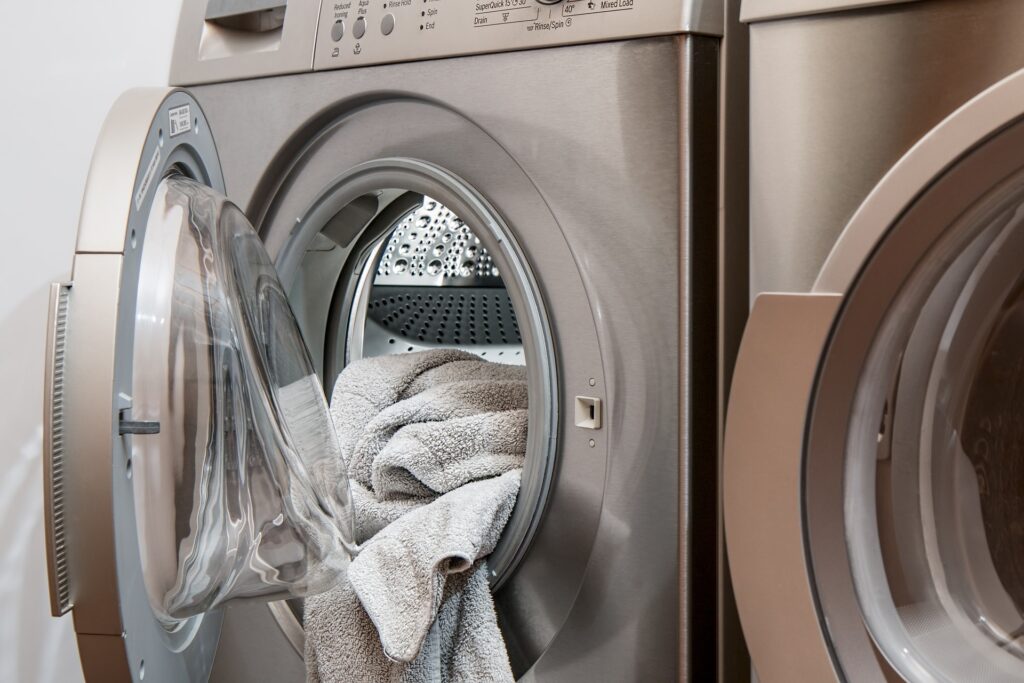
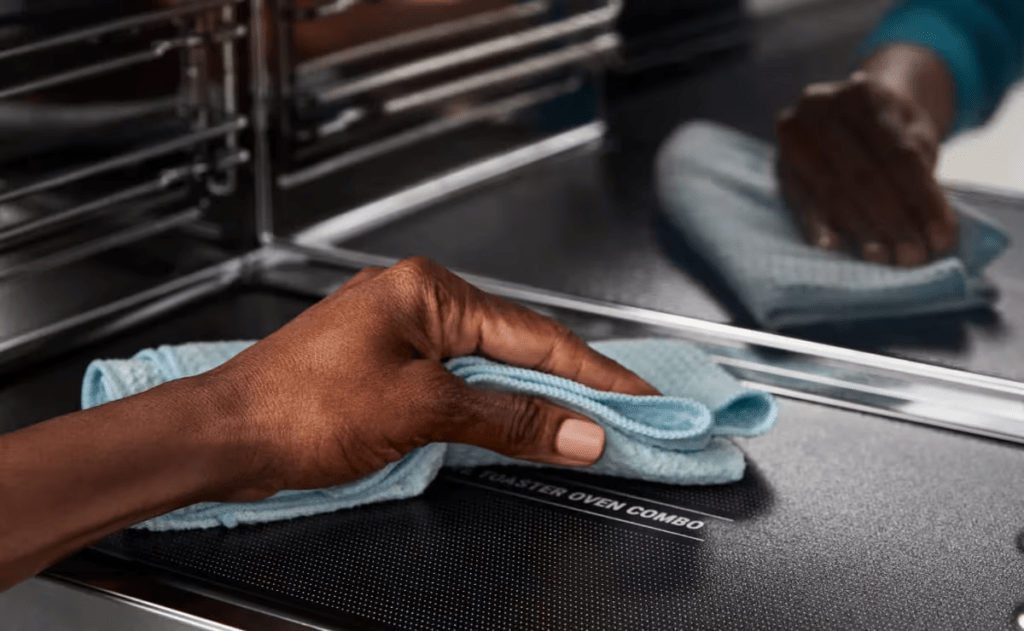
Is your tumble dryer acting up or taking forever to dry clothes? Dive into our comprehensive maintenance guide to keep your dryer running smoothly and efficiently! Related Services: Dryer Repair Hey there, lovely homeowners! If you’re like me, the tumble dryer is your trusty sidekick in the battle against the never-ending laundry pile. It’s that magical machine that turns soggy socks into warm, fluffy wonders. But, just like any superhero, your dryer needs some TLC to keep saving the day. Trust me, a little maintenance goes a long way in extending its life and keeping it from becoming a fire hazard. Picture this: You throw in a load of laundry, hit start, and… nothing. Or worse, your clothes come out as damp as they went in. Ugh, the horror! But don’t sweat it. With a few simple tricks and regular upkeep, you can keep your tumble dryer in tip-top shape. So, let’s roll up our sleeves and get to it—your dryer will thank you! Why Tumble Dryer Maintenance is Important First things first, let’s chat about why maintaining your tumble dryer is essential. This hardworking appliance is a staple in most homes, but it can also be a sneaky fire hazard if not properly cared for. According to some eye-opening stats, failure to clean the dryer is a leading cause of dryer fires. Yikes! Regular maintenance not only keeps your dryer running efficiently but also keeps your home safe. Now, I know what you’re thinking: “Isn’t cleaning the lint filter enough?” While that’s a great start, there’s so much more to it. From cleaning the vent hose to ensuring the dryer is balanced, each step plays a role in its overall performance. Plus, a well-maintained dryer uses less energy, which means lower bills for you. Win-win! So, what does this maintenance entail? Don’t worry, it’s not rocket science. With just a little effort, you can tackle these tasks and keep your dryer humming along happily. Let’s take a closer look at what you need to do. Essential Maintenance Tips for Your Tumble Dryer Alright, folks, it’s time to get down to the nitty-gritty of tumble dryer maintenance. These tips are your golden ticket to a dryer that works like a charm. From cleaning to adjusting, each step is crucial in keeping your appliance in perfect condition. Don’t Overload Your Dryer Let’s face it, we’ve all been tempted to cram as much laundry as possible into the dryer. But overloading is a big no-no. It puts unnecessary strain on the machine and reduces its efficiency. For best results, fill the drum just over halfway so your clothes have room to tumble freely. Regularly Clean the Lint Filter Cleaning the lint filter after every use might seem excessive, but it’s a must. A clogged filter makes your dryer work harder and can lead to overheating. Make it a habit to clear out the lint after each cycle, and you’ll be doing your dryer a huge favor. Deep Clean the Lint Filter and Housing Every few months, give the lint filter and its housing a thorough clean. Wash the filter under the tap and use a vacuum on low suction to clean the housing. Just ensure everything is dry before reassembling to avoid any mishaps. Keeping Your Tumble Dryer in Top Shape Now that we’ve tackled the basics, let’s explore a few more tips to keep your tumble dryer in pristine condition. These additional steps will ensure your dryer remains efficient and safe to use. Clean the Filter Drawer or Condenser Depending on your dryer’s model, it may have a filter drawer or condenser. These need regular cleaning to maintain efficiency. Check your user manual for specific instructions, and aim to clean these components every four or five cycles. Give Your Dryer Space to Breathe Your dryer needs room to ventilate, so avoid cramming it into tight spaces. Proper ventilation helps prevent overheating and ensures optimal performance. Consider stacking your dryer on top of your washing machine if space is limited. Keep Vent Hoses Clean If you have a vented dryer, clearing the vent hose every three months is essential. Disconnect the hose and clean it with a mild cleaning product or a feather duster. This simple step can prevent lint buildup and reduce fire risk. Frequently Asked Questions What maintenance does a tumble dryer need? A tumble dryer requires regular maintenance to function efficiently. This includes cleaning the lint filter after every use, deep cleaning the filter and housing every few months, and ensuring the vent hose is clear of debris. Additionally, keep the dryer balanced and ensure it has enough space for proper ventilation. How many times should you perform maintenance on your dryer? Regular maintenance should be a routine part of your laundry schedule. Clean the lint filter after every cycle and deep clean the filter housing every few months. For vented dryers, clear the vent hose every three months. By sticking to this schedule, you can keep your dryer running smoothly and safely. How do you clean your tumble dryer? To clean your tumble dryer, start by removing and cleaning the lint filter after each use. Every few months, deep clean the filter and housing with water and a vacuum. For vented models, clean the vent hose regularly. Wipe down the drum and exterior with a mild cleaning solution to prevent odors and keep your dryer looking fresh. Wrapping Up And there you have it, folks! With these simple maintenance tips, your tumble dryer will be in peak condition, ready to tackle even the most daunting laundry piles. Remember, regular upkeep is key to a long-lasting and efficient appliance. By taking the time to clean and care for your dryer, you’re not only ensuring its performance but also keeping your home safe from potential fire hazards. So, roll up those sleeves and give your trusty tumble dryer the love it deserves. You’ll be rewarded with perfectly dried clothes and peace of mind. Thanks for joining me on this

A Maintenance Guide For Your Tumble Dryer Read More »

samsung washing machine sanitization

Samsung Washing Machine Sanitization: Hygiene Steam Cycles

Is your Samsung washing machine in need of a little TLC? Dive into our guide on Samsung washing machine sanitization and discover how to keep it sparkling clean and running smoothly! Related Services: Washing Machine Repair Hey there, fellow homeowners! If you’ve ever caught a whiff of something funky coming from your laundry room, it might be time to give your Samsung washing machine a good sanitization. We all love our washers for making life easier, but they do need a bit of love in return. Regular cleaning not only keeps them smelling fresh but also ensures they work efficiently for years to come. But fear not! Sanitizing your Samsung washer isn’t as daunting as it sounds. With a few simple steps, you can banish those pesky odors and keep mold and mildew at bay. Whether you have a front loader or a top loader, we’ve got you covered with all the tips and tricks to make your machine shine. So, grab your cleaning supplies and let’s get started! Why Samsung Washing Machine Sanitization is Important First things first, let’s talk about why sanitizing your Samsung washing machine is a must-do task. Over time, moisture and detergent residue build up in your washer, creating a perfect environment for mold and mildew. This not only leads to unpleasant odors but can also affect the performance of your machine. Yikes! By regularly cleaning your washer, you can prevent these issues and keep your laundry smelling fresh. Samsung washers come with a handy Self Clean or Pure Cycle feature, designed to tackle the areas where dirt and grime tend to accumulate. It’s like a spa day for your washer, and it helps maintain its efficiency and longevity. Plus, a clean washing machine means cleaner clothes! When your washer is free from gunk and build-up, it can do its job more effectively, leaving your clothes looking and smelling their best. So, let’s dive into the nitty-gritty of how to keep your Samsung washing machine sanitization in tip-top shape. How to Sanitize Your Samsung Washing Machine Now that we know why it’s important, let’s get down to the how-to of Samsung washing machine sanitization. Whether you’re dealing with a front load or a top load washer, the process is quite similar. The goal is to eliminate any build-up and prevent future odors. Running a Self Clean Cycle The Self Clean or Pure Cycle is your washer’s best friend when it comes to sanitization. This special cycle is designed to clean the tub and other areas where moisture and detergent residue can accumulate. For top load washers, the cycle takes about an hour, while front load washers need around four hours. To run the cycle, simply make sure your washer is empty, press the Self Clean button, and hit Start. No need to add any cleaner, but if you’re dealing with a moldy smell, a bit of bleach can do wonders. If you notice suds or residue during the cycle, consider running another Self Clean cycle afterward. Keeping It Fresh Between Cleanings In between your monthly sanitization sessions, there are a few easy steps you can take to keep your washer fresh. First, try running a cycle with warm or hot water occasionally, especially if you usually wash with cold water. This helps slow down the build-up of soil and detergent. Also, make it a habit to leave the washer door and detergent drawer open after each wash. This allows air to circulate and prevents moisture from lingering, reducing the risk of mold and mildew formation. It’s a simple step that can make a big difference! Cleaning the Detergent Drawer and Pump Filter Don’t forget about the detergent drawer and pump filter! These areas can easily become clogged with detergent residue, affecting your washer’s performance. Wipe the detergent drawer dry after each use and deep clean it at least once a month. Simply remove the drawer, rinse it with warm water, and use a soft brush to remove any gunk. For front load washers, the pump filter should be cleaned monthly as well. This helps prevent odors and ensures proper drainage. Open the pump filter access panel, drain the water, and clean the filter with a soft brush. Easy peasy! Frequently Asked Questions Do you use detergent on the sanitize cycle? When running the sanitize cycle on your Samsung washing machine, you don’t need to add any detergent. The cycle is designed to clean the tub using hot water and the washer’s internal heater, effectively killing bacteria and mold. However, if you notice a persistent moldy smell, adding a small amount of bleach can help tackle the issue. How to run self clean on Samsung washing machine? Running a Self Clean cycle on your Samsung washing machine is a breeze. First, ensure the washer is empty, then press the Self Clean button followed by the Start button. The cycle will run for about an hour on top load washers and four hours on front load washers. No additional cleaner is needed, but you can add bleach if there’s a moldy odor. Does sanitize cycle shrink clothes? Worried about your clothes shrinking during the sanitize cycle? No need to fret! The sanitize cycle is specifically for cleaning the washer itself, not for washing clothes. It’s important to run this cycle with an empty drum to ensure effective cleaning. For regular laundry, stick to the recommended settings to avoid any unwanted shrinkage. https://www.tumblr.com/vancouverapplianceservice/771340100819894272/samsung-washing-machine-sanitization-hygiene Wrapping Up And there you have it, folks! Samsung washing machine sanitization is a simple yet crucial task that keeps your washer in prime condition. By regularly cleaning your washer, you can prevent odors, mold, and mildew, ensuring your laundry stays fresh and your machine runs smoothly. Remember to utilize the Self Clean or Pure Cycle feature, keep your washer’s door and detergent drawer open between washes, and give the detergent drawer and pump filter a good cleaning monthly. These small steps will make a big difference in the longevity and efficiency of your

Samsung Washing Machine Sanitization: Hygiene Steam Cycles Read More »

Unlock the secrets of LG Dishwasher Diagnostic Mode

Everything About LG Dishwasher Diagnostic Mode

Struggling with your LG dishwasher acting up? Dive into the world of LG Dishwasher Diagnostic Mode and unravel the mysteries of those pesky error codes! Related Services: Dishwasher Repair | Washing Machine Repair Hey there, fellow home enthusiasts! If you’ve ever found yourself staring at your LG dishwasher, wondering why it’s not cooperating, you’re definitely not alone. These modern marvels are packed with tech and sometimes, they just need a little nudge to get back on track. Luckily, LG has equipped their dishwashers with a nifty feature called Diagnostic Mode. It’s like a secret handshake between you and your appliance, helping you decode those cryptic error codes and get your dishwasher back to its sparkling best. Now, before you start imagining yourself as a dishwasher whisperer, let’s break down what Diagnostic Mode actually is. Think of it as a built-in troubleshooting buddy that helps identify issues without the need for a professional visit. Whether it’s a water leak, a motor hiccup, or a simple detergent mishap, Diagnostic Mode has got your back. So, grab a cup of coffee, and let’s explore how this magical feature can save the day (and your dishes). Understanding LG Dishwasher Diagnostic Mode So, what exactly is LG Dishwasher Diagnostic Mode, and why should you care? In simple terms, it’s a feature designed to make your life easier by pinpointing the source of your dishwasher troubles. LG dishwashers, known for their innovation and reliability, use this mode to communicate specific issues via error codes. These codes are like little SOS signals from your appliance, guiding you to the root of the problem. Diagnostic Mode is particularly handy because it allows you to troubleshoot issues without the guesswork. Imagine having a roadmap that tells you exactly where the detour is on your dishwashing journey. By understanding these codes, you can decide whether it’s a DIY fix or if it’s time to call in the pros. It’s all about empowering you to take control of your appliance’s health. Now, you might be wondering how to access this mode. It usually involves a specific sequence of button presses, kind of like a secret code to unlock hidden levels in a video game. Once you’re in, you’ll be able to see which error codes are flashing and what they mean. It’s like having a conversation with your dishwasher, minus the awkward small talk. Common LG Dishwasher Error Codes Before we dive into the nitty-gritty of Diagnostic Mode, let’s talk about some common error codes you might encounter. These codes are your dishwasher’s way of saying “Hey, something’s not right here!” Understanding them is the first step in resolving the issue. Let’s take a look at a few frequent flyers in the error code world. Error Code: IE (Water Level Problem) The IE code is a heads-up that your dishwasher isn’t getting enough water. This could be due to a kinked hose or a clogged inlet valve. Check your water supply and ensure everything is flowing smoothly. If the problem persists, you might need to call in a professional for further inspection. Error Code: OE (Drain Issue) Seeing an OE code? That means your dishwasher is having trouble draining. This could be due to a blockage in the filter or pump. Make sure to clean out any debris and check for clogs. If cleaning doesn’t do the trick, it might be time to look at the sump and drain pump for obstructions. Error Code: LE (Motor Problem) An LE error indicates a motor or circulation pump issue. This could be a simple reset situation or something that requires professional attention. Try turning off the dishwasher and restarting it. If the error remains, it might be best to call in the experts to take a closer look. How to Use LG Dishwasher Diagnostic Mode Alright, now that we’ve covered the basics, let’s get into the fun part: actually using Diagnostic Mode. This feature is like your dishwasher’s personal diary, revealing all its secrets and helping you fix them. Whether you’re dealing with a minor glitch or a more serious issue, Diagnostic Mode is your go-to tool. Accessing Diagnostic Mode To enter LG Dishwasher Diagnostic Mode, you’ll need to follow a specific sequence of button presses. This combination varies by model, so make sure to consult your user manual for the exact steps. Once you’re in, you’ll see a series of error codes that tell you what’s going on under the hood. Interpreting Error Codes Once you’re in Diagnostic Mode, it’s time to decode those error messages. Each code corresponds to a specific issue, like a secret language between you and your appliance. By understanding what each code means, you can take the right steps to resolve the problem, whether it’s a DIY fix or a call to the pros. Troubleshooting Common Issues With your error codes in hand, it’s time to troubleshoot. Start by addressing the most common issues, like checking water supply connections or cleaning out filters. If the problem persists, consult your user manual or reach out to a professional for assistance. Remember, Diagnostic Mode is there to guide you, but sometimes a little expert help is needed. Frequently Asked Questions How do I run smart diagnosis on my LG dishwasher? Running a smart diagnosis on your LG dishwasher is a breeze. Start by downloading the LG SmartThinQ app on your smartphone. Once installed, open the app and follow the on-screen instructions to initiate the diagnosis. Make sure your phone is close to the appliance, as the diagnosis involves sound signals that the app will interpret. This process will give you insights into any issues your dishwasher might be experiencing. How to test control board on LG dishwasher? Testing the control board on your LG dishwasher requires a bit of technical know-how. First, ensure the dishwasher is unplugged for safety. Then, remove the control board cover and inspect for any visible damage or burnt components. If everything looks fine, use a multimeter to test the electrical connections for continuity.

Everything About LG Dishwasher Diagnostic Mode Read More »

bosch dishwasher energy use

On Bosch Dishwasher Energy Use

Wondering how much energy your Bosch dishwasher really uses? Dive into our bubbly guide to discover everything you need to know about Bosch Dishwasher Energy Use and how it impacts your home and wallet! Related Services: Dishwasher Repair | Washing Machine Repair Hey there, fellow homeowners! Let’s talk about one of the unsung heroes of our kitchens—the dishwasher. Specifically, we’re diving into the world of Bosch dishwashers and their energy use. You might be thinking, “Why should I care about dishwasher energy use?” Well, my friend, knowing the energy consumption of your appliances can be a game-changer for both your electric bill and our lovely planet. Bosch dishwashers are known for their sleek designs and whisper-quiet operation, but they’re also praised for their energy efficiency. These machines are like the eco-friendly ninjas of the kitchen world, stealthily cleaning your dishes while keeping energy use low. So, if you’re curious about how these dishwashers help save energy and what it means for you, stick around as we break it all down! Understanding Bosch Dishwasher Energy Use Before we get into the nitty-gritty, let’s talk about why energy use is such a big deal. With rising energy costs and growing environmental concerns, homeowners are more conscious than ever about their energy consumption. Dishwashers, like any other appliance, contribute to your household’s overall energy use. But with Bosch, you’re in for a pleasant surprise! Bosch dishwashers are designed with energy efficiency in mind. They’re equipped with features like the Eco 50°C program, which is specifically designed to minimize energy and water consumption. This means you can have sparkling clean dishes without feeling guilty about your carbon footprint. The Eco program is the most efficient in terms of combined energy and water consumption, making it a popular choice among eco-conscious users. Not only do these dishwashers save energy, but they also come with an Energy Efficiency Class of A++, which is like getting an A+ on your energy report card. This rating means that Bosch dishwashers use less energy than many other models on the market, helping you save money on your electricity bill while doing your part for the environment. Key Features of Bosch Dishwashers Now that we’ve covered the importance of energy use, let’s dive into some of the standout features that make Bosch dishwasher energy use a top choice for energy efficiency. These features are not just about saving energy; they also enhance the overall performance and convenience of your dishwasher. Eco-Friendly Programs One of the main highlights of Bosch dishwashers is their Eco 50°C program. This program is designed to clean normally soiled tableware efficiently, using less energy and water. It’s like having a mini environmentalist in your kitchen, ensuring your dishes are clean without wasting resources. Silence and Efficiency Bosch dishwashers are renowned for their quiet operation. With noise levels as low as 42 dB, these dishwashers can run without disturbing your peaceful home environment. The Silence program takes it a step further, making it perfect for open-plan living spaces where noise can be a concern. Advanced Technology Tech-savvy homeowners will appreciate the advanced features Bosch dishwashers offer. From the VarioFlex Pro baskets for optimal space utilization to the LED display for easy program selection, these dishwashers are designed to make your life easier while being energy efficient. How Bosch Dishwashers Save Energy So, how exactly do Bosch dishwasher energy use make it very efficient? It all comes down to a combination of smart design and innovative technology. Let’s explore some of the ways Bosch dishwashers save energy while delivering top-notch cleaning performance. Optimized Water Usage Water usage is a critical factor in energy consumption. Bosch dishwashers are designed to use water efficiently, with some models consuming as little as 6.5 liters per cycle. This not only saves water but also reduces the energy needed to heat it, making these dishwashers a win-win for your wallet and the planet. Efficient Heating Elements Bosch dishwashers come with hidden heating elements that are designed to heat water efficiently. This ensures that energy is used effectively during the washing and drying cycles, reducing overall consumption. Plus, the heat exchanger technology provides hygienic and efficient drying, so your dishes come out spotless every time. Smart Sensors With features like the Hydrosensor and Load Sensor, Bosch dishwashers can adjust water and energy usage based on the load size and soil level. This means that whether you’re washing a full load or just a few items, your dishwasher uses only the necessary resources, optimizing energy use for every cycle. Frequently Asked Questions Do modern dishwashers use less electricity? Yes, modern dishwashers are designed to be more energy-efficient than older models. They often come with advanced features and programs that use less water and energy, such as the Eco cycle found in Bosch dishwashers. These improvements help reduce the overall electricity consumption, making them a better choice for environmentally conscious homeowners. How much electricity does a 1 hour dishwasher cycle use? The electricity used during a 1-hour dishwasher cycle can vary depending on the model and the specific program selected. For Bosch dishwashers, the energy consumption for a typical cycle is around 0.92 kWh. This figure can be lower or higher based on the specific settings and cycle chosen, but Bosch dishwashers are designed to keep energy use to a minimum. How much electricity does a Bosch dishwasher use? Bosch dishwashers are known for their energy efficiency, with an annual energy consumption of around 262 kWh based on 280 standard cleaning cycles. This translates to approximately 0.92 kWh per cycle. The Eco 50°C program is particularly efficient, making Bosch dishwashers an excellent choice for those looking to reduce their energy bills. https://www.tumblr.com/vancouverapplianceservice/771339513658261504/on-bosch-dishwasher-energy-use Wrapping Up In conclusion, Bosch dishwashers are a fantastic option for homeowners looking to balance performance with energy efficiency. With their advanced features and eco-friendly programs, these dishwashers provide a sparkling clean while keeping your energy consumption in check. Whether you’re motivated by saving money or saving the planet, Bosch dishwasher energy use

On Bosch Dishwasher Energy Use Read More »

how to clean the inside of a bosch dishwasher

Easy Guide on How To Clean the Inside of a Bosch Dishwasher

Is your Bosch dishwasher starting to smell funky or leaving your dishes less than sparkling? No worries – we’ve got the ultimate guide on how to clean the inside of a Bosch dishwasher! Related Services: Dishwasher Repair | Washing Machine Repair Let’s face it, dishwashers are the unsung heroes of our kitchens. They tirelessly battle through the grease, grime, and leftover lasagna bits so we don’t have to. But even heroes need a little TLC now and then. If your Bosch dishwasher has been a little less heroic lately, it might be time for a deep clean. Trust me, a clean dishwasher not only smells fresher but also performs better. It’s like giving your dishwasher a spa day, and who wouldn’t want that? Many of us might assume that our dishwashers are self-cleaning, but that’s not entirely true. Over time, bits of food, soap scum, and pesky water minerals can build up, making your dishwasher work harder than it should. And let’s not even talk about the odors that can develop! If you’ve noticed that your dishes aren’t coming out as clean as they used to, or if there’s a mysterious smell wafting from your kitchen, it’s time to roll up your sleeves and get to work. Let’s dive deep on how to clean the inside of a Bosch dishwasher! Understanding the Problem: Why Your Bosch Dishwasher Needs Cleaning So, why does your Bosch dishwasher need cleaning in the first place? It’s simple: over time, all those leftover food particles, grease, and mineral deposits from hard water can accumulate. This buildup doesn’t just make your dishwasher less efficient; it can also lead to unpleasant odors. Yikes! Nobody wants their kitchen to smell like last week’s dinner. When these particles aren’t addressed, they can clog up the spray arms and filters, which are crucial for your dishwasher’s performance. Imagine trying to wash dishes with a clogged sink – not fun, right? By regularly cleaning these components, you can keep your Bosch dishwasher running smoothly and ensure that your dishes come out sparkling every time. But don’t worry, cleaning your Bosch dishwasher isn’t as daunting as it sounds. With a few simple steps and some household ingredients, you can have it looking and smelling fresh in no time. Plus, regular maintenance can help extend the life of your appliance, saving you money in the long run. Let’s dive into the details and see how you can give your dishwasher the care it deserves. Step-by-Step Guide: How To Clean the Inside of a Bosch Dishwasher Now that we understand why cleaning is crucial, let’s get into the nitty-gritty of how to clean the inside of a Bosch dishwasher. It’s easier than you might think, and you’ll only need a few supplies that you probably already have at home. Ready to make your dishwasher shine? Let’s go! Cleaning the Dishwasher Filter The filter is like the dishwasher’s stomach, catching all the gunk you don’t want lingering around. To clean it, start by removing the lower rack and spray arm. Twist the filter cap and pull up to remove the filter and mesh screen. Rinse them under warm water and scrub away any stubborn debris with a soft brush. Once clean, place the filter back, twist the cap to secure it, and reattach the spray arm and rack. Cleaning the Dishwasher Tub The tub is where all the action happens, and it can get pretty grimy. For a deep clean, pour a cup of white vinegar into a dishwasher-safe bowl and place it on the top rack. Run a heavy clean cycle without any dishes. After that, sprinkle a cup of baking soda on the bottom of the tub and let it sit overnight. Run another cycle in the morning, and voilà – a fresh-smelling tub! Cleaning the Spray Arms Spray arms do the heavy lifting by spraying water all over your dishes. If they’re clogged, your dishes won’t get clean. Remove both spray arms and use a toothpick to clear out any debris from the holes. Rinse them under warm water, dry them off, and reattach them. Make sure they spin freely before putting the rack back in place. Preventing Future Odors and Buildup Now that we’ve tackled the deep clean, let’s talk about keeping your Bosch dishwasher in tip-top shape. Regular maintenance is key to preventing odors and buildup from returning. With a few easy steps, you can keep your dishwasher running smoothly and smelling fresh. First, make it a habit to clean the filter and spray arms every 3-6 months. This will keep them free from clogs and ensure optimal performance. After each dishwasher cycle, remove any leftover food particles and wipe down the interior with a clean cloth. This simple step can make a big difference in preventing odors. Additionally, consider using a high-quality detergent like FINISH, as recommended by Bosch. Using the right detergent can help reduce soap residue and smelly bacteria. Remember, less is more – don’t overdo it with the detergent, as excessive amounts can lead to buildup and odors. Frequently Asked Questions Do Bosch dishwashers have a filter that needs to be cleaned? Yes, Bosch dishwashers come with a filter that needs regular cleaning. The filter is located at the bottom of the dishwasher and is responsible for catching food particles and preventing clogs. It’s important to clean the filter every 3-6 months to ensure your dishwasher runs efficiently and to prevent unpleasant odors. Can I use vinegar in my Bosch dishwasher? While vinegar is a popular household cleaner, it’s not the best choice for regular use in your Bosch dishwasher. Vinegar is a mild acid, and over time, it can damage rubber gaskets and hoses. Instead, stick to Bosch’s recommended cleaning products to ensure the longevity of your dishwasher. What is the life expectancy of a Bosch dishwasher? Bosch dishwashers are known for their durability and can last anywhere from 10 to 15 years with proper care and maintenance. Regular cleaning and using the right

Easy Guide on How To Clean the Inside of a Bosch Dishwasher Read More »

how to repair dryer sensors

How to Diagnose and Repair Dryer Sensors for Optimal Efficiency

Is your dryer acting more like a sauna than a smart appliance? Let’s dive into the world of dryer and learn how to diagnose and repair dryer sensors for maximum efficiency! Related Services: Dryer Repair If your dryer is turning your laundry day into a never-ending saga, it might be time to give your repair dryer sensors a little TLC. These nifty little gadgets are the unsung heroes of your drying routine, ensuring your clothes come out perfectly dry and fresh. But when they start acting up, it’s like your dryer has a mind of its own—leaving you with damp clothes or running up your energy bill. Don’t worry, though! You don’t need to be an appliance repair wizard to get your dryer back on track. With just a few simple steps, you can diagnose and repair those pesky sensors right from the comfort of your home. So, grab your toolkit and let’s get started on making your dryer the efficient machine it was meant to be! Understanding Repair Dryer Sensors and Their Importance Before we jump into the nitty-gritty of repairs, let’s take a moment to understand on how to repair dryer sensors do and why they’re so crucial. Most modern dryers come equipped with moisture sensors that detect when your clothes are dry and automatically shut off the machine. This not only saves energy but also prevents over-drying, which can be harsh on your fabrics. However, these sensors can sometimes get dirty or malfunction, leading to inefficient drying cycles. If you’ve noticed your dryer running longer than usual or stopping before your clothes are dry, the sensors might be to blame. It’s essential to keep them clean and functioning correctly to maintain optimal efficiency and extend the life of your dryer. Now that we know what these sensors do, let’s explore how to diagnose and repair them. Whether you’re a seasoned DIYer or a newbie to appliance maintenance, we’ve got you covered with easy-to-follow steps and helpful tips. Diagnosing Dryer Sensor Issues So, you’ve noticed some odd behavior from your dryer, and you’re ready to play detective. Diagnosing dryer sensor issues isn’t as daunting as it sounds. The first step is to identify the symptoms, which can include cycles that end too soon or run indefinitely. These are telltale signs that your moisture sensors might be on the fritz. Begin by locating the moisture sensors inside your dryer. Typically, you’ll find them as two metal strips inside the drum, usually near the lint filter. If they’re covered in a waxy film, especially if you use dryer sheets, that’s a clear indicator they need cleaning. A dirty sensor can’t accurately detect moisture levels, leading to inefficient drying. Once you’ve identified the problem, it’s time to roll up your sleeves and get to work. Cleaning the sensors is a straightforward process that can often resolve minor issues. Let’s move on to the steps for cleaning and, if necessary, replacing those sensors. Cleaning and Repair Dryer Sensors Cleaning the sensors is a quick and easy fix that can save you a lot of hassle down the road. All you need are a few simple tools: alcohol wipes, a wire brush, or fine sandpaper. Regular cleaning can prevent sensor malfunctions and keep your dryer running smoothly. Step 1: Locate and Prepare First, make sure your dryer is unplugged for safety. Locate the moisture sensors inside the drum; they’re usually near the lint filter. Once you’ve found them, you’re ready to start cleaning. Step 2: Clean the Sensors Use alcohol wipes to gently clean the metal strips, wiping them down three or four times until they shine. Alternatively, you can use a small wire brush or fine sandpaper to remove any residue. This will help the sensors accurately detect moisture levels again. Step 3: Test the Sensors After cleaning, it’s time to test your handiwork. Set your dryer to Auto Dry and place a damp cotton shirt inside. Run the cycle and check if the dryer turns off when the shirt is dry. If it does, congratulations, you’ve successfully repair dryer sensors! Replacing Dryer Sensors If cleaning doesn’t do the trick, it might be time to replace the sensors. Don’t worry—this is still a DIY-friendly task. Replacing dryer sensors can seem intimidating, but with a bit of patience, you’ll have your dryer back in tip-top shape. Step 1: Unplug and Access As always, safety first! Unplug your dryer and pull it out to give yourself plenty of room to work. You’ll need to remove the top and front panels to access the sensors. Step 2: Remove the Old Sensors Once you have access, locate the moisture sensors secured by a screw and wire harness. Unplug the harness, remove the screw, and gently pull out the old sensors. Keep track of the screws and parts as you go. Step 3: Install New Sensors Position the new moisture sensors in place, secure them with the screw, and reattach the wire harness. Reassemble your dryer, plug it back in, and run a test cycle with a load of wet clothes to ensure everything is working correctly. Frequently Asked Questions How much does it cost to replace a dryer heat sensor? The cost of replacing a dryer heat sensor can vary depending on the brand and model of your dryer. On average, you might spend anywhere from $20 to $50 for the part itself. If you choose to hire a professional for the job, expect to add labor costs, which could range from $100 to $150. Doing it yourself is a great way to save some cash! Why do dryer moisture sensors fail? Dryer moisture sensors often fail due to a buildup of residue, especially if you use dryer sheets. The waxy film from these sheets can coat the sensors, preventing them from accurately detecting moisture levels. Regular cleaning can prevent this issue, but over time, sensors may also wear out from regular use and require replacement. How do you know if your dryer sensor is

How to Diagnose and Repair Dryer Sensors for Optimal Efficiency Read More »

how to replace refrigerator fuse

How to Identify and Replace Refrigerator Fuse to Prevent Power Outages

Is your refrigerator giving you the cold shoulder? Dive into our guide to identify and replace the refrigerator fuse, keeping those power outages at bay! Related Services: Fridge Repair We all know the refrigerator is the unsung hero of our kitchens, keeping our snacks cool and our leftovers fresh. But what happens when this trusty appliance decides to take an unexpected nap? Before you panic and start dialing every appliance repair service in town, let’s explore a DIY solution that could save the day: checking and replacing the refrigerator fuse. Yes, you heard that right! Sometimes, the root of the problem is as simple as a blown fuse. So, grab your tool kit, and let’s get to work! Now, before you roll up your sleeves and channel your inner handyman or woman, let’s chat about why this tiny component is so important. A refrigerator fuse is like a safety net for your appliance, preventing electrical overloads that can lead to bigger, more expensive issues. Whether you’re living in a cozy apartment or a sprawling house, knowing how to tackle this small but mighty repair can make a world of difference. Plus, it’s a great way to flex those eco-friendly muscles by extending the life of your appliance. Ready to become a refrigerator repair pro? Let’s jump in! Understanding the Refrigerator Fuse Alright, let’s get down to the nitty-gritty of the refrigerator fuse. This little gadget is a lifesaver when it comes to protecting your appliance from electrical mishaps. Think of it as the guardian angel of your fridge, stepping in to cut off power when things get too heated—literally. Overheating can cause the thermal fuse to blow, which then stops the refrigerator from working. While this might sound like a bummer, it’s actually a good thing because it prevents further damage. So, how do you know if your fuse is the culprit behind your fridge woes? One telltale sign is if the evaporator inside the fridge starts to freeze over. This usually means the thermal fuse has done its job and needs replacing. Another hint might be the lights inside your fridge going out while the rest of the house is still lit up like a Christmas tree. If you’re nodding along, thinking, “Yep, that’s my fridge,” then it’s time to roll up those sleeves and get to work. Before you dive into replacing the fuse, remember to unplug your refrigerator. Safety first, folks! Once that’s done, you’ll need to locate the fuse, which is usually tucked away behind some paneling. Depending on your fridge model, it might be inside or at the rear bottom near the compressor. Grab your trusty owner’s manual for guidance, and let’s move on to the next step. Identifying and Replacing the Refrigerator Fuse Now that you’ve got a handle on what the fuse does and why it’s important, let’s talk about how to actually replace it. This process might sound daunting, but trust me, it’s easier than assembling that flat-pack furniture you bought last month. With a few simple tools and a dash of confidence, you’ll have your fridge back up and running in no time. Gather Your Tools First things first, make sure you have the right tools on hand. You’ll need a Phillips head screwdriver, a flat head screwdriver, wire cutters, and some zip ties. These are pretty standard items you might already have lying around your home. Once you’ve got your tools ready, it’s time to find that pesky fuse. Locate the Fuse With your refrigerator unplugged, use the owner’s manual to locate the fuse. It’s usually behind some paneling, either inside the fridge or at the bottom rear near the compressor. Use the Phillips head screwdriver to remove any screws holding the panel in place, and then gently pry it open with the flat head screwdriver. Be careful not to damage any wires while doing this. Replace the Fuse Once you’ve exposed the thermal fuse, it’s time to replace it. The fuse is typically connected with plastic clips. Carefully unclip the old fuse and replace it with a new one. If the wiring is secured with zip ties, use the wire cutters to remove them and apply new zip ties once the new fuse is in place. Reassemble the paneling, plug the fridge back in, and voilà! Your fridge should be back to its chilly self. Frequently Asked Questions How do I know if my refrigerator fuse is blown? If your refrigerator suddenly stops working or the lights inside go out, a blown fuse could be the issue. Another sign is if the evaporator inside the fridge starts to freeze over. These symptoms indicate that the thermal fuse has tripped to prevent overheating, and it’s time to replace it. How to check refrigerator thermal fuse? To check the thermal fuse, first, unplug the refrigerator for safety. Then, locate the fuse by referring to your owner’s manual—it’s usually behind some paneling inside the fridge or near the compressor. Once you’ve found it, inspect the fuse for any visible damage or signs of tripping. What fuse does a fridge use? Most refrigerators use a thermal fuse, which is designed to trip when the appliance overheats. The specific type of fuse can vary depending on the refrigerator model, so it’s important to check your owner’s manual or consult with a professional to ensure you get the correct replacement. Wrapping Up And there you have it, folks! Replacing a refrigerator fuse might seem like a daunting task at first, but with the right tools and a little know-how, it’s a DIY project that’s totally manageable. Not only will you save some cash on repair bills, but you’ll also gain a newfound appreciation for the inner workings of your trusty fridge. Remember, while DIY repairs can be satisfying, safety is always the top priority. If you ever feel unsure about tackling this task, don’t hesitate to call in a professional. They’re just a phone call away and can ensure your appliance is repaired safely

How to Identify and Replace Refrigerator Fuse to Prevent Power Outages Read More »

how to repair oven fuse blown

How to Replace an Oven Fuse Blown for Safe and Consistent Heating

Is your oven fuse blown and refusing to heat up properly? Let’s dive into the world of oven fuses and get your kitchen back to its cozy, warm self! Related Services: Oven Repair You know that feeling when you’re ready to bake those cookies, but your oven is just not heating up? Total bummer, right? Before you start blaming your baking skills, it might just be a case of a blown oven fuse. But don’t worry, because replacing an oven fuse is easier than you think, and I’m here to guide you through it. In the world of electric ovens, fuses play a crucial role. They’re like the unsung heroes keeping your appliance from overheating or going haywire. However, when they blow, it can feel like your oven’s on strike. But fear not, because with a little know-how, you can replace that blown fuse and get your oven back to its baking glory. So, grab your tool kit, and let’s get started on this electrifying journey! Understanding the Oven Fuse Blown Problem First things first, let’s talk about what an oven fuse does and why it might blow. An oven fuse is a safety device designed to protect your appliance from electrical surges. When there’s too much electricity flowing through, the fuse blows to prevent damage. It’s like your oven’s personal bodyguard against electrical mishaps. Now, why do these fuses blow? It could be due to a short circuit, a malfunctioning oven component, or even a circuit overload. Imagine your oven trying to juggle too many tasks at once, and the fuse is just like, “Nope, not today!” Understanding these reasons can help you prevent future blowouts and keep your oven running smoothly. Replacing a blown fuse might sound intimidating, but it’s actually a straightforward process. With a few simple steps, you can swap out that faulty fuse and restore your oven’s heating prowess. Plus, it’s a great way to flex those DIY muscles and save some bucks on repair costs. Ready to become an oven-fixing pro? Let’s dive into the nitty-gritty of fuse replacement! Steps to Safely Replace an Oven Fuse Blown Before we jump into the fuse replacement process, it’s essential to ensure safety first. Always unplug your oven or turn off the power at the main panel before you start fiddling with anything. Safety goggles and a trusty screwdriver are your best friends in this mission. Locating the Fuse The first step is to find the fuse. In most ovens, the fuse is located under the cooktop. You might need to lift the top of the range or remove the drip pans and look on the sides of the cabinet. If you’re unsure, check your oven’s manual for guidance. Once you’ve located the fuse, it’s time to assess the situation. If the fuse looks burnt or damaged, it’s likely the culprit behind your oven’s cold shoulder. Make sure to have a replacement fuse of the same type and electrical rating ready to go. Replacing the Fuse With the power off and the fuse located, gently unscrew the old fuse. Be careful not to damage any surrounding components. Once removed, screw in the new fuse, ensuring it’s snug and secure. It’s a simple swap, but it can make all the difference in your oven’s performance. After replacing the fuse, it’s time to test your oven. Turn the power back on and see if it’s heating up as it should. If all goes well, you’ve successfully replaced your oven fuse blown like a pro. Pat yourself on the back and get ready to bake those cookies! Tips to Prevent Future Oven Fuse Blown Issues Now that you’re a fuse-replacing expert, let’s talk about preventing future blowouts. Regular maintenance and a few precautions can go a long way in keeping your oven fuse blown intact and your appliance running smoothly. Regular Maintenance One way to prevent fuse issues is by keeping your oven clean and well-maintained. Regularly check for any signs of wear and tear, and address them promptly. A little TLC goes a long way in prolonging your oven’s lifespan. Also, be mindful of how many appliances you have running on the same circuit. Overloading a circuit can lead to blown fuses, so try to distribute your electrical load evenly. It’s all about balance, just like in life! Professional Check-Ups If you’re ever in doubt or encounter persistent fuse issues, don’t hesitate to call in a professional. They can provide a thorough inspection and address any underlying problems. Sometimes, a little expert advice is all you need to keep your oven in top-notch condition. Remember, safety is key. If you’re not comfortable handling electrical components, it’s always best to consult a professional. Your oven will thank you for it! Frequently Asked Questions Why does my oven keep blowing the fuse? Your oven might be blowing the fuse due to several reasons. A common cause is a circuit overload, where the oven draws more power than the circuit can handle. This can happen if multiple appliances are connected to the same circuit, leading to excessive power consumption. Another reason could be a short circuit, which occurs when wires come into contact and increase amperage. A malfunctioning oven component might also be the culprit, causing the appliance to draw excessive electricity. Identifying the root cause can help you address the issue effectively. How to tell if an oven fuse is blown? To determine if your oven fuse is blown, first ensure the oven is unplugged or the power is off. Locate the fuse, usually found under the cooktop or at the back of the oven. If the fuse appears burnt or damaged, it’s likely blown. You can also use a multimeter to test for continuity. If the multimeter doesn’t show a reading, the fuse is blown and needs replacing. Always remember to replace it with a fuse of the same type and rating. What causes an oven fuse to trip? An oven fuse can trip due to several factors. One

How to Replace an Oven Fuse Blown for Safe and Consistent Heating Read More »

how to fix washing machine fuse

How to Fix a Washing Machine Fuse That Won’t Start Up

Is your washing machine giving you the silent treatment? Let’s dive into the world of washing machine fuses and get your laundry game back on track! Related Services: Washing Machine Repair Picture this: you’re all set to tackle Mount Laundry, only to find your washing machine isn’t starting. Cue the panic! But before you start imagining life without clean clothes, take a deep breath. Sometimes, the solution is as simple as fixing a washing machine fuse. This tiny component can be the difference between a functioning appliance and a stubbornly silent one. Now, don’t let the idea of a DIY repair scare you off. With a bit of guidance and a few tools, you can troubleshoot and potentially fix the issue yourself. Whether you’re a homeowner, apartment dweller, or eco-conscious repair enthusiast, this guide will walk you through the steps to get your washing machine back in action. So roll up those sleeves, and let’s get started! Understanding the Problem: Washing Machine Fuse Woes Washing machines, like any other household appliance, can sometimes throw a tantrum and refuse to start. One common culprit is a blown fuse. But what exactly is a washing machine fuse, and why does it matter? Simply put, a fuse is a safety device that protects your machine from electrical overloads. If it blows, your machine won’t start, and it’s a sign that something needs attention. Fuses are typically located in the control panel of the washing machine, and they can be tricky to access. However, they play a crucial role in ensuring your appliance doesn’t fry itself due to electrical issues. If you’re experiencing problems, checking the fuse should be one of your first steps. It’s a simple yet often overlooked component that can save you a lot of hassle and expense. Before you dive into the repair, it’s important to gather the right tools and take safety precautions. You’ll need a screwdriver, a multimeter, and possibly some replacement fuses. And remember, always disconnect your washing machine from the power source before attempting any repairs. Safety first, folks! Diagnosing the Issue: Is It Really the Fuse? Before you go all-in on fixing the fuse, it’s essential to make sure that’s the actual issue. There are several reasons a washing machine might not start, and a fuse is just one of them. Start by checking if your machine is plugged in and if the circuit breaker hasn’t tripped. These might seem like no-brainers, but you’d be surprised how often simple solutions are the answer. Checking the Power Source Sometimes, the problem is as basic as a loose power cord. Washing machines can vibrate quite a bit during cycles, and this can cause the plug to wiggle out of the socket. Ensure your machine is firmly plugged in. If that doesn’t work, test the outlet with another device to see if it’s working. If the outlet is dead, you might have a tripped circuit breaker on your hands. Inspecting the Lid Switch For top-load washing machines, the lid switch is a common culprit. This safety feature ensures the machine only operates when the lid is closed. If the switch is faulty, your machine won’t start. Use a multimeter to test the switch’s continuity. If the test comes back negative, it’s time to replace the switch. Examining the Control Board In some cases, the issue might be deeper within the machine’s electronics. The control board manages the main functions of the appliance, and if it’s malfunctioning, your washer won’t start. Unplug the machine and inspect the back of the control board for any signs of damage or burning. If you spot any, consider calling in a professional, as this is a more complex repair. Replacing the Washing Machine Fuse So, you’ve done your detective work, and it seems like the fuse is indeed the problem. Time to roll up your sleeves and get to work! Replacing a washing machine fuse isn’t rocket science, but it does require a bit of patience and attention to detail. Here’s how you can do it. Accessing the Control Panel First things first, unplug your washing machine. Safety is key! Next, locate the control panel, usually found at the top of the machine. You’ll need to remove a few screws to access it. Keep those screws safe—you’ll need them later. Once you’ve got the panel open, you should see the fuse. Identifying the Blown Fuse Blown fuses are often easy to spot—they’ll be blackened or broken. If you’re unsure, use a multimeter to test the fuse’s continuity. A negative result means it’s time for a replacement. Make sure to get the correct fuse type for your machine model; your owner’s manual or manufacturer’s website can help with this. Replacing the Fuse With the faulty fuse identified, carefully remove it and replace it with a new one. Be gentle and ensure it’s securely in place. Once done, reassemble the control panel, plug your machine back in, and give it a test run. With any luck, you’ll hear the sweet sound of a working washing machine! Frequently Asked Questions What to do if the washing machine is plugged in but won’t turn on? If your washing machine is plugged in but still won’t turn on, start by checking the circuit breaker. It might have tripped, cutting power to the outlet. If the breaker is fine, test the outlet with another device to ensure it’s working. If the outlet is dead, you may need an electrician to check the wiring. How do I know if my washing machine fuse is blown? A blown fuse will often appear blackened or broken. To be sure, test the fuse with a multimeter for continuity. If the multimeter shows no continuity, the fuse is blown and needs replacing. Always refer to your washing machine’s manual for specific guidance on fuse location and type. Why is my washing machine not starting the cycle? There could be several reasons your washing machine isn’t starting a cycle. Check if the door or

How to Fix a Washing Machine Fuse That Won’t Start Up Read More »

remove microwave burnt stains and smell

How Do I Clean the Microwave Burnt-On Mess?

Tackling a microwave with a burnt-on mess? Don’t sweat it—let’s explore the best ways to clean it up and get your kitchen smelling fresh again! Related Services: Microwave Repair Hey there, microwave warriors! We all know that microwaves are like the unsung heroes of the kitchen. They zap our leftovers back to life and make popcorn night a breeze. But, oh boy, when that popcorn turns into a charcoal brick, we’re left with a sticky, smelly mess. Don’t worry, though! I’m here to guide you through the chaos and help you rescue your microwave from the clutches of burnt-on disasters. Cleaning a microwave burnt-on mess might seem like a daunting task, but it’s totally manageable with the right approach. Whether you’re a homeowner or a busy renter, you deserve a microwave that doesn’t smell like last week’s burnt popcorn. So, let’s dive into some fun and effective methods to tackle those stubborn stains and odors, and get your microwave back in tip-top shape! Understanding the Microwave Burnt-On Mess Before we jump into the cleaning frenzy, let’s talk about what’s happening inside your microwave. When food gets overcooked, it releases smoke and tiny particles that stick to the microwave’s interior. This not only leaves a burnt-on mess but also creates a lingering smell that’s hard to ignore. The longer you leave it, the more stubborn it becomes, so it’s best to act quickly! Burnt food particles can affect the flavor of your food and even seep into your kitchen cabinets. This is why it’s crucial to address the issue promptly. Ignoring it can lead to more than just an unpleasant smell; it can also pose a fire hazard if not cleaned properly. So, let’s get to work and make sure your microwave is fresh and ready for action! But fear not! With a little elbow grease and some household items, you can banish the microwave burnt-on mess and the smell that comes with it. Let’s explore some tried-and-true methods to clean your microwave and keep it smelling fresh. Effective Cleaning Methods Now that we understand the problem, it’s time to roll up our sleeves and get cleaning. There are several methods to choose from, depending on the severity of the mess and your personal preferences. Let’s explore some of these techniques and find the one that works best for you. Steam Cleaning with Water First up, let’s talk about the power of steam. It’s like giving your microwave a spa day! Start by removing any loose debris or microwave burnt pieces. Then, fill a microwave-safe container with one cup of water and heat it for 3 to 4 minutes. The steam will help loosen up the grime, making it easier to wipe away. Once the steam has done its magic, grab a soft cloth and dip it in water with a little dish soap. Gently wipe down the interior of the microwave, making sure to follow the grain if it’s stainless steel. Rinse with clean water and dry with a lint-free cloth. Leave the door open for a few hours to air it out, and voilà—your microwave is fresh and clean! Using Lemon Juice or Vinegar If the microwave burnt smell is still hanging around, it’s time to call in reinforcements. Lemon juice and vinegar are natural odor neutralizers that can help tackle even the toughest smells. Mix one cup of water with a tablespoon of lemon juice or vinegar in a microwave-safe container, and heat for 2 to 5 minutes. Let the steam work its magic, then wipe the interior with a dry sponge or rag. If you’re not a fan of the vinegar or lemon scent, try adding vanilla extract or coffee grounds to the mix. This method not only cleans but also leaves your microwave smelling delightful! Overnight Deodorizing For those stubborn odors that just won’t quit, an overnight deodorizing session might be in order. Place an open box of baking soda, a cup of activated charcoal, or some dried coffee grounds inside your microwave before bedtime. Let it sit overnight to absorb any lingering smells. In the morning, remove the deodorizer and enjoy a fresh-smelling microwave. If the cabinets above your microwave are also affected, consider moving the deodorizer there to help absorb any trapped odors. Remember, a clean microwave is a happy microwave! Frequently Asked Questions How do you fix a burnt microwave? Fixing a burnt microwave starts with a thorough cleaning. Begin by unplugging the microwave for safety. Remove any loose debris, then use the steam cleaning method with water or a vinegar solution to loosen burnt-on grime. Wipe down the interior with a soft cloth and dish soap, rinse, and dry. If the microwave burnt smell persists, try the overnight deodorizing method with baking soda or activated charcoal. Can I still use a burnt microwave? Yes, you can still use a burnt microwave, but it’s important to clean it first. If the microwave only smells microwave burnt but isn’t damaged, a good cleaning should make it safe to use again. However, if any parts of the microwave appear damaged or burned, it’s best to consult a professional or consider replacing the appliance to avoid fire hazards. What causes a microwave to burn inside? Microwaves burn inside when food particles are overcooked, releasing smoke and residue that stick to the interior. This often happens with dry or starchy foods like popcorn or bread. To prevent this, keep a close eye on your food while it’s cooking, and make sure to use microwave-safe containers to avoid overheating. Wrapping Up There you have it, folks! Cleaning a microwave with a burnt-on mess doesn’t have to be a nightmare. With the right techniques and a little patience, you can restore your microwave to its former glory and keep your kitchen smelling fresh. Remember, regular cleaning and maintenance are key to preventing future mishaps. Whether you’re a busy homeowner or a renter on the go, these cleaning methods are designed to fit into your lifestyle. So go ahead,

How Do I Clean the Microwave Burnt-On Mess? Read More »

Call 604-265-3852 Call 604-265-3852 Book Online Book Online