Maintenance

samsung washing machine sanitization

Samsung Washing Machine Sanitization: Hygiene Steam Cycles

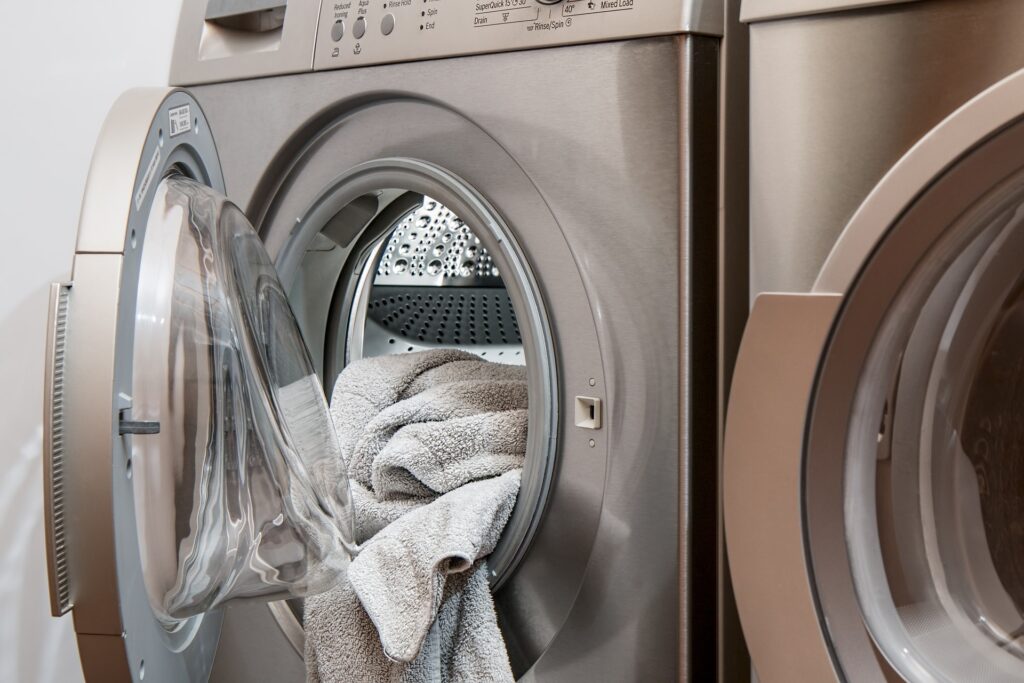
Is your Samsung washing machine in need of a little TLC? Dive into our guide on Samsung washing machine sanitization and discover how to keep it sparkling clean and running smoothly! Related Services: Washing Machine Repair Hey there, fellow homeowners! If you’ve ever caught a whiff of something funky coming from your laundry room, it might be time to give your Samsung washing machine a good sanitization. We all love our washers for making life easier, but they do need a bit of love in return. Regular cleaning not only keeps them smelling fresh but also ensures they work efficiently for years to come. But fear not! Sanitizing your Samsung washer isn’t as daunting as it sounds. With a few simple steps, you can banish those pesky odors and keep mold and mildew at bay. Whether you have a front loader or a top loader, we’ve got you covered with all the tips and tricks to make your machine shine. So, grab your cleaning supplies and let’s get started! Why Samsung Washing Machine Sanitization is Important First things first, let’s talk about why sanitizing your Samsung washing machine is a must-do task. Over time, moisture and detergent residue build up in your washer, creating a perfect environment for mold and mildew. This not only leads to unpleasant odors but can also affect the performance of your machine. Yikes! By regularly cleaning your washer, you can prevent these issues and keep your laundry smelling fresh. Samsung washers come with a handy Self Clean or Pure Cycle feature, designed to tackle the areas where dirt and grime tend to accumulate. It’s like a spa day for your washer, and it helps maintain its efficiency and longevity. Plus, a clean washing machine means cleaner clothes! When your washer is free from gunk and build-up, it can do its job more effectively, leaving your clothes looking and smelling their best. So, let’s dive into the nitty-gritty of how to keep your Samsung washing machine sanitization in tip-top shape. How to Sanitize Your Samsung Washing Machine Now that we know why it’s important, let’s get down to the how-to of Samsung washing machine sanitization. Whether you’re dealing with a front load or a top load washer, the process is quite similar. The goal is to eliminate any build-up and prevent future odors. Running a Self Clean Cycle The Self Clean or Pure Cycle is your washer’s best friend when it comes to sanitization. This special cycle is designed to clean the tub and other areas where moisture and detergent residue can accumulate. For top load washers, the cycle takes about an hour, while front load washers need around four hours. To run the cycle, simply make sure your washer is empty, press the Self Clean button, and hit Start. No need to add any cleaner, but if you’re dealing with a moldy smell, a bit of bleach can do wonders. If you notice suds or residue during the cycle, consider running another Self Clean cycle afterward. Keeping It Fresh Between Cleanings In between your monthly sanitization sessions, there are a few easy steps you can take to keep your washer fresh. First, try running a cycle with warm or hot water occasionally, especially if you usually wash with cold water. This helps slow down the build-up of soil and detergent. Also, make it a habit to leave the washer door and detergent drawer open after each wash. This allows air to circulate and prevents moisture from lingering, reducing the risk of mold and mildew formation. It’s a simple step that can make a big difference! Cleaning the Detergent Drawer and Pump Filter Don’t forget about the detergent drawer and pump filter! These areas can easily become clogged with detergent residue, affecting your washer’s performance. Wipe the detergent drawer dry after each use and deep clean it at least once a month. Simply remove the drawer, rinse it with warm water, and use a soft brush to remove any gunk. For front load washers, the pump filter should be cleaned monthly as well. This helps prevent odors and ensures proper drainage. Open the pump filter access panel, drain the water, and clean the filter with a soft brush. Easy peasy! Frequently Asked Questions Do you use detergent on the sanitize cycle? When running the sanitize cycle on your Samsung washing machine, you don’t need to add any detergent. The cycle is designed to clean the tub using hot water and the washer’s internal heater, effectively killing bacteria and mold. However, if you notice a persistent moldy smell, adding a small amount of bleach can help tackle the issue. How to run self clean on Samsung washing machine? Running a Self Clean cycle on your Samsung washing machine is a breeze. First, ensure the washer is empty, then press the Self Clean button followed by the Start button. The cycle will run for about an hour on top load washers and four hours on front load washers. No additional cleaner is needed, but you can add bleach if there’s a moldy odor. Does sanitize cycle shrink clothes? Worried about your clothes shrinking during the sanitize cycle? No need to fret! The sanitize cycle is specifically for cleaning the washer itself, not for washing clothes. It’s important to run this cycle with an empty drum to ensure effective cleaning. For regular laundry, stick to the recommended settings to avoid any unwanted shrinkage. https://www.tumblr.com/vancouverapplianceservice/771340100819894272/samsung-washing-machine-sanitization-hygiene Wrapping Up And there you have it, folks! Samsung washing machine sanitization is a simple yet crucial task that keeps your washer in prime condition. By regularly cleaning your washer, you can prevent odors, mold, and mildew, ensuring your laundry stays fresh and your machine runs smoothly. Remember to utilize the Self Clean or Pure Cycle feature, keep your washer’s door and detergent drawer open between washes, and give the detergent drawer and pump filter a good cleaning monthly. These small steps will make a big difference in the longevity and efficiency of your

Samsung Washing Machine Sanitization: Hygiene Steam Cycles Read More »

Unlock the secrets of LG Dishwasher Diagnostic Mode

Everything About LG Dishwasher Diagnostic Mode

Struggling with your LG dishwasher acting up? Dive into the world of LG Dishwasher Diagnostic Mode and unravel the mysteries of those pesky error codes! Related Services: Dishwasher Repair | Washing Machine Repair Hey there, fellow home enthusiasts! If you’ve ever found yourself staring at your LG dishwasher, wondering why it’s not cooperating, you’re definitely not alone. These modern marvels are packed with tech and sometimes, they just need a little nudge to get back on track. Luckily, LG has equipped their dishwashers with a nifty feature called Diagnostic Mode. It’s like a secret handshake between you and your appliance, helping you decode those cryptic error codes and get your dishwasher back to its sparkling best. Now, before you start imagining yourself as a dishwasher whisperer, let’s break down what Diagnostic Mode actually is. Think of it as a built-in troubleshooting buddy that helps identify issues without the need for a professional visit. Whether it’s a water leak, a motor hiccup, or a simple detergent mishap, Diagnostic Mode has got your back. So, grab a cup of coffee, and let’s explore how this magical feature can save the day (and your dishes). Understanding LG Dishwasher Diagnostic Mode So, what exactly is LG Dishwasher Diagnostic Mode, and why should you care? In simple terms, it’s a feature designed to make your life easier by pinpointing the source of your dishwasher troubles. LG dishwashers, known for their innovation and reliability, use this mode to communicate specific issues via error codes. These codes are like little SOS signals from your appliance, guiding you to the root of the problem. Diagnostic Mode is particularly handy because it allows you to troubleshoot issues without the guesswork. Imagine having a roadmap that tells you exactly where the detour is on your dishwashing journey. By understanding these codes, you can decide whether it’s a DIY fix or if it’s time to call in the pros. It’s all about empowering you to take control of your appliance’s health. Now, you might be wondering how to access this mode. It usually involves a specific sequence of button presses, kind of like a secret code to unlock hidden levels in a video game. Once you’re in, you’ll be able to see which error codes are flashing and what they mean. It’s like having a conversation with your dishwasher, minus the awkward small talk. Common LG Dishwasher Error Codes Before we dive into the nitty-gritty of Diagnostic Mode, let’s talk about some common error codes you might encounter. These codes are your dishwasher’s way of saying “Hey, something’s not right here!” Understanding them is the first step in resolving the issue. Let’s take a look at a few frequent flyers in the error code world. Error Code: IE (Water Level Problem) The IE code is a heads-up that your dishwasher isn’t getting enough water. This could be due to a kinked hose or a clogged inlet valve. Check your water supply and ensure everything is flowing smoothly. If the problem persists, you might need to call in a professional for further inspection. Error Code: OE (Drain Issue) Seeing an OE code? That means your dishwasher is having trouble draining. This could be due to a blockage in the filter or pump. Make sure to clean out any debris and check for clogs. If cleaning doesn’t do the trick, it might be time to look at the sump and drain pump for obstructions. Error Code: LE (Motor Problem) An LE error indicates a motor or circulation pump issue. This could be a simple reset situation or something that requires professional attention. Try turning off the dishwasher and restarting it. If the error remains, it might be best to call in the experts to take a closer look. How to Use LG Dishwasher Diagnostic Mode Alright, now that we’ve covered the basics, let’s get into the fun part: actually using Diagnostic Mode. This feature is like your dishwasher’s personal diary, revealing all its secrets and helping you fix them. Whether you’re dealing with a minor glitch or a more serious issue, Diagnostic Mode is your go-to tool. Accessing Diagnostic Mode To enter LG Dishwasher Diagnostic Mode, you’ll need to follow a specific sequence of button presses. This combination varies by model, so make sure to consult your user manual for the exact steps. Once you’re in, you’ll see a series of error codes that tell you what’s going on under the hood. Interpreting Error Codes Once you’re in Diagnostic Mode, it’s time to decode those error messages. Each code corresponds to a specific issue, like a secret language between you and your appliance. By understanding what each code means, you can take the right steps to resolve the problem, whether it’s a DIY fix or a call to the pros. Troubleshooting Common Issues With your error codes in hand, it’s time to troubleshoot. Start by addressing the most common issues, like checking water supply connections or cleaning out filters. If the problem persists, consult your user manual or reach out to a professional for assistance. Remember, Diagnostic Mode is there to guide you, but sometimes a little expert help is needed. Frequently Asked Questions How do I run smart diagnosis on my LG dishwasher? Running a smart diagnosis on your LG dishwasher is a breeze. Start by downloading the LG SmartThinQ app on your smartphone. Once installed, open the app and follow the on-screen instructions to initiate the diagnosis. Make sure your phone is close to the appliance, as the diagnosis involves sound signals that the app will interpret. This process will give you insights into any issues your dishwasher might be experiencing. How to test control board on LG dishwasher? Testing the control board on your LG dishwasher requires a bit of technical know-how. First, ensure the dishwasher is unplugged for safety. Then, remove the control board cover and inspect for any visible damage or burnt components. If everything looks fine, use a multimeter to test the electrical connections for continuity.

Everything About LG Dishwasher Diagnostic Mode Read More »

how to clean the inside of a bosch dishwasher

InSinkErator Garbage Disposal Not Working? Troubleshooting and Repair Guide

An InSinkErator garbage disposal can handle a lot — but certain things will jam it, dull the impellers, or cause damage over time. Knowing what not to put down your disposal is as important as knowing how to use it. Here’s the complete guide to InSinkErator care, common repairs, and what to do when it jams or stops working. Related Services: Garburator & Garbage Disposal Repair in Vancouver InSinkErator garbage disposal troubleshooting Disposal won’t turn on — won’t start If you flip the switch and nothing happens: Reset button: Look at the bottom of the disposal unit under the sink. There’s a small red or black reset button. Press it firmly until you feel it click. This resets the thermal overload protector, which trips when the disposal overheats or jams. This resolves the problem in a large percentage of “dead disposal” calls. Check the outlet: Some disposals plug into an outlet under the sink. Check that it’s plugged in and the outlet has power (test it with another appliance). Check the circuit breaker: If the reset button doesn’t help and the outlet is good, check the breaker panel. Wiring issue: If none of the above, the switch or wiring may have failed. Disposal hums but won’t spin A humming disposal that doesn’t move has a jam. The motor is running but the grinding plate is stuck. Turn off the switch immediately — running a jammed motor overheats it. Locate the hex key opening at the very bottom center of the disposal. Insert a ¼-inch (6mm) hex key / Allen wrench into the opening. Turn it back and forth to free the grinding plate. You’ll feel resistance and then release when the jam breaks free. Shine a flashlight into the disposal from the top and look for the foreign object — use tongs or pliers to remove it. Never put your hand in. Press the reset button, then test the disposal. InSinkErator models come with a “SelfService Wrench” — a small red hex key stored under the sink that fits the bottom socket. If yours is missing, a standard ¼-inch hex key from any hardware store works. Disposal leaking water Identify where the leak is coming from before replacing anything: Leak from the top (at the sink flange): The mounting gasket between the disposal and the sink opening has failed, or the mounting bolts have loosened. Remount the disposal and replace the flange seal if the gasket is deteriorated. Leak from the side (at the dishwasher connection): The dishwasher drain hose connection on the side of the disposal. Tighten the clamp or replace the hose if it’s cracked. Leak from the drain outlet (bottom side connection): The drain connection going into the P-trap. Retighten or replace the drain gasket. Leak from the bottom of the disposal body: This means the internal seals have failed. At this point, replacement is typically more cost-effective than repair. Disposal is slow or grinding is weak Over time, the impellers inside the disposal wear down — they lose their edge and can’t grind food efficiently. Fibrous foods, starchy foods, and repeated jams accelerate wear. Once the grinding plate is worn, performance doesn’t recover through cleaning. This is typically an end-of-life issue for older disposals. What not to put in an InSinkErator disposal Avoid these items — they cause jams, damage, or buildup: Fibrous vegetables: Celery, artichokes, asparagus, and corn husks. The fibers wrap around the grinding plate and jam it. Grease and fats: These cool and solidify inside the drain line, eventually causing blockages. Pour fats into a container and discard in the trash. Starchy foods: Potato peels, pasta, and rice expand with water and create a paste that clogs the drain. Hard items: Bones, fruit pits, seafood shells. These damage the grinding plate. Coffee grounds: They accumulate in the drain trap and cause slow draining over time. Expandable foods: Pasta and rice expand even after grinding — they absorb water in the drain line. Onion skins: The thin papery layer slips past the grinder and can cause blockages. What your InSinkErator handles well: Soft food scraps and vegetable cuttings (soft vegetables, not fibrous) Fruit scraps (avoid pits) Cooked meat and fish (small amounts) Ice cubes — useful for cleaning (they help clean the grinding plate and sharpen the impellers mildly) Citrus peels — good for odour control in small amounts InSinkErator maintenance and cleaning Monthly maintenance: Run cold water for 30 seconds before and 30 seconds after each use Grind a tray of ice cubes to clean the grinding plate Follow with half a cup of coarse salt to scrub the interior Drop in citrus peels and run to freshen the unit For odours: Baking soda and vinegar down the disposal, followed by hot water, neutralizes odours. Avoid bleach — it can damage rubber seals over time. InSinkErator models: which one do you need? InSinkErator makes several tiers: Badger series (¹/₃ to ½ HP): Entry level, adequate for light use. Not recommended for large households with heavy disposal use. Badger 5 Plus / Badger 900: More common residential level, ½ to ¾ HP. Evolution series (¾ HP to 1 HP): Quieter, more powerful, better warranty. Recommended for most households and families. When replacing a disposal, going up one size from the current unit is generally worthwhile for the quieter operation and reduced jam rate. When to call a technician Use the hex key to clear jams and the reset button for power issues — these are genuinely DIY fixes. Call for help if: there’s a persistent leak from the flange or drain, the disposal needs mounting or replacing, the wiring is damaged, or the disposal’s grinding performance has degraded to the point of replacement. Vancouver Appliance Service installs and repairs InSinkErator garbage disposals across Metro Vancouver. We carry common InSinkErator models for direct replacement when needed.

InSinkErator Garbage Disposal Not Working? Troubleshooting and Repair Guide Read More »

how to repair dryer sensors

How to Diagnose and Repair Dryer Sensors for Optimal Efficiency

Is your dryer acting more like a sauna than a smart appliance? Let’s dive into the world of dryer and learn how to diagnose and repair dryer sensors for maximum efficiency! Related Services: Dryer Repair If your dryer is turning your laundry day into a never-ending saga, it might be time to give your repair dryer sensors a little TLC. These nifty little gadgets are the unsung heroes of your drying routine, ensuring your clothes come out perfectly dry and fresh. But when they start acting up, it’s like your dryer has a mind of its own—leaving you with damp clothes or running up your energy bill. Don’t worry, though! You don’t need to be an appliance repair wizard to get your dryer back on track. With just a few simple steps, you can diagnose and repair those pesky sensors right from the comfort of your home. So, grab your toolkit and let’s get started on making your dryer the efficient machine it was meant to be! Understanding Repair Dryer Sensors and Their Importance Before we jump into the nitty-gritty of repairs, let’s take a moment to understand on how to repair dryer sensors do and why they’re so crucial. Most modern dryers come equipped with moisture sensors that detect when your clothes are dry and automatically shut off the machine. This not only saves energy but also prevents over-drying, which can be harsh on your fabrics. However, these sensors can sometimes get dirty or malfunction, leading to inefficient drying cycles. If you’ve noticed your dryer running longer than usual or stopping before your clothes are dry, the sensors might be to blame. It’s essential to keep them clean and functioning correctly to maintain optimal efficiency and extend the life of your dryer. Now that we know what these sensors do, let’s explore how to diagnose and repair them. Whether you’re a seasoned DIYer or a newbie to appliance maintenance, we’ve got you covered with easy-to-follow steps and helpful tips. Diagnosing Dryer Sensor Issues So, you’ve noticed some odd behavior from your dryer, and you’re ready to play detective. Diagnosing dryer sensor issues isn’t as daunting as it sounds. The first step is to identify the symptoms, which can include cycles that end too soon or run indefinitely. These are telltale signs that your moisture sensors might be on the fritz. Begin by locating the moisture sensors inside your dryer. Typically, you’ll find them as two metal strips inside the drum, usually near the lint filter. If they’re covered in a waxy film, especially if you use dryer sheets, that’s a clear indicator they need cleaning. A dirty sensor can’t accurately detect moisture levels, leading to inefficient drying. Once you’ve identified the problem, it’s time to roll up your sleeves and get to work. Cleaning the sensors is a straightforward process that can often resolve minor issues. Let’s move on to the steps for cleaning and, if necessary, replacing those sensors. Cleaning and Repair Dryer Sensors Cleaning the sensors is a quick and easy fix that can save you a lot of hassle down the road. All you need are a few simple tools: alcohol wipes, a wire brush, or fine sandpaper. Regular cleaning can prevent sensor malfunctions and keep your dryer running smoothly. Step 1: Locate and Prepare First, make sure your dryer is unplugged for safety. Locate the moisture sensors inside the drum; they’re usually near the lint filter. Once you’ve found them, you’re ready to start cleaning. Step 2: Clean the Sensors Use alcohol wipes to gently clean the metal strips, wiping them down three or four times until they shine. Alternatively, you can use a small wire brush or fine sandpaper to remove any residue. This will help the sensors accurately detect moisture levels again. Step 3: Test the Sensors After cleaning, it’s time to test your handiwork. Set your dryer to Auto Dry and place a damp cotton shirt inside. Run the cycle and check if the dryer turns off when the shirt is dry. If it does, congratulations, you’ve successfully repair dryer sensors! Replacing Dryer Sensors If cleaning doesn’t do the trick, it might be time to replace the sensors. Don’t worry—this is still a DIY-friendly task. Replacing dryer sensors can seem intimidating, but with a bit of patience, you’ll have your dryer back in tip-top shape. Step 1: Unplug and Access As always, safety first! Unplug your dryer and pull it out to give yourself plenty of room to work. You’ll need to remove the top and front panels to access the sensors. Step 2: Remove the Old Sensors Once you have access, locate the moisture sensors secured by a screw and wire harness. Unplug the harness, remove the screw, and gently pull out the old sensors. Keep track of the screws and parts as you go. Step 3: Install New Sensors Position the new moisture sensors in place, secure them with the screw, and reattach the wire harness. Reassemble your dryer, plug it back in, and run a test cycle with a load of wet clothes to ensure everything is working correctly. Frequently Asked Questions How much does it cost to replace a dryer heat sensor? The cost of replacing a dryer heat sensor can vary depending on the brand and model of your dryer. On average, you might spend anywhere from $20 to $50 for the part itself. If you choose to hire a professional for the job, expect to add labor costs, which could range from $100 to $150. Doing it yourself is a great way to save some cash! Why do dryer moisture sensors fail? Dryer moisture sensors often fail due to a buildup of residue, especially if you use dryer sheets. The waxy film from these sheets can coat the sensors, preventing them from accurately detecting moisture levels. Regular cleaning can prevent this issue, but over time, sensors may also wear out from regular use and require replacement. How do you know if your dryer sensor is

How to Diagnose and Repair Dryer Sensors for Optimal Efficiency Read More »

how to replace refrigerator fuse

How to Identify and Replace Refrigerator Fuse to Prevent Power Outages

Is your refrigerator giving you the cold shoulder? Dive into our guide to identify and replace the refrigerator fuse, keeping those power outages at bay! Related Services: Fridge Repair We all know the refrigerator is the unsung hero of our kitchens, keeping our snacks cool and our leftovers fresh. But what happens when this trusty appliance decides to take an unexpected nap? Before you panic and start dialing every appliance repair service in town, let’s explore a DIY solution that could save the day: checking and replacing the refrigerator fuse. Yes, you heard that right! Sometimes, the root of the problem is as simple as a blown fuse. So, grab your tool kit, and let’s get to work! Now, before you roll up your sleeves and channel your inner handyman or woman, let’s chat about why this tiny component is so important. A refrigerator fuse is like a safety net for your appliance, preventing electrical overloads that can lead to bigger, more expensive issues. Whether you’re living in a cozy apartment or a sprawling house, knowing how to tackle this small but mighty repair can make a world of difference. Plus, it’s a great way to flex those eco-friendly muscles by extending the life of your appliance. Ready to become a refrigerator repair pro? Let’s jump in! Understanding the Refrigerator Fuse Alright, let’s get down to the nitty-gritty of the refrigerator fuse. This little gadget is a lifesaver when it comes to protecting your appliance from electrical mishaps. Think of it as the guardian angel of your fridge, stepping in to cut off power when things get too heated—literally. Overheating can cause the thermal fuse to blow, which then stops the refrigerator from working. While this might sound like a bummer, it’s actually a good thing because it prevents further damage. So, how do you know if your fuse is the culprit behind your fridge woes? One telltale sign is if the evaporator inside the fridge starts to freeze over. This usually means the thermal fuse has done its job and needs replacing. Another hint might be the lights inside your fridge going out while the rest of the house is still lit up like a Christmas tree. If you’re nodding along, thinking, “Yep, that’s my fridge,” then it’s time to roll up those sleeves and get to work. Before you dive into replacing the fuse, remember to unplug your refrigerator. Safety first, folks! Once that’s done, you’ll need to locate the fuse, which is usually tucked away behind some paneling. Depending on your fridge model, it might be inside or at the rear bottom near the compressor. Grab your trusty owner’s manual for guidance, and let’s move on to the next step. Identifying and Replacing the Refrigerator Fuse Now that you’ve got a handle on what the fuse does and why it’s important, let’s talk about how to actually replace it. This process might sound daunting, but trust me, it’s easier than assembling that flat-pack furniture you bought last month. With a few simple tools and a dash of confidence, you’ll have your fridge back up and running in no time. Gather Your Tools First things first, make sure you have the right tools on hand. You’ll need a Phillips head screwdriver, a flat head screwdriver, wire cutters, and some zip ties. These are pretty standard items you might already have lying around your home. Once you’ve got your tools ready, it’s time to find that pesky fuse. Locate the Fuse With your refrigerator unplugged, use the owner’s manual to locate the fuse. It’s usually behind some paneling, either inside the fridge or at the bottom rear near the compressor. Use the Phillips head screwdriver to remove any screws holding the panel in place, and then gently pry it open with the flat head screwdriver. Be careful not to damage any wires while doing this. Replace the Fuse Once you’ve exposed the thermal fuse, it’s time to replace it. The fuse is typically connected with plastic clips. Carefully unclip the old fuse and replace it with a new one. If the wiring is secured with zip ties, use the wire cutters to remove them and apply new zip ties once the new fuse is in place. Reassemble the paneling, plug the fridge back in, and voilà! Your fridge should be back to its chilly self. Frequently Asked Questions How do I know if my refrigerator fuse is blown? If your refrigerator suddenly stops working or the lights inside go out, a blown fuse could be the issue. Another sign is if the evaporator inside the fridge starts to freeze over. These symptoms indicate that the thermal fuse has tripped to prevent overheating, and it’s time to replace it. How to check refrigerator thermal fuse? To check the thermal fuse, first, unplug the refrigerator for safety. Then, locate the fuse by referring to your owner’s manual—it’s usually behind some paneling inside the fridge or near the compressor. Once you’ve found it, inspect the fuse for any visible damage or signs of tripping. What fuse does a fridge use? Most refrigerators use a thermal fuse, which is designed to trip when the appliance overheats. The specific type of fuse can vary depending on the refrigerator model, so it’s important to check your owner’s manual or consult with a professional to ensure you get the correct replacement. Wrapping Up And there you have it, folks! Replacing a refrigerator fuse might seem like a daunting task at first, but with the right tools and a little know-how, it’s a DIY project that’s totally manageable. Not only will you save some cash on repair bills, but you’ll also gain a newfound appreciation for the inner workings of your trusty fridge. Remember, while DIY repairs can be satisfying, safety is always the top priority. If you ever feel unsure about tackling this task, don’t hesitate to call in a professional. They’re just a phone call away and can ensure your appliance is repaired safely

How to Identify and Replace Refrigerator Fuse to Prevent Power Outages Read More »

how to repair oven fuse blown

How to Replace an Oven Fuse Blown for Safe and Consistent Heating

Is your oven fuse blown and refusing to heat up properly? Let’s dive into the world of oven fuses and get your kitchen back to its cozy, warm self! Related Services: Oven Repair You know that feeling when you’re ready to bake those cookies, but your oven is just not heating up? Total bummer, right? Before you start blaming your baking skills, it might just be a case of a blown oven fuse. But don’t worry, because replacing an oven fuse is easier than you think, and I’m here to guide you through it. In the world of electric ovens, fuses play a crucial role. They’re like the unsung heroes keeping your appliance from overheating or going haywire. However, when they blow, it can feel like your oven’s on strike. But fear not, because with a little know-how, you can replace that blown fuse and get your oven back to its baking glory. So, grab your tool kit, and let’s get started on this electrifying journey! Understanding the Oven Fuse Blown Problem First things first, let’s talk about what an oven fuse does and why it might blow. An oven fuse is a safety device designed to protect your appliance from electrical surges. When there’s too much electricity flowing through, the fuse blows to prevent damage. It’s like your oven’s personal bodyguard against electrical mishaps. Now, why do these fuses blow? It could be due to a short circuit, a malfunctioning oven component, or even a circuit overload. Imagine your oven trying to juggle too many tasks at once, and the fuse is just like, “Nope, not today!” Understanding these reasons can help you prevent future blowouts and keep your oven running smoothly. Replacing a blown fuse might sound intimidating, but it’s actually a straightforward process. With a few simple steps, you can swap out that faulty fuse and restore your oven’s heating prowess. Plus, it’s a great way to flex those DIY muscles and save some bucks on repair costs. Ready to become an oven-fixing pro? Let’s dive into the nitty-gritty of fuse replacement! Steps to Safely Replace an Oven Fuse Blown Before we jump into the fuse replacement process, it’s essential to ensure safety first. Always unplug your oven or turn off the power at the main panel before you start fiddling with anything. Safety goggles and a trusty screwdriver are your best friends in this mission. Locating the Fuse The first step is to find the fuse. In most ovens, the fuse is located under the cooktop. You might need to lift the top of the range or remove the drip pans and look on the sides of the cabinet. If you’re unsure, check your oven’s manual for guidance. Once you’ve located the fuse, it’s time to assess the situation. If the fuse looks burnt or damaged, it’s likely the culprit behind your oven’s cold shoulder. Make sure to have a replacement fuse of the same type and electrical rating ready to go. Replacing the Fuse With the power off and the fuse located, gently unscrew the old fuse. Be careful not to damage any surrounding components. Once removed, screw in the new fuse, ensuring it’s snug and secure. It’s a simple swap, but it can make all the difference in your oven’s performance. After replacing the fuse, it’s time to test your oven. Turn the power back on and see if it’s heating up as it should. If all goes well, you’ve successfully replaced your oven fuse blown like a pro. Pat yourself on the back and get ready to bake those cookies! Tips to Prevent Future Oven Fuse Blown Issues Now that you’re a fuse-replacing expert, let’s talk about preventing future blowouts. Regular maintenance and a few precautions can go a long way in keeping your oven fuse blown intact and your appliance running smoothly. Regular Maintenance One way to prevent fuse issues is by keeping your oven clean and well-maintained. Regularly check for any signs of wear and tear, and address them promptly. A little TLC goes a long way in prolonging your oven’s lifespan. Also, be mindful of how many appliances you have running on the same circuit. Overloading a circuit can lead to blown fuses, so try to distribute your electrical load evenly. It’s all about balance, just like in life! Professional Check-Ups If you’re ever in doubt or encounter persistent fuse issues, don’t hesitate to call in a professional. They can provide a thorough inspection and address any underlying problems. Sometimes, a little expert advice is all you need to keep your oven in top-notch condition. Remember, safety is key. If you’re not comfortable handling electrical components, it’s always best to consult a professional. Your oven will thank you for it! Frequently Asked Questions Why does my oven keep blowing the fuse? Your oven might be blowing the fuse due to several reasons. A common cause is a circuit overload, where the oven draws more power than the circuit can handle. This can happen if multiple appliances are connected to the same circuit, leading to excessive power consumption. Another reason could be a short circuit, which occurs when wires come into contact and increase amperage. A malfunctioning oven component might also be the culprit, causing the appliance to draw excessive electricity. Identifying the root cause can help you address the issue effectively. How to tell if an oven fuse is blown? To determine if your oven fuse is blown, first ensure the oven is unplugged or the power is off. Locate the fuse, usually found under the cooktop or at the back of the oven. If the fuse appears burnt or damaged, it’s likely blown. You can also use a multimeter to test for continuity. If the multimeter doesn’t show a reading, the fuse is blown and needs replacing. Always remember to replace it with a fuse of the same type and rating. What causes an oven fuse to trip? An oven fuse can trip due to several factors. One

How to Replace an Oven Fuse Blown for Safe and Consistent Heating Read More »

how to fix washing machine fuse

How to Fix a Washing Machine Fuse That Won’t Start Up

Is your washing machine giving you the silent treatment? Let’s dive into the world of washing machine fuses and get your laundry game back on track! Related Services: Washing Machine Repair Picture this: you’re all set to tackle Mount Laundry, only to find your washing machine isn’t starting. Cue the panic! But before you start imagining life without clean clothes, take a deep breath. Sometimes, the solution is as simple as fixing a washing machine fuse. This tiny component can be the difference between a functioning appliance and a stubbornly silent one. Now, don’t let the idea of a DIY repair scare you off. With a bit of guidance and a few tools, you can troubleshoot and potentially fix the issue yourself. Whether you’re a homeowner, apartment dweller, or eco-conscious repair enthusiast, this guide will walk you through the steps to get your washing machine back in action. So roll up those sleeves, and let’s get started! Understanding the Problem: Washing Machine Fuse Woes Washing machines, like any other household appliance, can sometimes throw a tantrum and refuse to start. One common culprit is a blown fuse. But what exactly is a washing machine fuse, and why does it matter? Simply put, a fuse is a safety device that protects your machine from electrical overloads. If it blows, your machine won’t start, and it’s a sign that something needs attention. Fuses are typically located in the control panel of the washing machine, and they can be tricky to access. However, they play a crucial role in ensuring your appliance doesn’t fry itself due to electrical issues. If you’re experiencing problems, checking the fuse should be one of your first steps. It’s a simple yet often overlooked component that can save you a lot of hassle and expense. Before you dive into the repair, it’s important to gather the right tools and take safety precautions. You’ll need a screwdriver, a multimeter, and possibly some replacement fuses. And remember, always disconnect your washing machine from the power source before attempting any repairs. Safety first, folks! Diagnosing the Issue: Is It Really the Fuse? Before you go all-in on fixing the fuse, it’s essential to make sure that’s the actual issue. There are several reasons a washing machine might not start, and a fuse is just one of them. Start by checking if your machine is plugged in and if the circuit breaker hasn’t tripped. These might seem like no-brainers, but you’d be surprised how often simple solutions are the answer. Checking the Power Source Sometimes, the problem is as basic as a loose power cord. Washing machines can vibrate quite a bit during cycles, and this can cause the plug to wiggle out of the socket. Ensure your machine is firmly plugged in. If that doesn’t work, test the outlet with another device to see if it’s working. If the outlet is dead, you might have a tripped circuit breaker on your hands. Inspecting the Lid Switch For top-load washing machines, the lid switch is a common culprit. This safety feature ensures the machine only operates when the lid is closed. If the switch is faulty, your machine won’t start. Use a multimeter to test the switch’s continuity. If the test comes back negative, it’s time to replace the switch. Examining the Control Board In some cases, the issue might be deeper within the machine’s electronics. The control board manages the main functions of the appliance, and if it’s malfunctioning, your washer won’t start. Unplug the machine and inspect the back of the control board for any signs of damage or burning. If you spot any, consider calling in a professional, as this is a more complex repair. Replacing the Washing Machine Fuse So, you’ve done your detective work, and it seems like the fuse is indeed the problem. Time to roll up your sleeves and get to work! Replacing a washing machine fuse isn’t rocket science, but it does require a bit of patience and attention to detail. Here’s how you can do it. Accessing the Control Panel First things first, unplug your washing machine. Safety is key! Next, locate the control panel, usually found at the top of the machine. You’ll need to remove a few screws to access it. Keep those screws safe—you’ll need them later. Once you’ve got the panel open, you should see the fuse. Identifying the Blown Fuse Blown fuses are often easy to spot—they’ll be blackened or broken. If you’re unsure, use a multimeter to test the fuse’s continuity. A negative result means it’s time for a replacement. Make sure to get the correct fuse type for your machine model; your owner’s manual or manufacturer’s website can help with this. Replacing the Fuse With the faulty fuse identified, carefully remove it and replace it with a new one. Be gentle and ensure it’s securely in place. Once done, reassemble the control panel, plug your machine back in, and give it a test run. With any luck, you’ll hear the sweet sound of a working washing machine! Frequently Asked Questions What to do if the washing machine is plugged in but won’t turn on? If your washing machine is plugged in but still won’t turn on, start by checking the circuit breaker. It might have tripped, cutting power to the outlet. If the breaker is fine, test the outlet with another device to ensure it’s working. If the outlet is dead, you may need an electrician to check the wiring. How do I know if my washing machine fuse is blown? A blown fuse will often appear blackened or broken. To be sure, test the fuse with a multimeter for continuity. If the multimeter shows no continuity, the fuse is blown and needs replacing. Always refer to your washing machine’s manual for specific guidance on fuse location and type. Why is my washing machine not starting the cycle? There could be several reasons your washing machine isn’t starting a cycle. Check if the door or

How to Fix a Washing Machine Fuse That Won’t Start Up Read More »

remove microwave burnt stains and smell

Samsung Washing Machine Problems: Error Codes, Spin, Drain, and Noise Fixes

Samsung washing machines are common in Metro Vancouver households, and while they’re generally reliable, they do develop a set of recurring problems. Here’s a practical guide to diagnosing the most frequent Samsung washer issues — with specific error codes and repair steps. Related Services: Washing Machine Repair in Vancouver Samsung washing machine won’t spin If your Samsung washer runs through the wash cycle but stops before or during spin, or the drum barely moves during spin: Unbalanced load: Samsung front-loaders will pause or abort the spin cycle if the load is out of balance. Redistribute the laundry evenly around the drum and retry. UE or Ub error code: This is Samsung’s unbalanced load error. The machine detected an imbalance during spin and stopped to protect itself. Redistribute and restart. Lid switch (top-loaders): Top-load Samsung washers won’t spin if the lid switch doesn’t engage. If the lid seems to close but the machine still won’t spin, the lid switch may need replacement. Motor control board fault: If the motor runs during wash but not during spin, the motor control board may be limiting output. This shows up in older Samsung top-loaders more than front-loaders. Samsung washer error codes Samsung washers display error codes on the front panel. Key codes to know: 4E / 4C: Water supply error — the machine isn’t getting enough water. Check that both hot and cold supply valves are fully open. Check the inlet hose screens for debris. 5E / 5C / nF: Drain error — water isn’t draining. Check the drain filter (accessible at the front lower panel) and the drain hose. UE / Ub: Unbalanced load. Redistribute and restart. dC / dE / dF: Door error — the door isn’t latching properly. Check the latch and the door seal for obstructions. Sud / 5ud: Excessive suds detected. This happens when too much detergent is used or non-HE detergent is used in an HE washer. The machine adds rinse cycles to clear the suds — wait it out, then switch to HE detergent. LE / LC: Leakage detected. The machine has an overflow sensor at the base. If water has leaked inside the machine, the sensor trips. Find and fix the leak before resetting. tE / tC: Temperature sensor error — thermistor fault. HE / HC: Heater error — heating element issue on washers with hot water heating (common on some Samsung front-loaders). How to reset a Samsung washing machine A soft reset clears most transient errors: Turn off the washer. Unplug from the wall (or trip the breaker). Wait 5 minutes. Restore power and turn on. This resets the control board. If the error code returns immediately, the underlying fault is still present and needs diagnosis. Samsung washing machine not draining The 5E/5C drain error is one of the most common Samsung washer complaints. The fix is usually in the drain filter: Locate the filter access panel at the bottom front of the machine (on front-loaders). Place a towel and a shallow tray under the panel — water will come out. Unscrew the drain plug slowly and let water drain into the tray. Remove and clean the drain filter — it collects lint, coins, and small items. Reinstall and test. If cleaning the filter doesn’t clear the drain error, check the drain hose for kinks. If the hose is clear, the drain pump motor may have failed — listen during the drain cycle for the pump motor running. No sound means the pump isn’t activating; unusual sounds suggest a jammed or failing pump. Samsung washer door won’t open Samsung front-loaders lock the door during a cycle and unlock when the cycle completes. If the door won’t open after the cycle ends: Wait 2 to 3 minutes — the door lock releases on a timer after the cycle ends. Try turning the machine off and back on. If there’s standing water in the drum, the door lock won’t release. Run a drain cycle first. If nothing works, most Samsung front-loaders have a manual door release — a small tab inside the filter access panel at the lower front. Pull it gently. Samsung washer making noise during spin Loud vibration and banging during spin is common on Samsung front-loaders — particularly the WF series. Common causes: Shipping bolts not removed: If the machine was recently moved or installed, confirm the shipping bolts (usually 4, in the back panel) have been removed. Shipping bolts cause extreme vibration. Not level: Check all four feet and adjust until the machine is stable and level. Worn shock absorbers or suspension rods: Older Samsung front-loaders develop worn shocks. The drum bangs against the cabinet during spin. Replacement shocks are $30 to $60 and require partial disassembly. Drum bearing failure: A constant rumbling during spin (not just at peak speed) that gets worse over time points to bearing failure. This is a more significant repair — several hours of labour — but often cost-effective on machines under 8 years old. Samsung top-load washer problems Samsung ActiveWash top-loaders (WA series) have a few specific failure points: Pulsator/agitator wobble: The pulsator can crack or come loose. If you hear a clunking from the bottom of the drum, inspect the pulsator nut — it may just need tightening. Water not filling: The 4E error often traces back to the water inlet valve screens clogging. Unscrew the inlet hose connections and clean the small mesh screens inside. Lid lock failure: A failed lid lock prevents the machine from starting or spinning. Replacement lid lock assemblies are $30 to $60. When to call a technician Clean the drain filter and check for unbalanced loads yourself. Replacing a lid switch, drain filter, or inlet screen is also reasonable DIY. Call for help with: drum bearing replacement, motor control board diagnosis, persistent error codes after basic troubleshooting, or front-loader issues requiring full cabinet disassembly. Vancouver Appliance Service repairs Samsung washers across Metro Vancouver. We stock common Samsung parts including drain pumps, door locks, and control boards for most WF

Samsung Washing Machine Problems: Error Codes, Spin, Drain, and Noise Fixes Read More »

how to clean and maintain refrigerator coils

Samsung Dishwasher Problems: Error Codes, Draining, Drying, and Noise Fixes

Samsung dishwashers are generally reliable, but like any machine they develop specific failure patterns. Knowing what to look for — and what the error codes mean — helps you troubleshoot faster and decide when to DIY versus when to call a technician. Related Services: Dishwasher Repair in Vancouver Samsung dishwasher error codes Samsung displays codes on the front panel when it detects a fault. Key codes and what they mean: 1E / IE: Water level sensor fault. The sensor may be dirty, damaged, or the wiring harness is loose. 3C / 3E: Motor fault. The wash motor isn’t running properly. Could be the motor itself or the control board relay. 4C / 4E: Water supply error. The machine isn’t getting water. Check supply valves, inlet hose, and the screen filters in the hose. 5C / 5E: Drain error. Most commonly a clogged filter or kinked drain hose. 7E: Door latch error. The door isn’t fully latching — check for obstructions and confirm the latch clicks. bE2 / 6E: Button stuck error. A control panel button is registering as continuously pressed. Try resetting the machine. LC / LE: Leak detected. The flood sensor at the base of the machine has activated. Look for any visible leaking and let the machine dry out before resetting. OC / 0C: Water overfill — the machine filled more than expected. Check the water inlet valve. How to reset a Samsung dishwasher For most error codes, a reset clears the error. To reset: Press the Start button and hold for 3 to 5 seconds, or Turn off the machine, unplug from the wall (or turn off the circuit breaker), wait 5 minutes, then restore power. If the error code returns immediately after reset, the underlying problem is still active and needs addressing. Samsung dishwasher not draining (5C / 5E) Drainage failure is the most common Samsung dishwasher complaint. Typical causes in order of likelihood: Clogged filter: Twist off the filter in the center of the floor and clean it under warm water with a soft brush. Kinked drain hose: Pull the machine forward and check the hose routing behind it. Garbage disposal connection: If connected to a garbage disposal and the disposal is new, check that the knockout plug was removed from the disposal’s dishwasher port. Clogged pump: After clearing the filter, reach into the sump area and check for debris around the pump impeller. Failed drain pump motor: If none of the above applies and you hear no sound from the pump during the drain phase, the motor has failed. Samsung dishwasher not cleaning dishes properly If dishes come out with food residue or are poorly cleaned: Clean the filter (see above) Remove and clean the spray arms — poke each nozzle hole clear with a toothpick Verify the detergent dispenser is opening during the cycle Check water temperature — Samsung dishwashers need water at 50°C or higher for effective cleaning. If your hot water heater is set low or the supply line runs cold before reaching the dishwasher, cleaning performance drops. Confirm you’re using HE dishwasher detergent in the right amount Samsung dishwasher not drying Samsung dishwashers use a condensation drying method — no drying element in most models. They dry by condensing steam on the cooler stainless steel tub walls. This works well but has limitations: Plastic items dry poorly with condensation drying — this is normal. Use a towel on plastics if this bothers you. Rinse aid is critical for condensation drying. If the rinse aid dispenser is empty, drying performance drops significantly. The Auto Open door feature (on some Samsung models) opens the door slightly at the end of the cycle to let steam escape — if this is disabled, drying will be worse. Enable it in the settings if your model has it. Some Samsung dishwashers (particularly newer DW80 series models) have a Zone Booster or Heated dry option — confirm these are enabled. Samsung dishwasher door latch problems Samsung dishwasher door latches wear over time. Signs of a failing latch: the door feels loose, the machine won’t start (it’s waiting for a confirmed door signal), or the 7E error appears. Check first: look at the door latch area and the strike plate for visible damage or misalignment. Sometimes just pressing firmly on the door until it clicks resolves an intermittent latch problem. If the latch mechanism is physically broken, the assembly needs replacement — it’s behind the inner door panel, a 30-minute job on most Samsung models. Samsung dishwasher leaking water Samsung LC or LE codes indicate the flood sensor has activated. Common leak sources: Door seal (gasket) cracked or lifted out of its channel Spray arm hitting a tall item and directing water at the door Pump housing seal worn — often a slow drip under the machine Water inlet valve dripping when closed For the LC error, tilt the front of the machine up slightly (use a folded towel) to let water drain from the flood sensor tray. Once dry, reset and test. If the leak source isn’t found and fixed, the code will return immediately. Samsung dishwasher making noise Grinding: Foreign object in the pump — glass, a bone, a pit. Drain the machine and inspect the filter and pump area. Buzzing / rattling: Spray arm hitting a dish or the filter assembly not seated correctly. Loud humming: Wash pump motor bearing wearing out. More common on machines over 5 to 7 years old. Clicking: Normal — water fill valve cycling. When to call a technician Clean the filter, check the drain hose, and reset error codes yourself. Call for help with motor faults (3C/3E), control board issues, pump replacement, or recurring leak codes after basic inspection. Vancouver Appliance Service repairs Samsung dishwashers across Metro Vancouver. We carry Samsung drain pumps, water inlet valves, and control boards for DW60 and DW80 series models.

Samsung Dishwasher Problems: Error Codes, Draining, Drying, and Noise Fixes Read More »

Call 604-265-3852 Call 604-265-3852 Book Online Book Online