Marketing

eco dry samsung dryer

What’s the Eco Dry Samsung Dryer Setting?

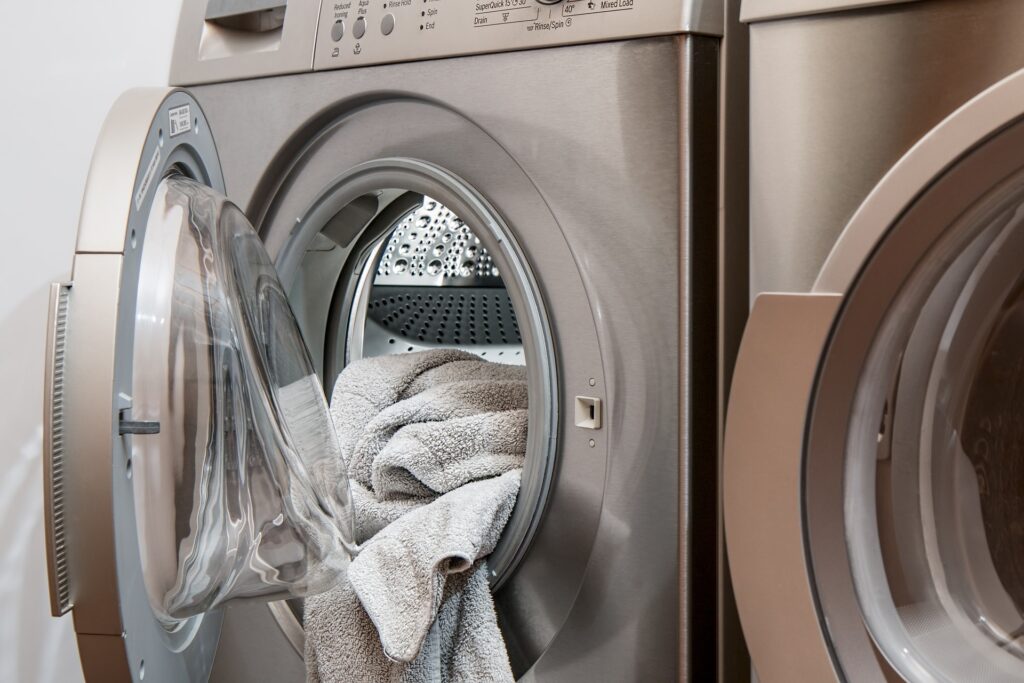
Curious about the Eco Dry Samsung dryer setting? Let’s dive into what this eco-friendly option is all about and how it can change your laundry game for the better! Related Services: Dryer Repair Hey there, laundry warriors! If you’ve ever found yourself staring at your Samsung dryer, wondering what all those settings do, you’re not alone. The Eco Dry setting might sound like something straight out of a sci-fi movie, but it’s actually your new best friend for saving energy and keeping your clothes in top-notch condition. This setting is designed to be gentle on both your garments and your energy bill, making it a win-win for your home and the planet. In today’s world, where every little bit of energy conservation counts, the Eco Dry setting is a small change that can make a big difference. But what exactly does it do? And why should you care? Let’s unravel the mystery behind this nifty feature and see how it can transform your laundry routine from a chore into a breeze. Understanding the Eco Dry Samsung Dryer Setting So, what’s the deal with the Eco Dry setting on Samsung dryers? In simple terms, it’s an energy-efficient option that extends the drying time to use less heat. This means your clothes might take a bit longer to dry, but they’ll come out fresh and fabulous without scorching your energy bill. The Eco Dry setting is enabled by default on Normal and Time Dry cycles for models that have this feature, allowing you to enjoy its benefits without lifting a finger. One of the coolest things about Eco Dry is how it starts the cycle without using heat. By gently tumbling your clothes first, it reduces the overall energy consumption. This is especially handy for smaller loads or delicate fabrics that don’t need a blast of hot air to get dry. Plus, the setting dynamically adjusts the temperature and time, so your clothes get the perfect amount of drying love. Now, you might be wondering if this means your laundry day will stretch into infinity. Fear not! While the Eco Dry setting can extend the cycle time, it’s a small price to pay for the energy savings and the gentle care it provides to your clothes. So, if you’re not in a rush, it’s definitely worth giving this setting a try. Why Your Samsung Dryer Takes Too Long to Dry Ever felt like your dryer is taking forever to finish a cycle? You’re not alone, and there are a few common culprits that might be slowing things down. Understanding these issues can help you optimize your dryer’s performance and make the most of that Eco Dry setting. Let’s explore some of the reasons why your Samsung dryer might be taking its sweet time. First up, let’s talk about power issues. Your dryer needs the right amount of juice to work efficiently. For electric dryers, a 240v outlet is a must, while gas dryers require a proper gas line connection. If your dryer isn’t getting enough power, it could struggle to generate the heat needed for a quick dry. Another factor to consider is how much you’re loading into the dryer. Overloading can prevent hot air from circulating properly, leading to longer drying times. Aim to fill your dryer only three-quarters full to allow for adequate air flow. And don’t forget to check your wash load’s spin cycle – if clothes are too wet going in, they’ll take longer to dry. Making the Most of Your Samsung Dryer Now that we’ve covered some common drying delays, let’s focus on how to get the best out of your Samsung dryer. From selecting the right cycle to maintaining your machine, these tips will have you drying like a pro in no time. Let’s dive in! First things first, make sure you’re selecting the correct drying cycle for your load. While the Eco Dry setting is great for energy savings, it might not be the best choice if you’re in a hurry. For a quicker dry, consider using a Sensor Dry cycle with a higher dry level. This way, you can tailor the drying time to match your needs. Maintenance is key to keeping your dryer running smoothly. Regularly clean the lint trap to ensure proper airflow, and don’t forget about the exhaust vent. A clogged vent can lead to longer drying times and even pose a fire risk. By keeping these areas clean, you’ll not only improve efficiency but also extend the life of your dryer. Frequently Asked Questions What is Eco Dry on Samsung dryers? The Eco Dry setting on Samsung dryers is an energy-efficient option that reduces power consumption by extending the drying time. It achieves this by starting the cycle without heat and dynamically adjusting the temperature and time. This setting is perfect for those looking to save on energy bills while still getting their clothes dry and fresh. Does Eco Dry take longer? Yes, the Eco Dry setting can take longer than other drying cycles. It extends the drying time to use less heat, which means your clothes will dry more gently. The exact length of time depends on the load size and temperature setting, so it’s great for those who aren’t in a rush and want to save energy. Which dryer setting dries clothes the fastest? If speed is your priority, consider using a Sensor Dry cycle with a higher dry level. This setting adjusts the drying time based on the moisture level in your clothes, ensuring they dry quickly and efficiently. While Eco Dry is fantastic for energy savings, a Sensor Dry cycle is your go-to for getting clothes dry in a flash. Wrapping Up There you have it, folks! The Eco Dry setting on your Samsung dryer is a fantastic way to save energy while keeping your clothes in tip-top shape. By understanding how this setting works and when to use it, you can make laundry day a little less of a chore and a whole lot

What’s the Eco Dry Samsung Dryer Setting? Read More »

Why Is My Oven Not Heating Up?

Why Is My Oven Not Heating Up?

Is your oven not heating up and leaving you with raw cookie dough instead of delicious treats? Fear not, because we’re diving into the world of oven troubles and uncovering why your trusty kitchen companion might be giving you the cold shoulder! Related Services: Oven Repair Picture this: you’ve prepped a mouth-watering meal, popped it into the oven, and set the timer. But when you eagerly open the oven door, you’re greeted by a disappointing, lukewarm dish. It’s a culinary nightmare! If your oven is not heating up, you’re not alone. Many homeowners face this frustrating issue, and understanding the possible causes is the first step toward a solution. Let’s explore why your oven might be acting up and how to get it back to its warm, toasty self. Your oven is like the heart of your kitchen, tirelessly working to bake, roast, and broil your favorite dishes. But when it stops heating, it can throw a wrench in your dinner plans. Whether it’s a faulty heating element or a tripped circuit breaker, several factors could be at play. So, grab your toolbox (or maybe just your curiosity), and let’s troubleshoot this pesky problem together. Why Your Oven Is Not Heating Up Understanding why your oven isn’t heating up is crucial to fixing the issue. There are several common culprits to consider. First, check if your appliance is plugged in correctly. It might sound simple, but an unplugged oven won’t heat up, no matter how many times you turn the dial. Another possibility is a tripped circuit breaker, which can cut off power to your oven. If your oven’s heating element is broken, it won’t be able to generate the heat needed for cooking. This can lead to higher electric bills and undercooked meals. Additionally, a misaligned or damaged temperature sensor can cause your oven to heat inconsistently or not at all. These components are vital for maintaining the correct temperature. Finally, your oven’s igniter could be defective. This is especially true for gas ovens, where a faulty igniter can prevent the gas from igniting, leaving your oven cold. Identifying these issues is the first step to getting your oven back in working order. Common Reasons for Oven Not Heating Up Let’s dive deeper into some of the most common reasons your oven might not be heating up. These issues can often be resolved with a bit of troubleshooting and, if necessary, professional help. Understanding these problems will help you diagnose and fix your oven more effectively. Unplugged Appliance or Tripped Circuit Breaker Believe it or not, one of the simplest reasons your oven isn’t heating up is because it’s unplugged. Double-check that your oven is securely plugged into the outlet. If that’s not the issue, a tripped circuit breaker might be to blame. A power surge or overload can cause the breaker to trip, cutting off electricity to your oven. To fix this, head to your circuit breaker panel and look for the switch labeled “Oven.” If it’s halfway between “On” and “Off,” it’s tripped. Simply switch it off and then back on to restore power to your oven. If the breaker trips again, it may be time to consult an electrician. Broken Heating Element A broken heating element is another common reason for an oven not heating up. These elements are responsible for generating heat, so when they fail, your oven won’t reach the desired temperature. You can usually spot a faulty element if it doesn’t glow bright orange when the oven is on. If you suspect a broken heating element, turn off the power and inspect it for cracks or blisters. If it appears damaged, it’s time to call a professional to replace it. Attempting to fix it yourself could be dangerous due to the high voltage involved. Defective Igniter For gas ovens, a defective igniter can prevent the oven from heating up. The igniter’s job is to light the gas, creating the heat needed for cooking. If it’s not working, your oven will remain cold. Signs of a faulty igniter include no ignition sound or an irregular flame. To check the igniter, look for any visible damage or discoloration. If you notice any issues, it’s best to contact a certified service professional to replace it. Handling gas components can be hazardous, so professional assistance is recommended. Frequently Asked Questions Why is my oven on but not hot? If your oven is on but not heating up, it could be due to several reasons. A tripped circuit breaker or an unplugged appliance are common culprits. Additionally, a broken heating element or a defective igniter can prevent your oven from reaching the desired temperature. Make sure to check these components to diagnose the problem. How do you fix an oven that won’t heat up? To fix an oven that won’t heat up, start by checking if it’s plugged in and if the circuit breaker is tripped. Inspect the heating element for any visible damage, such as cracks or blisters. For gas ovens, ensure the igniter is functioning properly. If you identify any faulty components, it’s best to contact a professional for repair or replacement. What happens if an oven stops working? If an oven stops working, it can disrupt your cooking routine and leave you with uncooked meals. It’s important to identify the cause of the problem, whether it’s a power issue or a faulty component. Addressing these issues promptly will help restore your oven’s functionality and prevent further inconvenience. Wrapping Up Dealing with an oven that refuses to heat up can be frustrating, but understanding the common causes can help you troubleshoot the issue. From unplugged appliances to broken heating elements, there are several factors to consider. By identifying the problem, you can take the necessary steps to fix it and get your oven back in working order. Remember, safety is a priority when dealing with electrical or gas components. If you’re unsure about any repairs, it’s always best to contact a professional for assistance. With

Why Is My Oven Not Heating Up? Read More »

Is Your Samsung Fridge Not Cooling? What To Do

Is Your Samsung Fridge Not Cooling? What To Do

Is your Samsung fridge not cooling like it should? Dive into these easy-to-follow steps to troubleshoot and fix the issue without breaking a sweat! Related Services: Fridge Repair Picture this: you open your Samsung fridge, ready to grab a chilled drink, only to find it’s not cool at all. Ugh, what a bummer! A fridge not cooling can throw a wrench in your daily routine, but fear not, dear homeowner. We’ve got you covered with some nifty tips and tricks to get your Samsung fridge back in action. Before you start worrying about calling in the pros, know that many cooling issues can be tackled right at home. From checking the power plug to ensuring the doors are sealed tight, you might be surprised at how simple some solutions can be. Let’s dive into the nitty-gritty of why your Samsung fridge might be giving you the cold shoulder. Why Is Your Samsung Fridge Not Cooling? When your Samsung fridge isn’t cooling, it can be due to a variety of reasons. Sometimes, it’s as simple as a loose plug or a door not closing properly. Other times, it might be a more technical issue like a blocked air vent or a fan that’s stopped spinning. One of the most common culprits is the door seal. If the seal is dirty or damaged, it lets warm air in, affecting the fridge’s cooling ability. Another frequent issue is a fridge that’s packed too tight, blocking air circulation. Let’s explore these problems and more to help you pinpoint what’s going wrong. Understanding the root cause can save you time and money. By addressing these common issues, you can often restore your fridge’s cooling power without needing professional help. So, let’s get started on diagnosing and fixing your Samsung fridge. Common Fixes for a Samsung Fridge Not Cooling Now that we’ve identified potential issues, it’s time to roll up your sleeves and get to fixing. These DIY solutions can often solve the problem without needing a technician. Let’s look at some common fixes you can try at home. Check the Power Connection First things first, ensure your fridge is properly plugged in. A loose plug can cause your fridge to lose power and stop cooling. If the plug is secure but the fridge is still not working, try plugging another device into the same outlet to check if it’s the outlet that’s faulty. Inspect the Door Seals Door seals can be sneaky little culprits. If they’re dirty or damaged, they can let warm air in, making your fridge work harder to cool. Clean the seals with a damp cloth to remove any dirt and check for any tears or damage that might need professional repair. Ensure Proper Airflow Your fridge needs space to breathe! Make sure it’s not crammed against the wall and that there’s at least an inch of space behind it. Also, avoid overstuffing your fridge, as this can block air vents and prevent cold air from circulating properly. Advanced Troubleshooting Steps If the basic fixes haven’t solved the issue, it might be time to delve a little deeper. Don’t worry, these steps are still manageable without needing a tech degree. Let’s tackle some more advanced troubleshooting. Check for Demo Mode Sometimes, your fridge might accidentally be set to Demo Mode, which disables cooling to save energy. Check your fridge’s display for an “OF-OF” or “OFF” message. Consult your manual for instructions on how to exit Demo Mode for your specific model. Inspect the Condenser Coils Dirty condenser coils can hinder your fridge’s cooling efficiency. These coils are usually located at the back of the fridge. Unplug your fridge, pull it away from the wall, and clean the coils with a vacuum or a brush to remove dust and debris. Test the Fans Your fridge has fans that help circulate cold air. If these fans are blocked or not working, your fridge might not cool properly. Unplug your fridge, locate the fans, and make sure they can spin freely. If they’re stuck, you might need to call a technician for repairs. Frequently Asked Questions How to fix a Samsung fridge that is not cooling? To fix a Samsung fridge not cooling, start by checking the power connection and ensuring the fridge is plugged in properly. Next, inspect the door seals for dirt or damage and clean them if necessary. If the issue persists, check for Demo Mode, clean the condenser coils, and ensure the fans are functioning properly. What is the most common problem with a Samsung refrigerator? The most common problem with a Samsung refrigerator is often related to the door seals. Dirty or damaged seals can allow warm air to enter the fridge, reducing its cooling efficiency. Ensuring the seals are clean and intact can often resolve this issue. Which part is responsible for cooling in a refrigerator? The compressor is the main component responsible for cooling in a refrigerator. It circulates refrigerant throughout the system, allowing the fridge to maintain a cool temperature. Other important parts include the condenser coils and evaporator fan, which help distribute cool air inside the fridge. Wrapping Up Having a Samsung fridge that’s not cooling can be a real hassle, but with these tips, you’re well on your way to solving the problem. By tackling the common issues outlined above, you can often restore your fridge’s cooling power without needing professional help. Remember, regular maintenance can prevent many of these issues from cropping up in the first place. Keep your fridge clean, ensure proper airflow, and regularly check the seals to keep everything running smoothly. If you’ve tried all these steps and your fridge still isn’t cooling, it might be time to call in a professional. But with a little luck and some elbow grease, you’ll have your fridge back to cooling in no time! And if your appliance needs a repair, don’t hesitate to call on Vancouver Appliance Service Pros to get the job done!

Is Your Samsung Fridge Not Cooling? What To Do Read More »

How To Make the Best of Your Samsung American Fridge Freezer

How To Make the Best of Your Samsung American Fridge Freezer

Trying to figure out how to make the most of your Samsung American Fridge Freezer? Dive into our guide to discover how to organize and optimize your fridge like a pro! Related Services: Fridge Repair Hey there, fellow home decor enthusiasts! If you’re anything like me, you know that the Samsung American Fridge Freezer isn’t just any kitchen appliance; it’s the heart of your culinary kingdom. With its sleek design and spacious interior, it’s practically begging to be organized to perfection. But let’s be real, keeping it neat and efficient can sometimes feel like a never-ending game of Tetris. Fear not, because today, we’re diving into the ultimate guide to making the most of your Samsung American Fridge Freezer! Picture this: you open your fridge, and it’s like staring into a well-organized paradise where everything has its place. Sounds dreamy, right? Well, achieving that dream is easier than you think. By understanding the unique features of your Samsung American Fridge Freezer and implementing a few clever strategies, you’ll not only keep your food fresher longer but also save money and reduce waste. So, let’s roll up our sleeves and get started on transforming your fridge into the organized masterpiece you’ve always wanted! The Importance of Fridge Organization Before we dive into the nitty-gritty, let’s talk about why organizing your fridge is a game-changer. A cluttered fridge isn’t just an eyesore; it can also lead to food spoilage and waste. By organizing your Samsung American Fridge Freezer, you’ll be able to see what you have at a glance, reducing the chances of buying duplicates or letting food expire. Plus, a well-organized fridge makes meal prep a breeze! One of the key benefits of a tidy fridge is improved food safety. By knowing exactly where to store each type of food, you can prevent cross-contamination and ensure that your perishables stay at the right temperature. Your Samsung American Fridge Freezer has different temperature zones, and utilizing them correctly is crucial for keeping your food fresh. Trust me, your taste buds and wallet will thank you! Lastly, an organized fridge can actually help your appliance run more efficiently. When air can circulate freely, your Samsung American Fridge Freezer doesn’t have to work as hard to keep things cool, saving you energy and extending the life of your appliance. So, not only will you have a visually pleasing fridge, but you’ll also be doing your part for the environment. Win-win! Maximizing Space in Your Samsung American Fridge Freezer Now that we know why organization is essential, let’s talk about some tips and tricks to maximize the space in your Samsung American Fridge Freezer. With its generous capacity, it’s important to use every inch wisely. Whether you’re storing groceries for a big family or just a week’s worth of meals for yourself, these strategies will help you make the most of your fridge space. Use Door Bins Wisely The door bins of your Samsung American Fridge Freezer are perfect for items that don’t need to be super cold. Think condiments, juice, and soda. Since the door is the warmest part of the fridge, it’s best to keep items here that can handle a little temperature fluctuation. Just remember, eggs and milk are a no-go for the door! Top Shelf Tips The top shelf is ideal for foods that need to be cool but not freezing, like leftovers and snacks. It’s also a great spot for yogurt and cheese. By keeping these items on the top shelf, you’ll avoid accidentally freezing them and keep them at the perfect temperature for snacking. Utilize the Lower Shelves The lower shelves are the coldest part of your fridge, making them perfect for dairy and meats. Store your milk, eggs, and raw meats here to keep them fresh and safe from bacteria. This is where your Samsung American Fridge Freezer really shines, keeping your perishables at the optimal temperature. Organizing the Freezer Like a Pro Let’s not forget about the freezer! Your Samsung American Fridge Freezer’s freezer section is just as important as the fridge. A well-organized freezer means you’ll always know what you have on hand, saving you from last-minute grocery runs and helping reduce food waste. Door Storage Do’s and Don’ts Just like the fridge, the freezer door is the warmest part. Keep items here that aren’t super sensitive to temperature changes, like bread and nuts. Avoid placing ice cream here, as it can get soft and melty every time you open the door. Top Shelf Strategies The top shelf is perfect for items that don’t leak, like frozen fruits and veggies. It’s also a great spot for baked goods and popsicles. By keeping these items up top, you’ll prevent any potential messes and keep your freezer tidy. Bottom Shelf Best Practices Reserve the bottom shelf for items that might leak, like meats and prepared meals. This way, if anything does drip, it won’t contaminate your other food. Plus, it’s the coldest part of the freezer, perfect for keeping these items at their best. Frequently Asked Questions What is the proper way to organize a refrigerator? Organizing your refrigerator is all about using the different temperature zones to your advantage. Store items like condiments and drinks in the door bins, as they don’t need to be super cold. The top shelves are great for leftovers and dairy, while the bottom shelves are best for meats and eggs. Don’t forget to use the crisper drawers for your fruits and veggies! What is the best setting for a fridge freezer? The ideal temperature setting for a fridge is between 35 and 38 degrees Fahrenheit, while the freezer should be set between 0 and 5 degrees Fahrenheit. These settings ensure that your food stays fresh and safe to eat. Make sure to check these temperatures regularly with a thermometer to keep your Samsung American Fridge Freezer running efficiently. Do and don’ts in using refrigerator? Do: Keep your fridge organized, store leftovers at eye level, and clean spills immediately. Don’t: Overload

How To Make the Best of Your Samsung American Fridge Freezer Read More »

tumble dryer

A Maintenance Guide For Your Tumble Dryer

Is your tumble dryer acting up or taking forever to dry clothes? Dive into our comprehensive maintenance guide to keep your dryer running smoothly and efficiently! Related Services: Dryer Repair Hey there, lovely homeowners! If you’re like me, the tumble dryer is your trusty sidekick in the battle against the never-ending laundry pile. It’s that magical machine that turns soggy socks into warm, fluffy wonders. But, just like any superhero, your dryer needs some TLC to keep saving the day. Trust me, a little maintenance goes a long way in extending its life and keeping it from becoming a fire hazard. Picture this: You throw in a load of laundry, hit start, and… nothing. Or worse, your clothes come out as damp as they went in. Ugh, the horror! But don’t sweat it. With a few simple tricks and regular upkeep, you can keep your tumble dryer in tip-top shape. So, let’s roll up our sleeves and get to it—your dryer will thank you! Why Tumble Dryer Maintenance is Important First things first, let’s chat about why maintaining your tumble dryer is essential. This hardworking appliance is a staple in most homes, but it can also be a sneaky fire hazard if not properly cared for. According to some eye-opening stats, failure to clean the dryer is a leading cause of dryer fires. Yikes! Regular maintenance not only keeps your dryer running efficiently but also keeps your home safe. Now, I know what you’re thinking: “Isn’t cleaning the lint filter enough?” While that’s a great start, there’s so much more to it. From cleaning the vent hose to ensuring the dryer is balanced, each step plays a role in its overall performance. Plus, a well-maintained dryer uses less energy, which means lower bills for you. Win-win! So, what does this maintenance entail? Don’t worry, it’s not rocket science. With just a little effort, you can tackle these tasks and keep your dryer humming along happily. Let’s take a closer look at what you need to do. Essential Maintenance Tips for Your Tumble Dryer Alright, folks, it’s time to get down to the nitty-gritty of tumble dryer maintenance. These tips are your golden ticket to a dryer that works like a charm. From cleaning to adjusting, each step is crucial in keeping your appliance in perfect condition. Don’t Overload Your Dryer Let’s face it, we’ve all been tempted to cram as much laundry as possible into the dryer. But overloading is a big no-no. It puts unnecessary strain on the machine and reduces its efficiency. For best results, fill the drum just over halfway so your clothes have room to tumble freely. Regularly Clean the Lint Filter Cleaning the lint filter after every use might seem excessive, but it’s a must. A clogged filter makes your dryer work harder and can lead to overheating. Make it a habit to clear out the lint after each cycle, and you’ll be doing your dryer a huge favor. Deep Clean the Lint Filter and Housing Every few months, give the lint filter and its housing a thorough clean. Wash the filter under the tap and use a vacuum on low suction to clean the housing. Just ensure everything is dry before reassembling to avoid any mishaps. Keeping Your Tumble Dryer in Top Shape Now that we’ve tackled the basics, let’s explore a few more tips to keep your tumble dryer in pristine condition. These additional steps will ensure your dryer remains efficient and safe to use. Clean the Filter Drawer or Condenser Depending on your dryer’s model, it may have a filter drawer or condenser. These need regular cleaning to maintain efficiency. Check your user manual for specific instructions, and aim to clean these components every four or five cycles. Give Your Dryer Space to Breathe Your dryer needs room to ventilate, so avoid cramming it into tight spaces. Proper ventilation helps prevent overheating and ensures optimal performance. Consider stacking your dryer on top of your washing machine if space is limited. Keep Vent Hoses Clean If you have a vented dryer, clearing the vent hose every three months is essential. Disconnect the hose and clean it with a mild cleaning product or a feather duster. This simple step can prevent lint buildup and reduce fire risk. Frequently Asked Questions What maintenance does a tumble dryer need? A tumble dryer requires regular maintenance to function efficiently. This includes cleaning the lint filter after every use, deep cleaning the filter and housing every few months, and ensuring the vent hose is clear of debris. Additionally, keep the dryer balanced and ensure it has enough space for proper ventilation. How many times should you perform maintenance on your dryer? Regular maintenance should be a routine part of your laundry schedule. Clean the lint filter after every cycle and deep clean the filter housing every few months. For vented dryers, clear the vent hose every three months. By sticking to this schedule, you can keep your dryer running smoothly and safely. How do you clean your tumble dryer? To clean your tumble dryer, start by removing and cleaning the lint filter after each use. Every few months, deep clean the filter and housing with water and a vacuum. For vented models, clean the vent hose regularly. Wipe down the drum and exterior with a mild cleaning solution to prevent odors and keep your dryer looking fresh. Wrapping Up And there you have it, folks! With these simple maintenance tips, your tumble dryer will be in peak condition, ready to tackle even the most daunting laundry piles. Remember, regular upkeep is key to a long-lasting and efficient appliance. By taking the time to clean and care for your dryer, you’re not only ensuring its performance but also keeping your home safe from potential fire hazards. So, roll up those sleeves and give your trusty tumble dryer the love it deserves. You’ll be rewarded with perfectly dried clothes and peace of mind. Thanks for joining me on this

A Maintenance Guide For Your Tumble Dryer Read More »

maytag dishwasher problem

Essential Tips for Troubleshooting Common Maytag Dishwasher Problems

Is your Maytag dishwasher acting up? No worries – we’re diving into the most common Maytag dishwasher problems and how you can tackle them without breaking a sweat! Related Services: Dishwasher Repair | Washing Machine Repair Hey there, fellow home enthusiasts! If you’re anything like me, your dishwasher is one of those trusty sidekicks you can’t live without. But when it starts acting up, it can throw a wrench in your daily routine. Fear not, because today we’re tackling the world of Maytag dishwasher problems. Whether it’s leaking, not draining, or just not cleaning those dishes like it used to, we’ve got you covered with some tips and tricks to get things back on track. Before you start panicking about a potential dishwasher meltdown, take a deep breath. Many common issues can be resolved with a little know-how and some elbow grease. From fixing leaks to dealing with stubborn odors, we’ll explore some DIY solutions that could save you a call to the repair service. So, let’s roll up our sleeves and dive into the world of Maytag dishwasher problem troubleshooting! Understanding Common Maytag Dishwasher Problems When it comes to Maytag dishwashers, there are a few common problems that homeowners often face. These can range from minor annoyances to more significant issues that require a bit of troubleshooting. Let’s take a closer look at some of these problems so you can identify and address them effectively. One of the most frequent issues is a dishwasher that won’t drain properly. This can leave you with a pool of water at the bottom of your machine, and nobody wants that! Another common problem is when dishes come out dirty or streaky, which can be frustrating after running a full cycle. Lastly, leaks can occur, causing water to spill onto your kitchen floor, which is never a fun surprise. Understanding these problems is the first step in finding a solution. By identifying what’s going wrong, you can take the necessary steps to fix it. Whether it’s a simple cleaning or a more involved repair, knowing the root of the issue will guide you toward the right fix. Dealing with Dishwasher Leaks Leaky dishwashers can be a real headache, but the good news is that many leaks are easy to fix. Before you call in the pros, there are a few things you can check on your own. Let’s explore some common causes of leaks and how you can tackle them. Use the Right Detergent One surprising cause of leaks is using the wrong kind of detergent. Regular dish soap can create too many suds, leading to overflow. Make sure you’re using a detergent specifically designed for dishwashers to prevent this issue. Check the Door Seal The door seal is another culprit when it comes to leaks. Over time, the seal can wear out, leading to gaps where water can escape. Inspect the seal for any signs of wear and tear, and consider replacing it if necessary. Load Dishes Properly Improperly loaded dishes can block the spray arms or prevent the door from sealing correctly. Make sure dishes are loaded according to your dishwasher’s guidelines to avoid these issues. Addressing Drainage Issues If your Maytag dishwasher problem is not draining, it can leave you with a soggy mess. But don’t worry, there are a few steps you can take to get things flowing smoothly again. Let’s delve into how to tackle drainage problems. Locate and Clean the Filter Start by checking the filter at the bottom of your dishwasher. If it’s clogged with food particles, it can prevent water from draining. Remove and clean the filter to ensure water can flow freely. Check for Blockages Inspect the drain hose for any kinks or blockages. A blocked hose can stop water from exiting the dishwasher, leading to drainage issues. Clear any obstructions to restore proper drainage. Inspect the Drain Pump If cleaning the filter and hose doesn’t resolve the issue, the drain pump may be the problem. This component can sometimes get clogged or fail, requiring a closer inspection or replacement. Tackling Dirty Dishes There’s nothing more frustrating than opening your dishwasher to find dirty dishes. Fortunately, there are a few things you can check to ensure your Maytag dishwasher is cleaning effectively. Let’s explore some solutions. Don’t Overload Overloading the dishwasher is a common mistake that can hinder cleaning performance. Make sure there’s enough space between items for water and detergent to circulate properly. Adjust Water Temperature For optimal cleaning, your dishwasher needs hot water. Ensure your water heater is set to at least 120℉ to help dissolve detergent and remove food particles effectively. Regular Maintenance Regular cleaning of the dishwasher’s tub, filter, and spray arms can improve performance. Remove any buildup or blockages to keep your machine running smoothly. Frequently Asked Questions What is the most common problem with Maytag dishwashers? The most common problem with Maytag dishwashers is poor drainage. This can often be attributed to a clogged filter or drain hose. Regular maintenance and cleaning can help prevent this issue and ensure your dishwasher operates efficiently. Is there a recall on Maytag dishwashers? As of the latest information, there are no active recalls on Maytag dishwashers. However, it’s always a good idea to check the manufacturer’s website or contact customer service for the most up-to-date information on recalls or safety notices. What is the average life of a Maytag dishwasher? The average life of a Maytag dishwasher is about 10 years. Regular maintenance, such as cleaning filters and checking seals, can help extend the lifespan of your appliance. Keeping up with minor repairs can also prevent more significant issues down the line. https://www.tumblr.com/vancouverapplianceservice/771729770699505664/essential-tips-for-troubleshooting-common-maytag Wrapping Up And there you have it, folks! Troubleshooting your Maytag dishwasher problems doesn’t have to be a daunting task. By understanding common problems and how to address them, you can keep your dishwasher running smoothly and your kitchen routine on track. Remember, regular maintenance is key to preventing many of these issues. By keeping your dishwasher

Essential Tips for Troubleshooting Common Maytag Dishwasher Problems Read More »

samsung washing machine sanitization

Samsung Washing Machine Sanitization: Hygiene Steam Cycles

Is your Samsung washing machine in need of a little TLC? Dive into our guide on Samsung washing machine sanitization and discover how to keep it sparkling clean and running smoothly! Related Services: Washing Machine Repair Hey there, fellow homeowners! If you’ve ever caught a whiff of something funky coming from your laundry room, it might be time to give your Samsung washing machine a good sanitization. We all love our washers for making life easier, but they do need a bit of love in return. Regular cleaning not only keeps them smelling fresh but also ensures they work efficiently for years to come. But fear not! Sanitizing your Samsung washer isn’t as daunting as it sounds. With a few simple steps, you can banish those pesky odors and keep mold and mildew at bay. Whether you have a front loader or a top loader, we’ve got you covered with all the tips and tricks to make your machine shine. So, grab your cleaning supplies and let’s get started! Why Samsung Washing Machine Sanitization is Important First things first, let’s talk about why sanitizing your Samsung washing machine is a must-do task. Over time, moisture and detergent residue build up in your washer, creating a perfect environment for mold and mildew. This not only leads to unpleasant odors but can also affect the performance of your machine. Yikes! By regularly cleaning your washer, you can prevent these issues and keep your laundry smelling fresh. Samsung washers come with a handy Self Clean or Pure Cycle feature, designed to tackle the areas where dirt and grime tend to accumulate. It’s like a spa day for your washer, and it helps maintain its efficiency and longevity. Plus, a clean washing machine means cleaner clothes! When your washer is free from gunk and build-up, it can do its job more effectively, leaving your clothes looking and smelling their best. So, let’s dive into the nitty-gritty of how to keep your Samsung washing machine sanitization in tip-top shape. How to Sanitize Your Samsung Washing Machine Now that we know why it’s important, let’s get down to the how-to of Samsung washing machine sanitization. Whether you’re dealing with a front load or a top load washer, the process is quite similar. The goal is to eliminate any build-up and prevent future odors. Running a Self Clean Cycle The Self Clean or Pure Cycle is your washer’s best friend when it comes to sanitization. This special cycle is designed to clean the tub and other areas where moisture and detergent residue can accumulate. For top load washers, the cycle takes about an hour, while front load washers need around four hours. To run the cycle, simply make sure your washer is empty, press the Self Clean button, and hit Start. No need to add any cleaner, but if you’re dealing with a moldy smell, a bit of bleach can do wonders. If you notice suds or residue during the cycle, consider running another Self Clean cycle afterward. Keeping It Fresh Between Cleanings In between your monthly sanitization sessions, there are a few easy steps you can take to keep your washer fresh. First, try running a cycle with warm or hot water occasionally, especially if you usually wash with cold water. This helps slow down the build-up of soil and detergent. Also, make it a habit to leave the washer door and detergent drawer open after each wash. This allows air to circulate and prevents moisture from lingering, reducing the risk of mold and mildew formation. It’s a simple step that can make a big difference! Cleaning the Detergent Drawer and Pump Filter Don’t forget about the detergent drawer and pump filter! These areas can easily become clogged with detergent residue, affecting your washer’s performance. Wipe the detergent drawer dry after each use and deep clean it at least once a month. Simply remove the drawer, rinse it with warm water, and use a soft brush to remove any gunk. For front load washers, the pump filter should be cleaned monthly as well. This helps prevent odors and ensures proper drainage. Open the pump filter access panel, drain the water, and clean the filter with a soft brush. Easy peasy! Frequently Asked Questions Do you use detergent on the sanitize cycle? When running the sanitize cycle on your Samsung washing machine, you don’t need to add any detergent. The cycle is designed to clean the tub using hot water and the washer’s internal heater, effectively killing bacteria and mold. However, if you notice a persistent moldy smell, adding a small amount of bleach can help tackle the issue. How to run self clean on Samsung washing machine? Running a Self Clean cycle on your Samsung washing machine is a breeze. First, ensure the washer is empty, then press the Self Clean button followed by the Start button. The cycle will run for about an hour on top load washers and four hours on front load washers. No additional cleaner is needed, but you can add bleach if there’s a moldy odor. Does sanitize cycle shrink clothes? Worried about your clothes shrinking during the sanitize cycle? No need to fret! The sanitize cycle is specifically for cleaning the washer itself, not for washing clothes. It’s important to run this cycle with an empty drum to ensure effective cleaning. For regular laundry, stick to the recommended settings to avoid any unwanted shrinkage. https://www.tumblr.com/vancouverapplianceservice/771340100819894272/samsung-washing-machine-sanitization-hygiene Wrapping Up And there you have it, folks! Samsung washing machine sanitization is a simple yet crucial task that keeps your washer in prime condition. By regularly cleaning your washer, you can prevent odors, mold, and mildew, ensuring your laundry stays fresh and your machine runs smoothly. Remember to utilize the Self Clean or Pure Cycle feature, keep your washer’s door and detergent drawer open between washes, and give the detergent drawer and pump filter a good cleaning monthly. These small steps will make a big difference in the longevity and efficiency of your

Samsung Washing Machine Sanitization: Hygiene Steam Cycles Read More »

Unlock the secrets of LG Dishwasher Diagnostic Mode

Everything About LG Dishwasher Diagnostic Mode

Struggling with your LG dishwasher acting up? Dive into the world of LG Dishwasher Diagnostic Mode and unravel the mysteries of those pesky error codes! Related Services: Dishwasher Repair | Washing Machine Repair Hey there, fellow home enthusiasts! If you’ve ever found yourself staring at your LG dishwasher, wondering why it’s not cooperating, you’re definitely not alone. These modern marvels are packed with tech and sometimes, they just need a little nudge to get back on track. Luckily, LG has equipped their dishwashers with a nifty feature called Diagnostic Mode. It’s like a secret handshake between you and your appliance, helping you decode those cryptic error codes and get your dishwasher back to its sparkling best. Now, before you start imagining yourself as a dishwasher whisperer, let’s break down what Diagnostic Mode actually is. Think of it as a built-in troubleshooting buddy that helps identify issues without the need for a professional visit. Whether it’s a water leak, a motor hiccup, or a simple detergent mishap, Diagnostic Mode has got your back. So, grab a cup of coffee, and let’s explore how this magical feature can save the day (and your dishes). Understanding LG Dishwasher Diagnostic Mode So, what exactly is LG Dishwasher Diagnostic Mode, and why should you care? In simple terms, it’s a feature designed to make your life easier by pinpointing the source of your dishwasher troubles. LG dishwashers, known for their innovation and reliability, use this mode to communicate specific issues via error codes. These codes are like little SOS signals from your appliance, guiding you to the root of the problem. Diagnostic Mode is particularly handy because it allows you to troubleshoot issues without the guesswork. Imagine having a roadmap that tells you exactly where the detour is on your dishwashing journey. By understanding these codes, you can decide whether it’s a DIY fix or if it’s time to call in the pros. It’s all about empowering you to take control of your appliance’s health. Now, you might be wondering how to access this mode. It usually involves a specific sequence of button presses, kind of like a secret code to unlock hidden levels in a video game. Once you’re in, you’ll be able to see which error codes are flashing and what they mean. It’s like having a conversation with your dishwasher, minus the awkward small talk. Common LG Dishwasher Error Codes Before we dive into the nitty-gritty of Diagnostic Mode, let’s talk about some common error codes you might encounter. These codes are your dishwasher’s way of saying “Hey, something’s not right here!” Understanding them is the first step in resolving the issue. Let’s take a look at a few frequent flyers in the error code world. Error Code: IE (Water Level Problem) The IE code is a heads-up that your dishwasher isn’t getting enough water. This could be due to a kinked hose or a clogged inlet valve. Check your water supply and ensure everything is flowing smoothly. If the problem persists, you might need to call in a professional for further inspection. Error Code: OE (Drain Issue) Seeing an OE code? That means your dishwasher is having trouble draining. This could be due to a blockage in the filter or pump. Make sure to clean out any debris and check for clogs. If cleaning doesn’t do the trick, it might be time to look at the sump and drain pump for obstructions. Error Code: LE (Motor Problem) An LE error indicates a motor or circulation pump issue. This could be a simple reset situation or something that requires professional attention. Try turning off the dishwasher and restarting it. If the error remains, it might be best to call in the experts to take a closer look. How to Use LG Dishwasher Diagnostic Mode Alright, now that we’ve covered the basics, let’s get into the fun part: actually using Diagnostic Mode. This feature is like your dishwasher’s personal diary, revealing all its secrets and helping you fix them. Whether you’re dealing with a minor glitch or a more serious issue, Diagnostic Mode is your go-to tool. Accessing Diagnostic Mode To enter LG Dishwasher Diagnostic Mode, you’ll need to follow a specific sequence of button presses. This combination varies by model, so make sure to consult your user manual for the exact steps. Once you’re in, you’ll see a series of error codes that tell you what’s going on under the hood. Interpreting Error Codes Once you’re in Diagnostic Mode, it’s time to decode those error messages. Each code corresponds to a specific issue, like a secret language between you and your appliance. By understanding what each code means, you can take the right steps to resolve the problem, whether it’s a DIY fix or a call to the pros. Troubleshooting Common Issues With your error codes in hand, it’s time to troubleshoot. Start by addressing the most common issues, like checking water supply connections or cleaning out filters. If the problem persists, consult your user manual or reach out to a professional for assistance. Remember, Diagnostic Mode is there to guide you, but sometimes a little expert help is needed. Frequently Asked Questions How do I run smart diagnosis on my LG dishwasher? Running a smart diagnosis on your LG dishwasher is a breeze. Start by downloading the LG SmartThinQ app on your smartphone. Once installed, open the app and follow the on-screen instructions to initiate the diagnosis. Make sure your phone is close to the appliance, as the diagnosis involves sound signals that the app will interpret. This process will give you insights into any issues your dishwasher might be experiencing. How to test control board on LG dishwasher? Testing the control board on your LG dishwasher requires a bit of technical know-how. First, ensure the dishwasher is unplugged for safety. Then, remove the control board cover and inspect for any visible damage or burnt components. If everything looks fine, use a multimeter to test the electrical connections for continuity.

Everything About LG Dishwasher Diagnostic Mode Read More »

bosch dishwasher energy use

On Bosch Dishwasher Energy Use

Wondering how much energy your Bosch dishwasher really uses? Dive into our bubbly guide to discover everything you need to know about Bosch Dishwasher Energy Use and how it impacts your home and wallet! Related Services: Dishwasher Repair | Washing Machine Repair Hey there, fellow homeowners! Let’s talk about one of the unsung heroes of our kitchens—the dishwasher. Specifically, we’re diving into the world of Bosch dishwashers and their energy use. You might be thinking, “Why should I care about dishwasher energy use?” Well, my friend, knowing the energy consumption of your appliances can be a game-changer for both your electric bill and our lovely planet. Bosch dishwashers are known for their sleek designs and whisper-quiet operation, but they’re also praised for their energy efficiency. These machines are like the eco-friendly ninjas of the kitchen world, stealthily cleaning your dishes while keeping energy use low. So, if you’re curious about how these dishwashers help save energy and what it means for you, stick around as we break it all down! Understanding Bosch Dishwasher Energy Use Before we get into the nitty-gritty, let’s talk about why energy use is such a big deal. With rising energy costs and growing environmental concerns, homeowners are more conscious than ever about their energy consumption. Dishwashers, like any other appliance, contribute to your household’s overall energy use. But with Bosch, you’re in for a pleasant surprise! Bosch dishwashers are designed with energy efficiency in mind. They’re equipped with features like the Eco 50°C program, which is specifically designed to minimize energy and water consumption. This means you can have sparkling clean dishes without feeling guilty about your carbon footprint. The Eco program is the most efficient in terms of combined energy and water consumption, making it a popular choice among eco-conscious users. Not only do these dishwashers save energy, but they also come with an Energy Efficiency Class of A++, which is like getting an A+ on your energy report card. This rating means that Bosch dishwashers use less energy than many other models on the market, helping you save money on your electricity bill while doing your part for the environment. Key Features of Bosch Dishwashers Now that we’ve covered the importance of energy use, let’s dive into some of the standout features that make Bosch dishwasher energy use a top choice for energy efficiency. These features are not just about saving energy; they also enhance the overall performance and convenience of your dishwasher. Eco-Friendly Programs One of the main highlights of Bosch dishwashers is their Eco 50°C program. This program is designed to clean normally soiled tableware efficiently, using less energy and water. It’s like having a mini environmentalist in your kitchen, ensuring your dishes are clean without wasting resources. Silence and Efficiency Bosch dishwashers are renowned for their quiet operation. With noise levels as low as 42 dB, these dishwashers can run without disturbing your peaceful home environment. The Silence program takes it a step further, making it perfect for open-plan living spaces where noise can be a concern. Advanced Technology Tech-savvy homeowners will appreciate the advanced features Bosch dishwashers offer. From the VarioFlex Pro baskets for optimal space utilization to the LED display for easy program selection, these dishwashers are designed to make your life easier while being energy efficient. How Bosch Dishwashers Save Energy So, how exactly do Bosch dishwasher energy use make it very efficient? It all comes down to a combination of smart design and innovative technology. Let’s explore some of the ways Bosch dishwashers save energy while delivering top-notch cleaning performance. Optimized Water Usage Water usage is a critical factor in energy consumption. Bosch dishwashers are designed to use water efficiently, with some models consuming as little as 6.5 liters per cycle. This not only saves water but also reduces the energy needed to heat it, making these dishwashers a win-win for your wallet and the planet. Efficient Heating Elements Bosch dishwashers come with hidden heating elements that are designed to heat water efficiently. This ensures that energy is used effectively during the washing and drying cycles, reducing overall consumption. Plus, the heat exchanger technology provides hygienic and efficient drying, so your dishes come out spotless every time. Smart Sensors With features like the Hydrosensor and Load Sensor, Bosch dishwashers can adjust water and energy usage based on the load size and soil level. This means that whether you’re washing a full load or just a few items, your dishwasher uses only the necessary resources, optimizing energy use for every cycle. Frequently Asked Questions Do modern dishwashers use less electricity? Yes, modern dishwashers are designed to be more energy-efficient than older models. They often come with advanced features and programs that use less water and energy, such as the Eco cycle found in Bosch dishwashers. These improvements help reduce the overall electricity consumption, making them a better choice for environmentally conscious homeowners. How much electricity does a 1 hour dishwasher cycle use? The electricity used during a 1-hour dishwasher cycle can vary depending on the model and the specific program selected. For Bosch dishwashers, the energy consumption for a typical cycle is around 0.92 kWh. This figure can be lower or higher based on the specific settings and cycle chosen, but Bosch dishwashers are designed to keep energy use to a minimum. How much electricity does a Bosch dishwasher use? Bosch dishwashers are known for their energy efficiency, with an annual energy consumption of around 262 kWh based on 280 standard cleaning cycles. This translates to approximately 0.92 kWh per cycle. The Eco 50°C program is particularly efficient, making Bosch dishwashers an excellent choice for those looking to reduce their energy bills. https://www.tumblr.com/vancouverapplianceservice/771339513658261504/on-bosch-dishwasher-energy-use Wrapping Up In conclusion, Bosch dishwashers are a fantastic option for homeowners looking to balance performance with energy efficiency. With their advanced features and eco-friendly programs, these dishwashers provide a sparkling clean while keeping your energy consumption in check. Whether you’re motivated by saving money or saving the planet, Bosch dishwasher energy use

On Bosch Dishwasher Energy Use Read More »

how to clean the inside of a bosch dishwasher

Easy Guide on How To Clean the Inside of a Bosch Dishwasher

Is your Bosch dishwasher starting to smell funky or leaving your dishes less than sparkling? No worries – we’ve got the ultimate guide on how to clean the inside of a Bosch dishwasher! Related Services: Dishwasher Repair | Washing Machine Repair Let’s face it, dishwashers are the unsung heroes of our kitchens. They tirelessly battle through the grease, grime, and leftover lasagna bits so we don’t have to. But even heroes need a little TLC now and then. If your Bosch dishwasher has been a little less heroic lately, it might be time for a deep clean. Trust me, a clean dishwasher not only smells fresher but also performs better. It’s like giving your dishwasher a spa day, and who wouldn’t want that? Many of us might assume that our dishwashers are self-cleaning, but that’s not entirely true. Over time, bits of food, soap scum, and pesky water minerals can build up, making your dishwasher work harder than it should. And let’s not even talk about the odors that can develop! If you’ve noticed that your dishes aren’t coming out as clean as they used to, or if there’s a mysterious smell wafting from your kitchen, it’s time to roll up your sleeves and get to work. Let’s dive deep on how to clean the inside of a Bosch dishwasher! Understanding the Problem: Why Your Bosch Dishwasher Needs Cleaning So, why does your Bosch dishwasher need cleaning in the first place? It’s simple: over time, all those leftover food particles, grease, and mineral deposits from hard water can accumulate. This buildup doesn’t just make your dishwasher less efficient; it can also lead to unpleasant odors. Yikes! Nobody wants their kitchen to smell like last week’s dinner. When these particles aren’t addressed, they can clog up the spray arms and filters, which are crucial for your dishwasher’s performance. Imagine trying to wash dishes with a clogged sink – not fun, right? By regularly cleaning these components, you can keep your Bosch dishwasher running smoothly and ensure that your dishes come out sparkling every time. But don’t worry, cleaning your Bosch dishwasher isn’t as daunting as it sounds. With a few simple steps and some household ingredients, you can have it looking and smelling fresh in no time. Plus, regular maintenance can help extend the life of your appliance, saving you money in the long run. Let’s dive into the details and see how you can give your dishwasher the care it deserves. Step-by-Step Guide: How To Clean the Inside of a Bosch Dishwasher Now that we understand why cleaning is crucial, let’s get into the nitty-gritty of how to clean the inside of a Bosch dishwasher. It’s easier than you might think, and you’ll only need a few supplies that you probably already have at home. Ready to make your dishwasher shine? Let’s go! Cleaning the Dishwasher Filter The filter is like the dishwasher’s stomach, catching all the gunk you don’t want lingering around. To clean it, start by removing the lower rack and spray arm. Twist the filter cap and pull up to remove the filter and mesh screen. Rinse them under warm water and scrub away any stubborn debris with a soft brush. Once clean, place the filter back, twist the cap to secure it, and reattach the spray arm and rack. Cleaning the Dishwasher Tub The tub is where all the action happens, and it can get pretty grimy. For a deep clean, pour a cup of white vinegar into a dishwasher-safe bowl and place it on the top rack. Run a heavy clean cycle without any dishes. After that, sprinkle a cup of baking soda on the bottom of the tub and let it sit overnight. Run another cycle in the morning, and voilà – a fresh-smelling tub! Cleaning the Spray Arms Spray arms do the heavy lifting by spraying water all over your dishes. If they’re clogged, your dishes won’t get clean. Remove both spray arms and use a toothpick to clear out any debris from the holes. Rinse them under warm water, dry them off, and reattach them. Make sure they spin freely before putting the rack back in place. Preventing Future Odors and Buildup Now that we’ve tackled the deep clean, let’s talk about keeping your Bosch dishwasher in tip-top shape. Regular maintenance is key to preventing odors and buildup from returning. With a few easy steps, you can keep your dishwasher running smoothly and smelling fresh. First, make it a habit to clean the filter and spray arms every 3-6 months. This will keep them free from clogs and ensure optimal performance. After each dishwasher cycle, remove any leftover food particles and wipe down the interior with a clean cloth. This simple step can make a big difference in preventing odors. Additionally, consider using a high-quality detergent like FINISH, as recommended by Bosch. Using the right detergent can help reduce soap residue and smelly bacteria. Remember, less is more – don’t overdo it with the detergent, as excessive amounts can lead to buildup and odors. Frequently Asked Questions Do Bosch dishwashers have a filter that needs to be cleaned? Yes, Bosch dishwashers come with a filter that needs regular cleaning. The filter is located at the bottom of the dishwasher and is responsible for catching food particles and preventing clogs. It’s important to clean the filter every 3-6 months to ensure your dishwasher runs efficiently and to prevent unpleasant odors. Can I use vinegar in my Bosch dishwasher? While vinegar is a popular household cleaner, it’s not the best choice for regular use in your Bosch dishwasher. Vinegar is a mild acid, and over time, it can damage rubber gaskets and hoses. Instead, stick to Bosch’s recommended cleaning products to ensure the longevity of your dishwasher. What is the life expectancy of a Bosch dishwasher? Bosch dishwashers are known for their durability and can last anywhere from 10 to 15 years with proper care and maintenance. Regular cleaning and using the right

Easy Guide on How To Clean the Inside of a Bosch Dishwasher Read More »

Call 604-265-3852 Call 604-265-3852 Book Online Book Online