(1)")
You turn the burner knob and nothing happens, no click, no flame, no heat, just frustration standing between you and dinner. [IMAGE PLACEHOLDER FOR STOVE_DIAGNOSIS] This guide walks you through the most common reasons a stove burner stops working, whether you have a gas range or an electric cooktop, and shows you exactly what to check before calling anyone.
A dead burner is one of those problems that can feel overwhelming in the moment but usually has a pretty straightforward explanation. Most of the time, it’s something you can diagnose yourself in under ten minutes, and quite often you can fix it too. At Vancouver Appliance Service Pros, we handle stove and range repairs regularly across Vancouver and the surrounding area, and the calls we get about burners not working almost always trace back to one of a handful of causes. The tricky part is knowing which one.
Vancouver homes, especially older ones in neighborhoods like Strathcona, tend to have a mix of appliance ages and styles. Some kitchens have gas ranges that have been running for twenty years, others have smooth-top electric ranges that came with a renovation five years back. The troubleshooting steps differ depending on which you have, so we’ll cover both.
Key takeaways
- A burner that works in another position on the stove tells you the element itself is fine, and the problem is in the socket, switch, or wiring at the original spot.
- On gas ranges, a wet or dirty igniter is one of the most common reasons a burner won’t light, and it’s usually a simple fix: remove the burner cap and let it dry completely.
- Electric cooktops require a 240-volt outlet, while most gas stoves only need 120 volts, plugging into the wrong outlet type will prevent the appliance from working properly.
- A yellow or orange flame on a gas burner signals incomplete combustion and can release carbon monoxide; clean the burner and get it sorted right away.
- Replacing a surface element switch on an electric range typically costs between $50 and $200 in parts, while a surface element board replacement can push repair costs toward $600 or more.
- If two or more burners on an electric range stop working at the same time, the surface element board has likely failed and will need professional diagnosis.

Why your stove burner stopped working
The most common reasons a stove burner stops working are a tripped circuit breaker, a dirty or wet igniter on gas stoves, a failed burner coil or socket on electric stoves, or a faulty infinite switch controlling the heat level. Start with the simplest checks first, you’d be surprised how often the fix is something obvious.
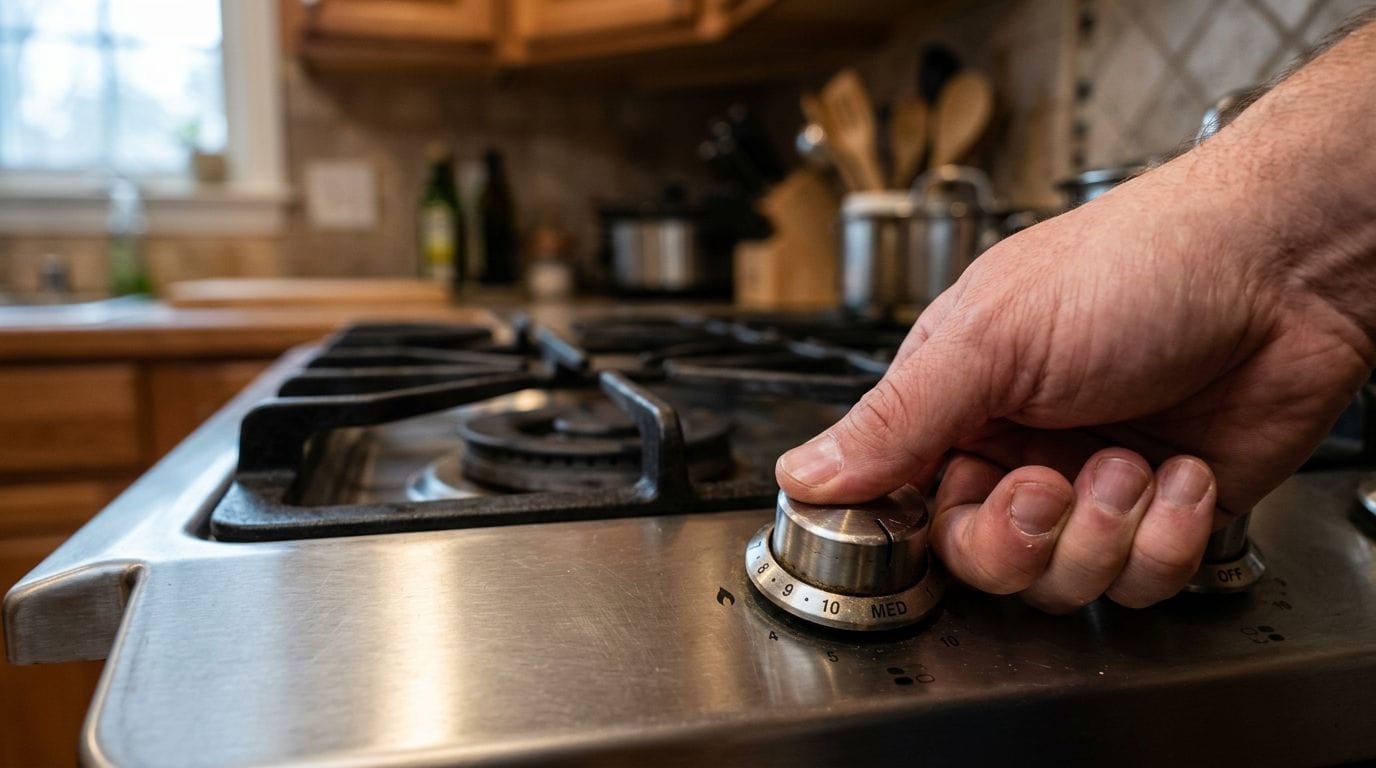
Before you do anything else, check the basics. Is the stove plugged in? Is the gas valve open? Has the circuit breaker tripped? These might sound too simple to mention, but we see it regularly. Someone moves the stove to clean behind it, the cord comes slightly loose from the outlet, and suddenly the back right burner does nothing. Spend two minutes ruling this out before you start pulling components.
If the basics check out and the problem is still there, you’re into actual troubleshooting. The process is different for gas and electric ranges, so let’s go through each one in turn.
Troubleshooting a gas range burner that won’t ignite
Gas burners rely on two things working together: a supply of gas and a spark to light it. When a burner won’t ignite, one or both of those is failing. The good news is that most of the common causes are visible and fixable without tools.
Check the igniter first
The igniter is the small ceramic nub you’ll see near the base of each burner. When it’s working, you’ll hear a rapid clicking when you turn the knob, and sparks jump to the gas as it flows. If you hear clicking but get no flame, the gas side of the equation is the problem. If you hear nothing at all, the igniter itself or the spark module feeding it has likely failed.
Wet igniters are extremely common, especially after a pot boils over or you’ve just cleaned the stovetop. Water gets into the igniter port, and even though the burner looks dry, the moisture prevents a proper spark. The fix is simple: remove the grate and burner cap, and let the igniter air out for thirty to sixty minutes. If you want to speed it up, a hair dryer on a low setting works fine. Once it’s fully dry, try again.
While you’re in there, look at the spark color. White sparks with a slight blue tint are normal. Yellow or orange sparks mean the igniter elements are degrading and the igniter probably needs replacing soon.
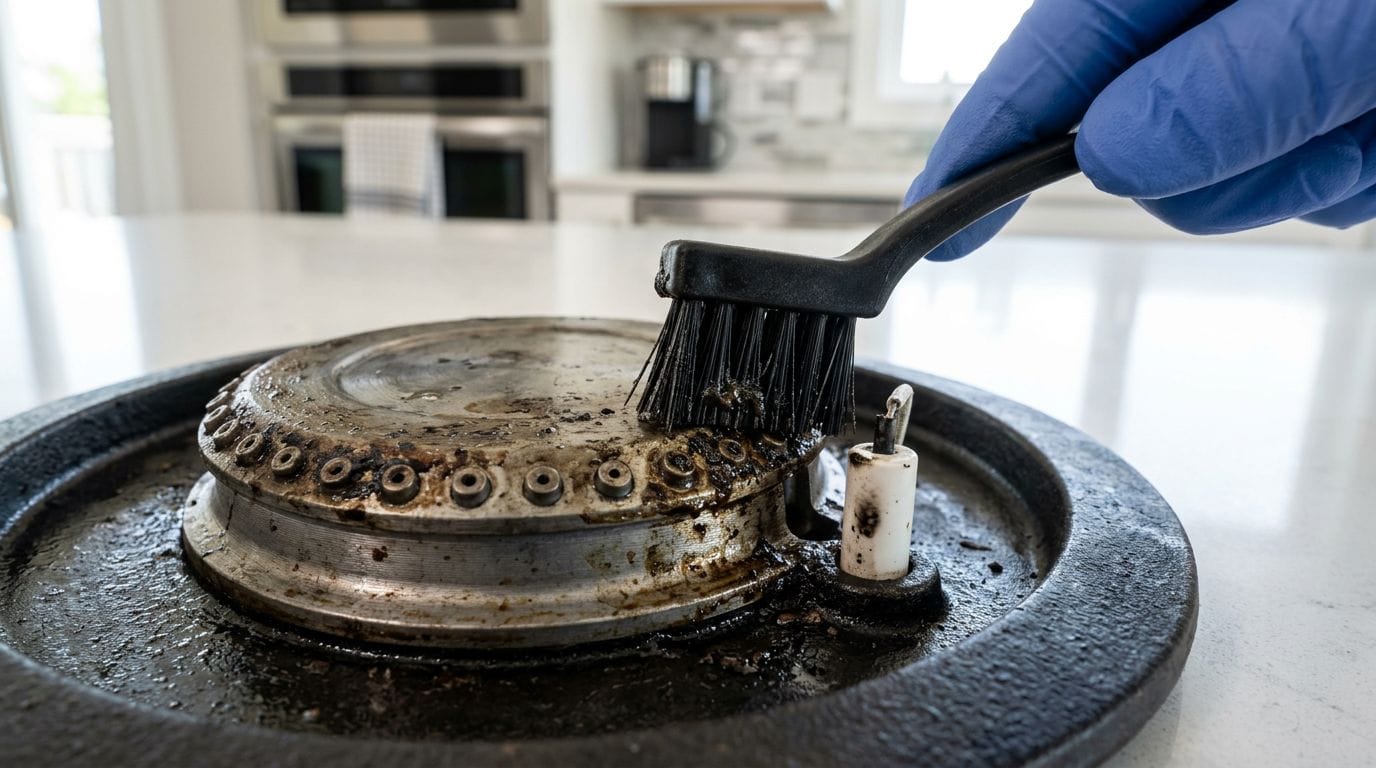
Clean the burner holes
Grease and cooking debris build up in the small holes around the burner over time. A partially clogged burner produces a weak, uneven flame that might be yellow or orange rather than blue. A fully clogged port means gas can’t get through at all.
Remove the burner cap and clean the holes with a stiff brush. A toothpick or a needle works well for clearing individual ports. Warm water and dish soap that contains a degreaser will break down cooking residue on the cap itself. After cleaning, leave the burner cap off for thirty to forty minutes so everything dries thoroughly before you try to light it.
Check the burner cap alignment
This one catches a lot of people off guard. The burner cap needs to sit perfectly flat and centered on the burner base. If it’s slightly off, which happens easily when you’re putting the stove back together after cleaning, the burner won’t ignite even if everything else is working. Take a look, reseat it, and try again. It’s a two-second fix when that’s the culprit.
Gas line and pilot light issues
If none of the burners will light and you’ve confirmed the stove is plugged in and the breaker is fine, check the gas supply valve behind the stove. The handle should run parallel to the gas line when it’s in the open position.
If you have an older range with a standing pilot light rather than an electronic igniter, a pilot that’s gone out will prevent any burner from lighting. Relighting a pilot light is straightforward on most older models, your owner’s manual has the procedure. But if you smell gas at any point, stop, ventilate the kitchen, and call a professional. Don’t try to diagnose a gas leak yourself.
For burners that light but then go out when you release the knob, the thermocouple is the likely cause. The thermocouple senses the flame and signals the gas valve to stay open. When it wears out or gets damaged, the valve closes as soon as you let go of the knob. This part can be replaced, but it’s a job for a technician on most modern ranges.
Troubleshooting an electric stove burner that won’t heat
Electric ranges are generally more predictable to diagnose because the failures tend to be more localized. A burner either works or it doesn’t, and there are only a few components between the wall outlet and the heat you feel.
The swap test
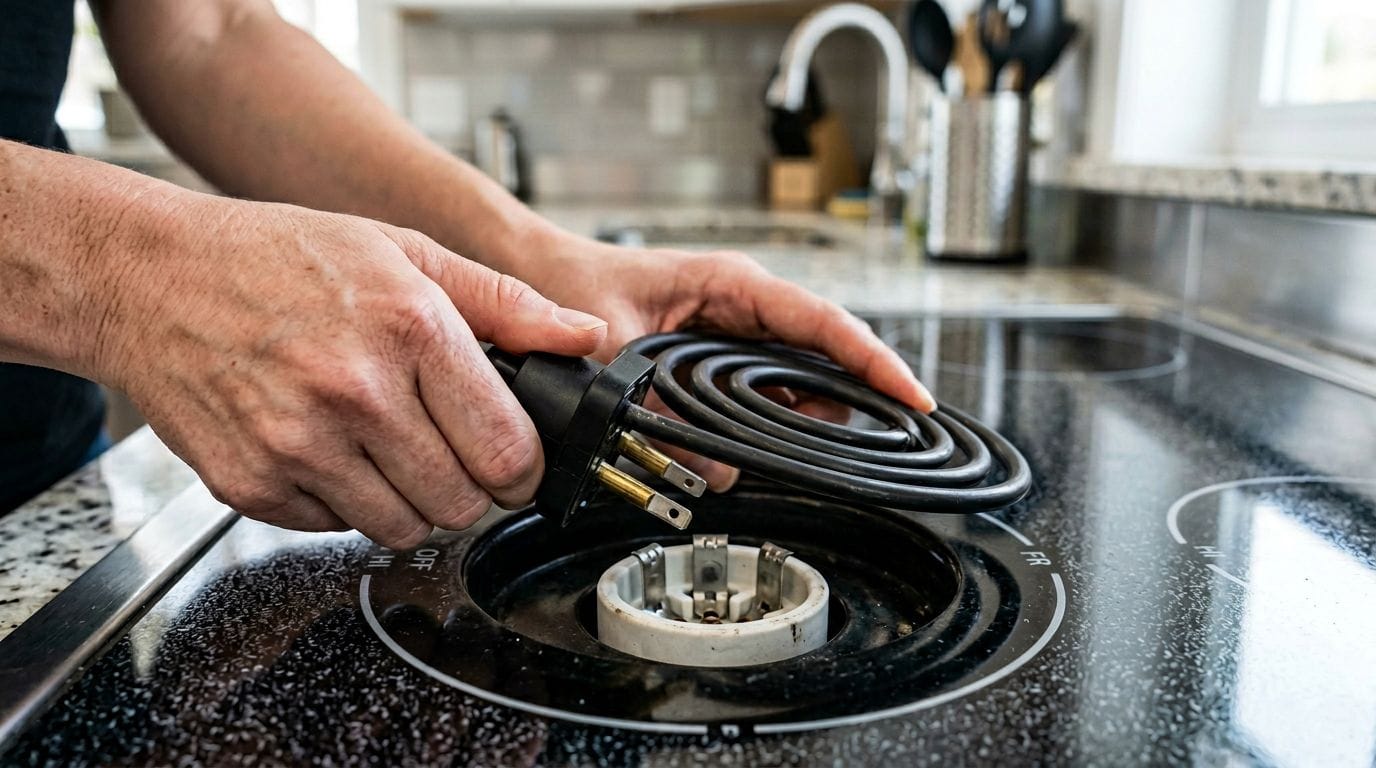
If you have a coil-element electric range, start here. Remove the burner coil that isn’t working and plug it into another burner receptacle of the same size. Turn it on. If it heats up in the new position, the element is fine and the problem is in the original socket or the switch controlling that position. If it doesn’t heat up anywhere on the stove, you need a new coil.
Now take a coil you know works and plug it into the problem position. If it doesn’t work there either, you’ve confirmed the issue is downstream, in the socket, the wiring, or the infinite switch for that burner.
Inspect the socket and prongs
Pull the coil out and look at the prongs and the socket. Burned prongs or a visibly scorched socket block mean that connection has failed. A burned socket usually needs replacing, and you can do it yourself on coil-element stoves: disconnect the terminal wires with a screwdriver and connect the replacement socket following the manufacturer’s diagram. It’s not complicated, but take a photo of how everything is wired before you disconnect anything.
We see burned sockets fairly often in older homes around East Vancouver where ranges have been running hard for many years without any maintenance attention to the connections.
The infinite switch
The infinite switch is the component that your burner knob connects to. It regulates how much power flows to the element. When it fails, you lose control of the heat, or the burner stops working entirely in that position.
The indicator light near the knob will often still come on even when the switch has failed, the light draws from a different part of the circuit. So a glowing indicator doesn’t confirm the switch is sending power to the element. The only reliable test is a multimeter measuring voltage at the receptacle when the knob is turned on. If you’re getting less than 240 volts at the receptacle, or nothing at all, the switch isn’t doing its job.
Switches can’t be repaired. If the switch has failed, you replace it. Part numbers vary by brand and model, so check your owner’s manual or the manufacturer’s parts lookup tool. On Frigidaire ranges, for example, the switch part number 316021500 was superseded by 316436000, worth knowing if you’re hunting down a replacement for an older model.
Glass-top and smooth-top burner problems
Smooth-top electric ranges have their own failure modes. If one burner on a glass-top stove isn’t working, the surface element switch or the heating element itself is the most likely cause. If two or more burners stop working at the same time, the surface element board, essentially the control board for your cooktop, has probably failed.
You can test a surface element switch by swapping two elements of the same size. If the working element doesn’t work in the problem position, the switch for that position has failed. The board and switches are not repairable; they need to be replaced.
Repair costs for glass-top stoves can vary considerably. A heating element runs under $50 for the part, but factor in labor and you’re looking at over $200 for a straightforward replacement. A surface element board can cost $600 or more in parts alone. At that price point, it’s worth having an honest conversation about whether repair or replacement makes more sense, especially if the range is more than ten years old. You can find more guidance on appliance repair decision-making from resources like the Consumer Reports appliance repair guide.
When to call a professional
Some of this work is genuinely DIY-friendly. Cleaning burners, swapping coils, checking the breaker, reseating a burner cap, anyone can do these things safely. Others are a different story.
Call a professional if you smell gas at any point during troubleshooting. Full stop. Gas leaks are not a diagnostic project. Similarly, if you’re dealing with wiring beyond swapping a surface element, or replacing components on a hardwired glass-top range, a licensed appliance repair technician or electrician is the right call. According to the Electrical Safety Foundation International, electrical system failures contribute to an estimated 51,000 home fires each year. That statistic isn’t meant to scare you off your own stove, it’s just a good reason not to improvise when the work goes beyond your comfort level. For electrical safety guidance, the Electrical Safety Foundation has solid homeowner resources.
Pilot light problems on older gas ranges are also worth handing to a professional. Adjusting a pilot yourself without knowing what you’re doing can cause more problems than it solves. If the pilot won’t stay lit, a gas company technician or appliance repair pro can diagnose it quickly and safely.
The thermocouple, spark module, and surface element board are all jobs where most homeowners are better off calling for help than attempting it themselves, not because these repairs are impossible, but because the diagnostic process requires equipment most people don’t have, and getting it wrong can create new problems.
For safe appliance servicing guidance, the National Fire Protection Association offers practical homeowner information worth bookmarking.
Frequently asked questions
These are the questions we hear most often when someone’s dealing with a burner that’s stopped working. Short answers first, then a bit more context where it helps.
Why does one burner on my electric stove work but another doesn’t?
When a single burner stops working on an electric range, the problem is almost always isolated to one of three components: the heating element itself, the socket it plugs into, or the infinite switch that controls it. Start with the swap test, move the non-working coil to another position and put a working coil in the problem spot. This tells you within two minutes whether the issue is the element or the position.
If neither coil works in that spot, the socket or the switch for that burner position has failed. The infinite switch is the more common culprit, particularly on ranges that are ten years old or more. Replacing it is a reasonable DIY job if you’re comfortable with basic appliance work, but if the wiring connections feel unfamiliar, a repair call is the safer move.
My gas burner clicks but won’t light. What’s wrong?
Clicking means the igniter is sparking, so that part is working. The problem is on the gas side. The most likely cause is a clogged burner port, grease or debris is blocking the gas flow. Remove the burner cap, clean the holes with a stiff brush and a toothpick, and make sure the cap is fully dry and properly aligned before reassembling.
If the burner is clean and the cap is properly seated and it still won’t light, check that the gas supply valve is fully open. If everything checks out and you’re still getting clicks without ignition, the issue may be in the gas valve or supply line itself, that’s when you call a professional.
Can a tripped breaker cause just one burner to stop working?
Usually a tripped breaker will affect the entire stove, not just one burner. Electric ranges run on a double-pole 240-volt breaker, and when it trips, everything goes out, burners, oven, clock. However, some ranges have a partial trip scenario where one leg of the 240-volt circuit loses power but the other stays live. In that case, you might have some burners working and others not, and the clock might still run. If you’re seeing that pattern, go check the breaker before doing anything else.
Is it worth repairing an old stove or should I replace it?
The general rule is that if the repair cost exceeds half the price of a comparable new appliance, replacement starts to make more sense, especially if the range is already more than ten to fifteen years old. A simple element or switch replacement is usually worth doing. A surface element board replacement on an older smooth-top range, where the part alone might cost $400 to $600, deserves a harder look.
Age matters too. An older gas range that needs a thermocouple is probably worth fixing, the repair is relatively inexpensive and gas ranges often have long useful lives. A fifteen-year-old glass-top stove needing a new control board is a closer call. Get a diagnosis first, know what the repair actually is, and then make the decision with full information.
Wrapping up
A stove burner that’s stopped working is annoying, but it’s rarely as bad as it first seems. Start simple: check the breaker, the plug, the gas valve, the burner cap alignment. On electric stoves, the swap test will tell you in minutes whether you’re dealing with a bad element or a deeper electrical issue. On gas ranges, a good cleaning of the burner and igniter solves the problem more often than not. When the issue goes beyond those basics, a failed switch, a damaged spark module, a surface element board, or anything involving the gas supply itself, that’s when bringing in someone who does this regularly is the right call.
At Vancouver Appliance Service Pros, we handle stove and range repairs across Vancouver and the surrounding communities, including Burnaby and Coquitlam. If you’ve worked through the steps here and still can’t pin down what’s wrong, or if you’d just rather have someone sort it out properly, give us a call and we’ll help you figure out exactly what you’re dealing with and what it will take to fix it.