(1)")
Your garbage disposal just went silent mid-cleanup, and now you’re standing at the sink wondering what went wrong. This guide walks you through the most common reasons a garbage disposal stops working and exactly what to do about each one, so you can get your kitchen back on track without guessing. 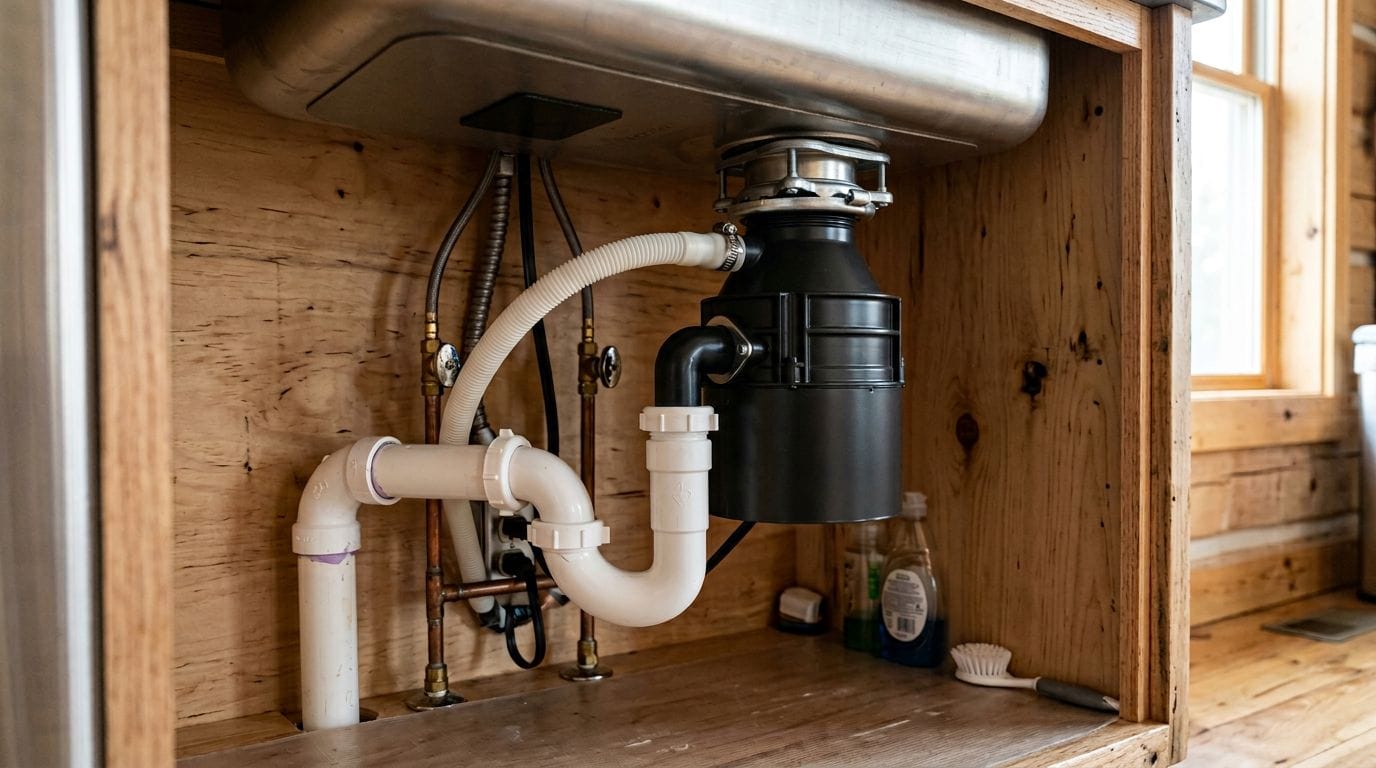
A dead garbage disposal is one of those problems that feels bigger than it is. Flip the switch, nothing happens, and suddenly doing dishes becomes a whole ordeal. At Vancouver Appliance Service Pros, we hear from homeowners dealing with this regularly, and the good news is that most disposal problems follow a pretty short list of causes. Vancouver’s older housing stock, especially homes with kitchens that haven’t seen updates in a decade or two, tends to produce more of these calls than newer builds, partly because the disposals are aging right alongside everything else under the sink.
There’s a logical order to troubleshooting this, and working through it step by step will either fix the problem or tell you exactly what you’re dealing with. Let’s get started.
Key takeaways
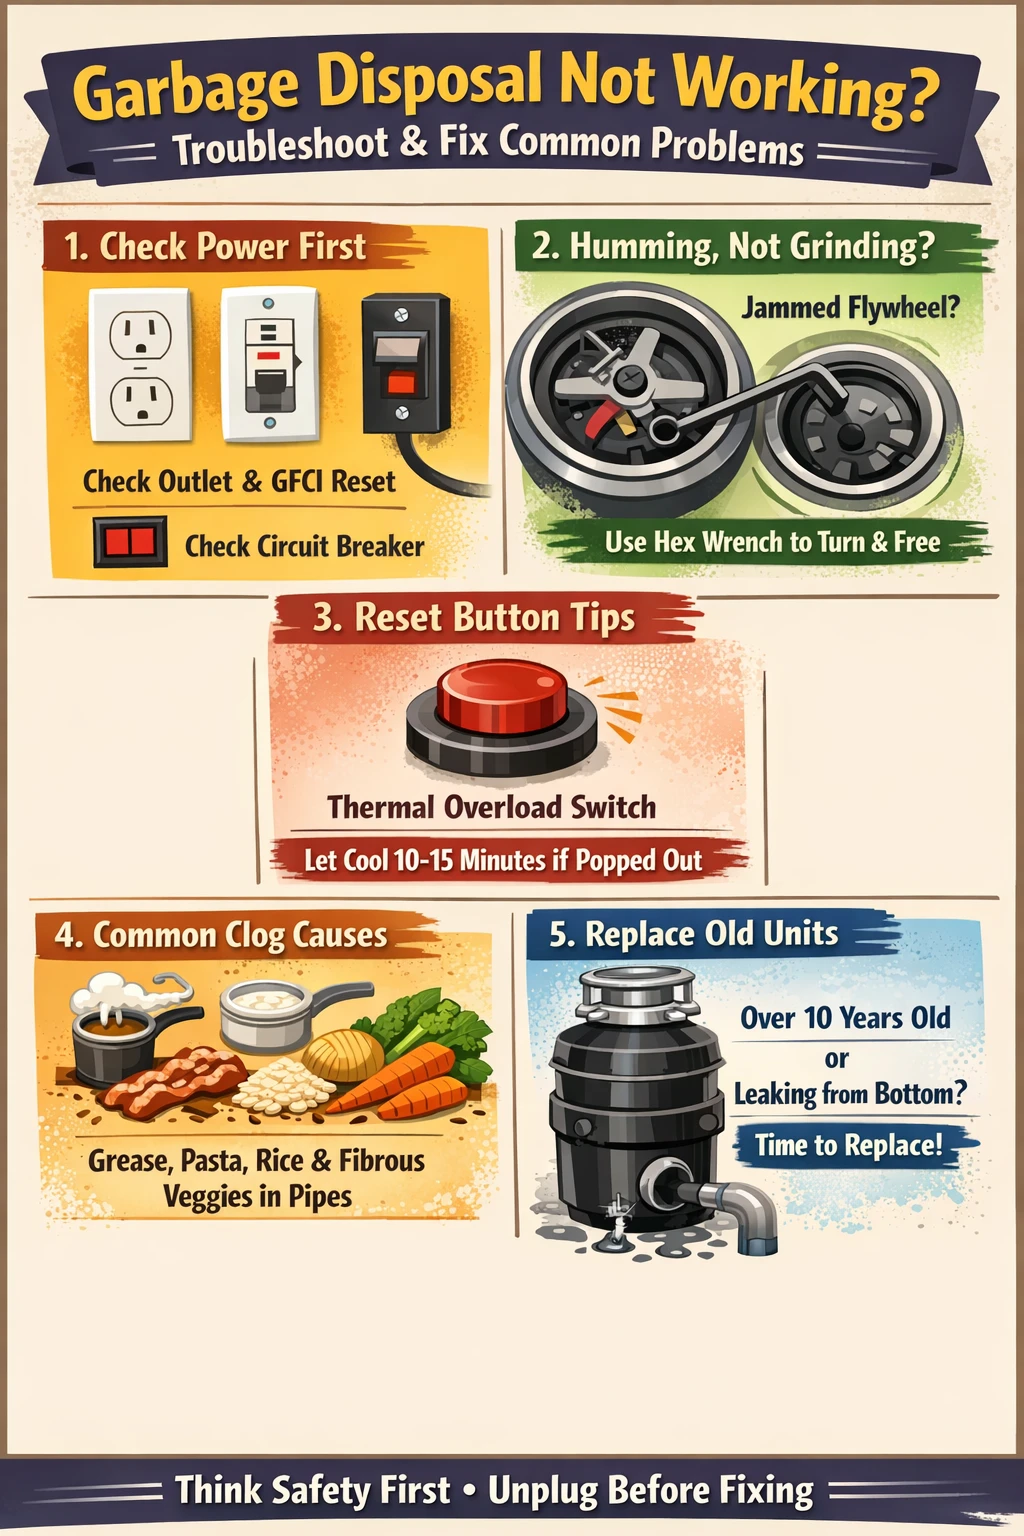
- A disposal that’s completely silent points to a power problem first – check the outlet, GFCI, and breaker before assuming the unit is dead.
- A humming sound with no grinding almost always means the flywheel is jammed, not that the motor has failed.
- The reset button on the bottom of the unit is a built-in thermal overload – if it won’t stay in, the motor may need time to cool down, about 10 to 15 minutes.
- A 1/4-inch hex wrench inserted into the bottom port lets you manually rotate the flywheel to free a jam without touching the blades.
- Most replacement disposals run between $100 and $200, and swapping one out is a manageable DIY job if you buy the same brand as your existing unit.
- If the disposal is leaking from the bottom near the reset button, that typically signals a cracked internal seal, and replacement is usually the right call.
Why your garbage disposal stopped working
The honest answer is that it depends on what you’re hearing, or not hearing. Complete silence when you flip the switch points squarely at a power issue. A humming noise without any grinding action tells you the motor is getting electricity but the flywheel is stuck. Slow draining with the unit running normally suggests a clog downstream. Each symptom points in a different direction, which is why starting with what you observe matters.
In our experience, the most common call we get goes like this: homeowner flips the switch, nothing happens, they assume the disposal is burned out. Nine times out of ten, it’s something much simpler. A GFCI outlet that tripped during a power blip, a plug that worked loose under the sink, or a reset button that popped and just needs to be pressed back in. These take two minutes to check and cost nothing to fix.
That said, disposals do fail. The motor burns out, usually after years of use or after running jammed for too long. Internal seals crack. The flywheel corrodes if the unit sits unused for extended periods. Age matters, too – a unit that’s pushing 10 to 12 years old and showing multiple symptoms is probably ready to retire.
What to check when the disposal is completely silent
No sound at all when you flip the switch means the motor isn’t receiving power. Work through this in order before you do anything else.
First, check whether the unit is plugged in. It sounds obvious, but items shift around under the sink all the time, and a plug can work loose without anyone noticing. If you can see the outlet, unplug it and plug in a lamp or phone charger to confirm the outlet itself is live. If you can’t access the outlet because the disposal is hardwired directly into the wall, skip to the next step.
Next, look for a GFCI outlet. These are the outlets with the small test and reset buttons on the face, and they’re common in kitchens because code requires ground-fault protection near water. The one protecting your disposal circuit might not be right under the sink – it could be on a nearby counter outlet, behind the dishwasher, or even in another room sharing the same circuit. Press the reset button firmly. Some people find they need a pen or small tool to get it to click. The U.S. Consumer Product Safety Commission has useful information about GFCI outlets and why they trip, which can help you understand what you’re looking at.
If the outlet and GFCI check out, head to the breaker box. Tripped breakers don’t always flip all the way to the off position – they stop somewhere in the middle, which makes them easy to miss. Look for any breaker that isn’t fully seated in the on position. Don’t rely on the labels, because those often haven’t been updated to reflect what’s actually on the circuit. Flip the suspected breaker fully off, then back on.
The reset button on the disposal itself
There’s a small button on the bottom of the disposal unit, usually red. This is the built-in thermal overload, and it pops out when the motor gets too hot. Press it firmly – it sometimes needs more pressure than you’d expect, and a pen or small screwdriver can help. If it clicks and stays in, restore power and test the unit.
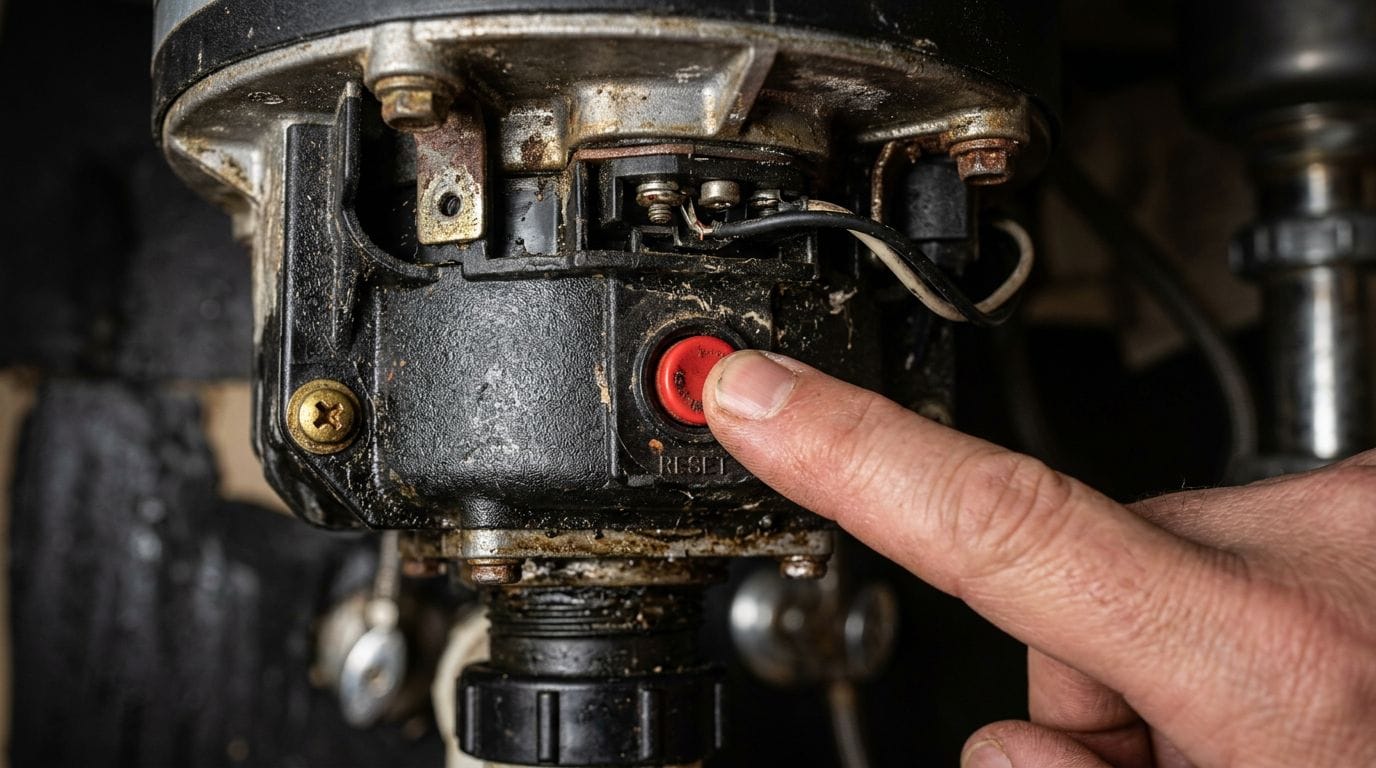
If the reset button pops right back out again, the motor is either still hot or there’s an ongoing issue. Give it 15 minutes to cool down, then try again. If it continues to trip immediately, that points to either a persistent jam or motor trouble.
How to fix a jammed disposal
If you’re hearing a hum when you flip the switch but the disposal isn’t grinding, the flywheel is jammed. The motor is running, trying to turn, but something is blocking it. Turn the unit off right away when this happens – running a jammed motor heats it up fast, and that’s how you end up burning it out.
Before touching anything, disconnect power at the breaker or unplug the unit. This is not optional. Even a disposal that appears off can activate if someone hits the switch while you’re working.
Most disposals come with a small hex wrench specifically for this purpose, though it usually ends up lost in a junk drawer somewhere. A standard 1/4-inch Allen wrench works just as well. Insert it into the hex port at the center of the bottom of the unit and work it back and forth. You’re manually rotating the flywheel to dislodge whatever is stuck. You’ll feel resistance at first, then it should loosen up and move more freely. InSinkErator’s support pages walk through this process for their specific models if you want to cross-reference the steps for your unit.
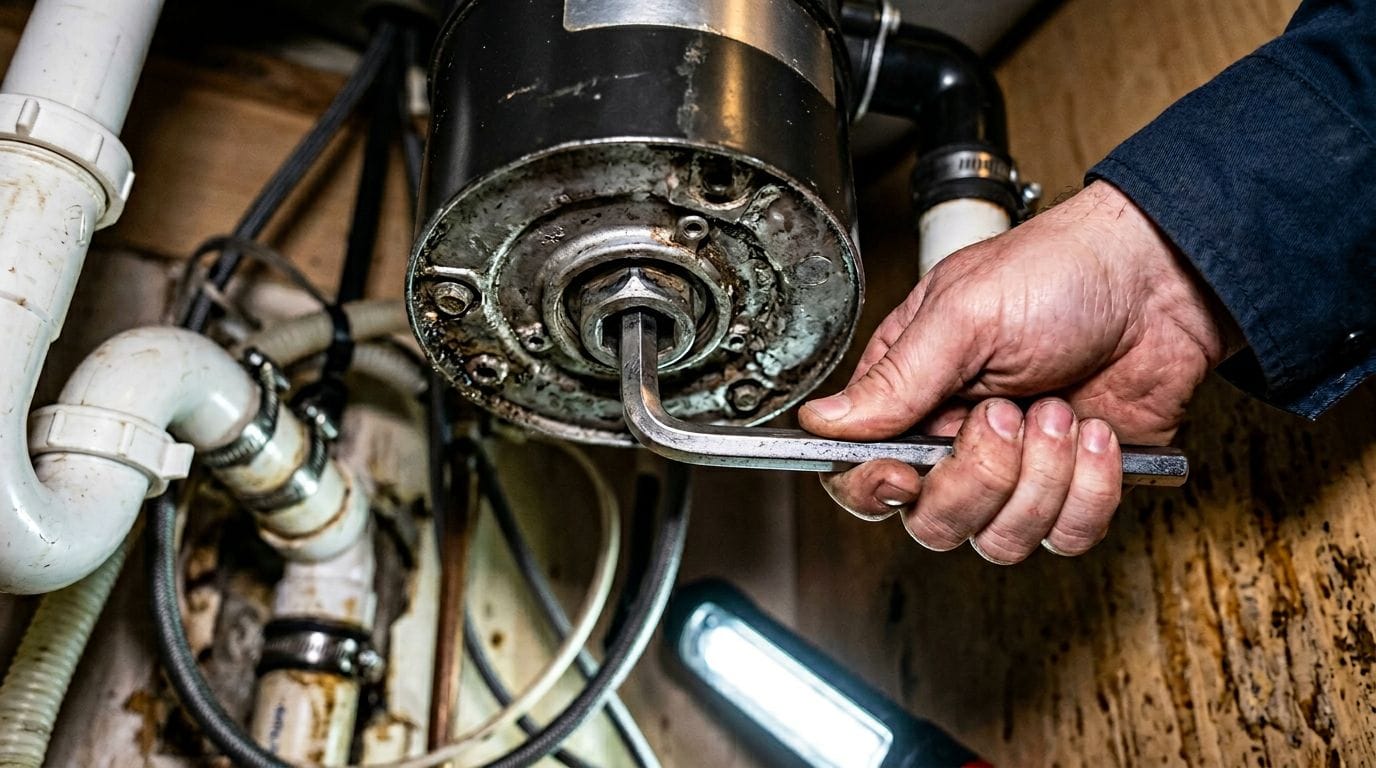
Once the flywheel moves freely, shine a flashlight down the drain and look for whatever caused the jam. Bones, fruit pits, bottle caps, broken dish fragments, small utensils – we’ve heard it all. Use tongs or needle-nose pliers to pull it out. Never reach your hand into the disposal, even when it’s disconnected. After you’ve removed the obstruction, press the reset button, restore power, run cold water, and test the unit.
The broom handle method
Some older disposal models don’t have a hex port on the bottom, and some jams are stubborn enough that the wrench alone won’t shift them. In those cases, a wooden broom handle inserted from the top can give you enough leverage to rock the flywheel loose. Push it down into the drain opening and work it in a circular motion to dislodge the blockage. Then fish out whatever came free with tongs before restoring power.
What to do when the disposal won’t drain
A disposal that runs fine but drains slowly, or barely at all, is dealing with a clog. The blockage could be inside the unit itself, in the P-trap directly below the sink, or further down the drain line.
Grease is a big one. Hot water helps grease slide past everything when it’s liquid, but once it cools in the pipes, it solidifies and builds up. Pasta and rice expand and create dense clogs in the trap. Coffee grounds are deceptive – they feel fine going down, but they accumulate into a thick paste that sits in the drain and doesn’t move. Fibrous vegetables like celery and corn husks are notorious for tangling around the grinding mechanism rather than breaking down cleanly.
For a partial clog, try plunging the drain. Block the other side of a double sink with a rag or stopper to direct the pressure in the right direction. If that doesn’t work, the P-trap under the sink may need to be removed and cleared out. Put a bucket underneath first. The trap usually unscrews by hand or with channel-lock pliers, and the debris causing the blockage often falls right out. We see this a lot in older Kitsilano and East Vancouver homes where the original plumbing hasn’t been touched in decades and grease has had years to build up in the trap.
One thing worth knowing: if your dishwasher drains into the disposal and suddenly stops draining at the same time the disposal acts up, the problem is almost certainly a shared clog where the two connect. Clearing the disposal drain line usually fixes both issues at once.
Understanding disposal leaks
Where the leak is coming from tells you almost everything about what you’re dealing with and how hard the fix will be.
Leaking from the top, where the disposal meets the sink flange, is usually a sealant or mounting issue. The plumber’s putty that seals the flange to the sink deteriorates over time, and the mounting bolts can work loose. Tightening the bolts and replacing the putty is a manageable repair for most homeowners comfortable with basic plumbing.
Leaking from the side where the dishwasher hose connects often just means the clamp has loosened. Tighten it down and see if that resolves it.
Leaking from the bottom is a different story. If water is dripping from the reset button area or from the body of the unit itself, that almost always means an internal seal has failed or the housing has cracked. These internal components aren’t designed to be serviced – the unit is sealed. Repair usually isn’t the right call here. Replacement is.
When to replace instead of repair
Not every problem is worth fixing. A few signs point clearly toward replacement being the smarter move.
Age is a big factor. A disposal past 10 years that’s showing symptoms is probably near the end of its useful life regardless. Repair costs that run close to or above half the price of a new unit rarely make sense. If the motor has burned out, that’s effectively the whole disposal – replacement is the practical answer. Leaks from the body of the unit, persistent reset trips after clearing all jams, or a motor that smells burnt all point in the same direction.
The good news is that replacement is genuinely not that bad as a DIY project. If you buy the same brand and roughly the same model, you can often reuse the existing sink mounting hardware, which cuts the job down significantly. Many homeowners with modest DIY comfort report swapping one out in under an hour. When shopping for a replacement, motor horsepower matters – a 1/2 HP unit handles typical household use fine, while a 3/4 or 1 HP motor is worth it for heavy use or larger households. The KitchenAid 1 HP model and the GE 3/4 HP continuous feed are both solid performers for busier kitchens.
If you’re in the Burnaby or North Vancouver area and not sure whether the disposal needs repair or replacement, it’s worth having someone take a look before you decide. Sometimes what looks like a dead motor is still a power supply issue, and you’d hate to buy a new unit for a problem that costs nothing to fix.
Keeping your disposal running well
A few simple habits will save you from most of these headaches.
Always run cold water before, during, and after using the disposal. Cold water keeps fats and grease solid so they grind and flush out cleanly. Hot water does the opposite – it melts fats just long enough for them to coat the pipes and re-solidify further down. Run the water for a few extra seconds after you turn the unit off to clear everything through.
A weekly clean takes about two minutes. Drop a few ice cubes down the drain with some coarse salt and run the unit. The ice helps scrub the grinding chamber, and it’s not damaging the blades – disposals use impellers, not sharp blades the way most people imagine. Follow that up with a few citrus peels once a month for odor control. The texture and acidity do a good job cleaning the grinder, and it leaves the drain smelling decent.
And then there’s what to keep out. Bones and hard shells. Grease and cooking oils. Coffee grounds. Fibrous vegetables – celery, onion skins, corn husks. Starchy foods like pasta, rice, and potato peels that swell up and turn into glue in the drain. None of these belong in a garbage disposal, and they account for a huge portion of the jams and clogs we see.
Frequently asked questions
These are the questions we get most often when someone’s disposal stops cooperating. The answers below should give you a clear direction without making things more complicated than they need to be.
Why does my garbage disposal hum but not spin?
A humming disposal that won’t spin has a jammed flywheel. The motor is running and trying to turn, but something is blocking it. Turn the power off immediately, insert a 1/4-inch hex wrench into the port on the bottom of the unit, and work the flywheel back and forth until it moves freely. Then use tongs to remove the obstruction, press the reset button, restore power, and test it. If the flywheel spins freely but the unit still hums without grinding, the motor bearings may have seized, and replacement is likely the next step.
The reset button keeps popping out. What does that mean?
The reset button is a thermal overload switch that trips when the motor gets too hot or overloaded. If it keeps popping, there are usually two possible reasons. Either there’s still a jam causing the motor to overwork each time it runs, or the motor itself is failing and drawing too much current. Clear any jam first using the hex wrench method, give the unit 15 minutes to cool, then try again. If it continues to trip immediately on reset, the motor is likely the issue and the disposal probably needs to be replaced.
Can I put pasta, rice, or potato peels in the disposal?
Better to avoid all three. Pasta and rice absorb water and expand, which turns them into a dense, sticky mass that can clog the trap and drain line. Potato peels go in as thin slices and come out as a starchy paste that coats the inside of your pipes. None of them are so large that they’d jam the flywheel immediately, but they’ll cause slow drain issues over time. The disposal is better suited for soft food scraps and small amounts of non-starchy waste.
My disposal is leaking. Can I fix it myself?
It depends on where it’s leaking from. Leaks at the top, where the unit meets the sink, are usually a worn putty seal or loose mounting bolts – that’s a reasonable DIY fix. A leak at the side where the dishwasher hose connects is often just a loose clamp. Leaks coming from the bottom of the unit or the reset button area indicate a failed internal seal, and those aren’t repairable in the field. If water is coming from the body of the disposal itself, replacement is the practical answer.
How long should a garbage disposal last?
Most disposals last somewhere between 8 and 15 years depending on how they’re used and maintained. Units that get run with cold water, cleared promptly after jams, and kept free of grease buildup tend to sit at the higher end of that range. Disposals that get run hot, jam frequently, or handle food they shouldn’t tend to burn out sooner. If yours is past 10 years and acting up, it’s worth factoring replacement cost into the equation rather than chasing repairs. The U.S. Department of Energy’s appliance guidance covers how to evaluate aging appliances for efficiency and cost-effectiveness.
Wrapping up
Most garbage disposal problems come down to three things: a power issue, a mechanical jam, or a worn-out unit that’s reached the end of its run. Working through the steps in order, starting with power and working toward the mechanical, will resolve the problem most of the time without spending a dollar. If the unit is old, leaking from the body, or the motor keeps tripping its overload, replacement is usually the cleaner path forward rather than chasing diminishing returns on an aging appliance. At Vancouver Appliance Service Pros, we handle appliance repairs and replacements across Vancouver and the surrounding area, including disposals, dishwashers, and just about anything else in the kitchen. If you’d rather have someone take a look before committing to a repair or replacement, give us a call and we’ll help you figure out the best path forward.