(1)")
You tossed a load in the dryer, came back an hour later, and everything is still cold and damp nobody wants that, especially on a busy weekday. This guide walks you through the most common reasons a dryer stops heating, what you can check yourself, and when it’s time to call in a pro. Dryers are deceptively simple machines that do one job: tumble clothes through warm air until they’re dry. When the heat disappears but the drum keeps spinning, most people assume the worst. In our experience at Vancouver Appliance Service Pros, the fix is often simpler than homeowners expect though a handful of causes do require professional attention. Either way, knowing what’s going on saves you time, money, and the frustration of throwing parts at a problem you haven’t actually diagnosed. Vancouver’s damp climate doesn’t help. Clothes come out of the wash holding more moisture than you’d find in drier inland cities, so when a dryer is already struggling with heat, the results are especially noticeable. Wet laundry that sits around in a damp house creates its own problems mildew, musty smells, and a general sense that nothing in your home is cooperating.
Key takeaways
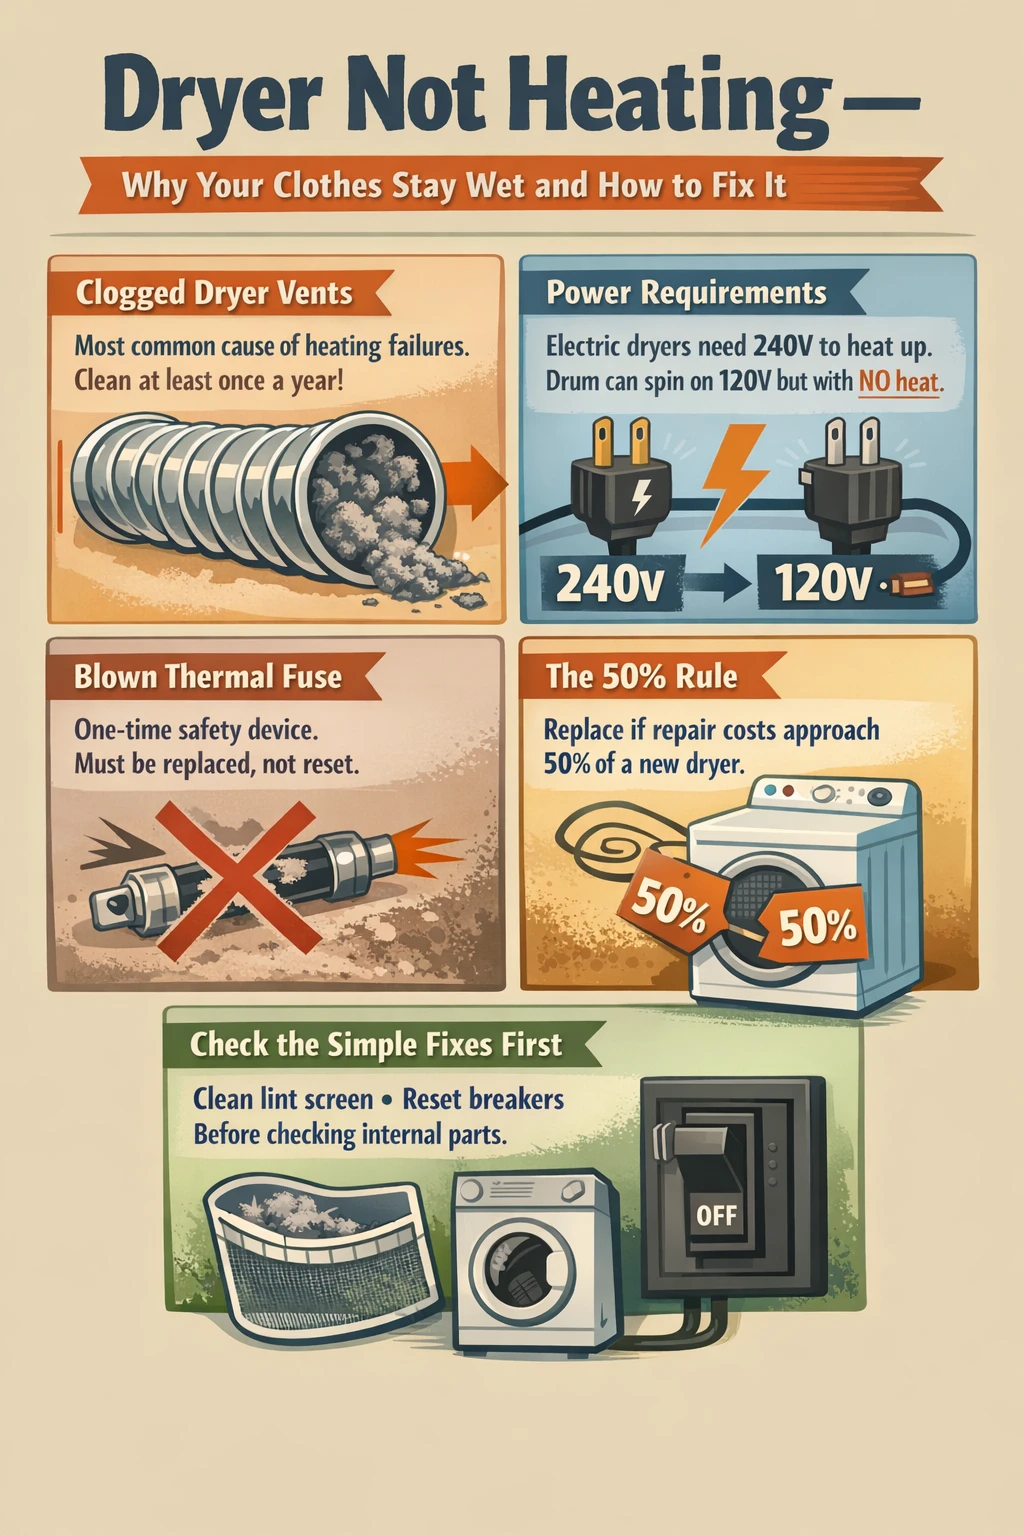
- A dryer can run perfectly while producing zero heat the drum motor and heating system operate on separate circuits, so one failing doesn’t necessarily affect the other.
- Clogged dryer vents are the single most common cause of heating failures and dryer fires; clean yours at least once a year, more often if you do heavy laundry.
- Electric dryers need a full 240-volt supply to heat if only one leg of the circuit is working, the drum spins but the heat element gets nothing.
- A blown thermal fuse is a one-time-use safety device that cannot be reset; once it goes, it must be replaced before the dryer will heat again.
- The 50% rule is a useful benchmark: if repair costs approach half the price of a new dryer, replacement is often the smarter long-term call.
- Dryers over 15 years old with recurring heating problems are usually better candidates for replacement than repeated repair.
Why your dryer runs but won’t heat
The drum and the heater in your dryer are separate systems. That’s the key insight here. The motor that spins the drum runs on 120 volts, while the heating element (on an electric model) needs a full 240-volt supply to fire up. So when one leg of your electrical circuit fails a tripped breaker, a damaged cord, a bad outlet you get a dryer that tumbles away happily while your clothes stay cold and wet. The machine looks like it’s working. It isn’t. On gas dryers, the situation is similar but the cause is different. The drum motor still runs on electricity, but if the gas supply is interrupted a closed shutoff valve, a weak igniter, failed gas valve coils there’s nothing to produce heat. The drum spins, the timer counts down, and your clothes come out exactly as damp as they went in. We get calls about this regularly, and the first thing we ask is whether the dryer is running at all. If it is, that narrows things down considerably. You’re not dealing with a dead motor or a total electrical failure. You’re dealing specifically with the heat side of the system, which is a shorter list of suspects.
The most common causes, starting with the easy ones
Before you pull the dryer away from the wall and start taking panels off, check the obvious stuff. Is the lint screen clean? A clogged lint screen doesn’t just slow drying it restricts airflow so badly that internal temperature sensors can trigger a safety shutoff. Whirlpool recommends cleaning the lint screen after every single load, and doing a deeper clean with a nylon brush and soapy water every six months. It takes five minutes and it’s free. Next, look at the vent. The flexible duct running from the back of your dryer to the exterior of your home needs to be clean and unobstructed. Check it for kinks a crushed duct is a common culprit in older homes, especially in finished basements where the duct gets bent around corners. Pull the exhaust hood off the exterior wall and look for lint buildup or, occasionally, a bird nest (it happens more than you’d think). The vent system should be cleaned every one to two years under normal use. 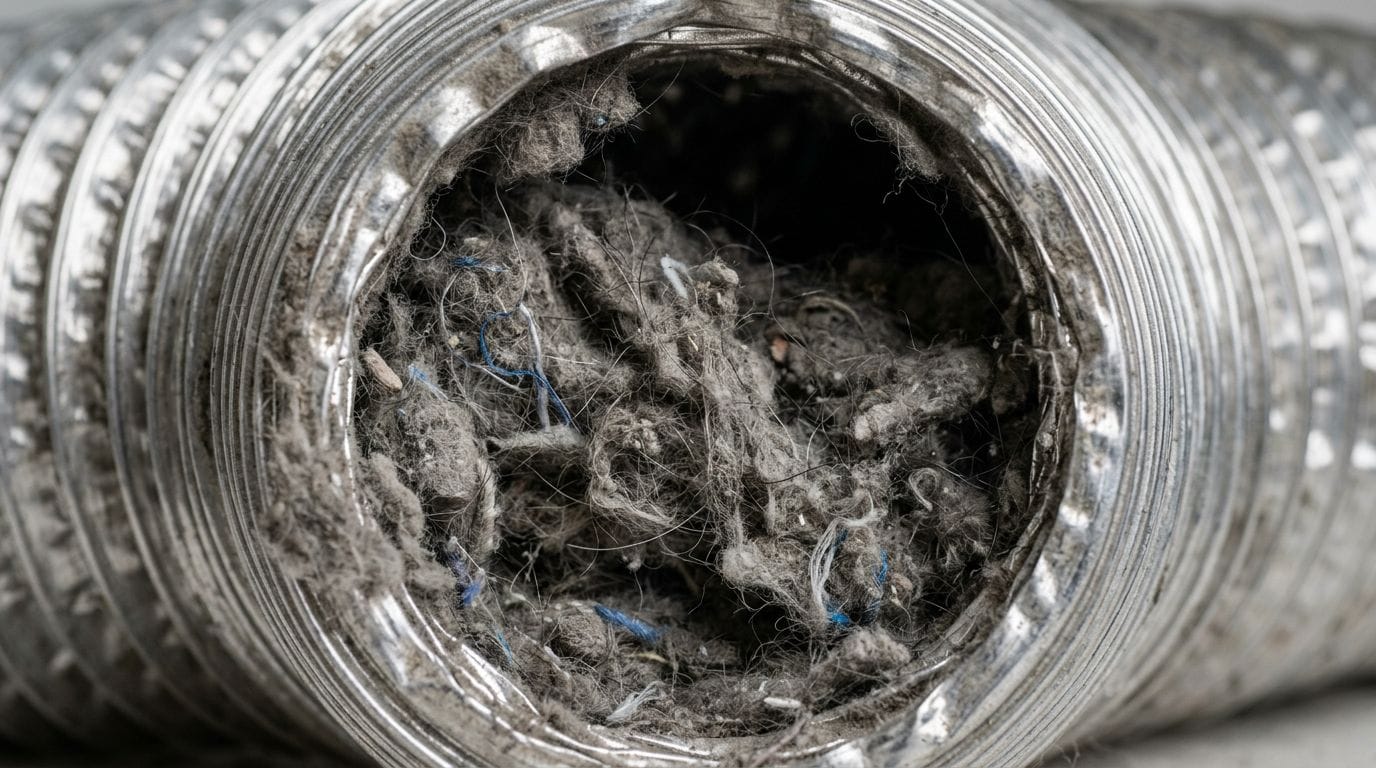 One thing people forget: if your dryer feels slightly warm but never gets hot enough to actually dry clothes, a partially blocked vent is often the cause. The heat builds up, safety thermostats cut the element back, and you end up with a dryer that takes three cycles to do what one used to handle. Cleaning the vent often fixes this completely.
Load size and wet clothes
This sounds basic, but it’s worth mentioning because we’ve seen it. Fill the drum past about three-quarters capacity and hot air can’t circulate properly. The clothes on the outside dry, the ones in the middle stay damp, and it can feel like the machine isn’t heating evenly. Overstuffing also puts unnecessary wear on the heating system. Similarly, clothes that come straight from a washer with a weak spin cycle are carrying far more water than the dryer is designed to handle efficiently. If your washer isn’t spinning properly, run an extra spin cycle before transferring the load. It’s a small step that makes a real difference.
Electrical issues: what to check before calling anyone
Electric dryers need 240 volts delivered across two separate “legs” of your home’s electrical supply. Each leg carries 120 volts. The drum motor uses one leg; the heating element uses both. If one leg fails due to a tripped breaker, a damaged cord, or a faulty outlet you’re down to 120 volts. The drum spins. The heat does nothing. The first thing to check is your circuit breaker panel. Look for the dryer breaker, which should be a double-pole breaker (two switches connected together). It’s possible for one side to trip without the other, which looks like the breaker is in the “on” position even though you’ve lost half your power. Flip it fully off, then firmly back on. This costs nothing and sometimes solves the problem immediately. 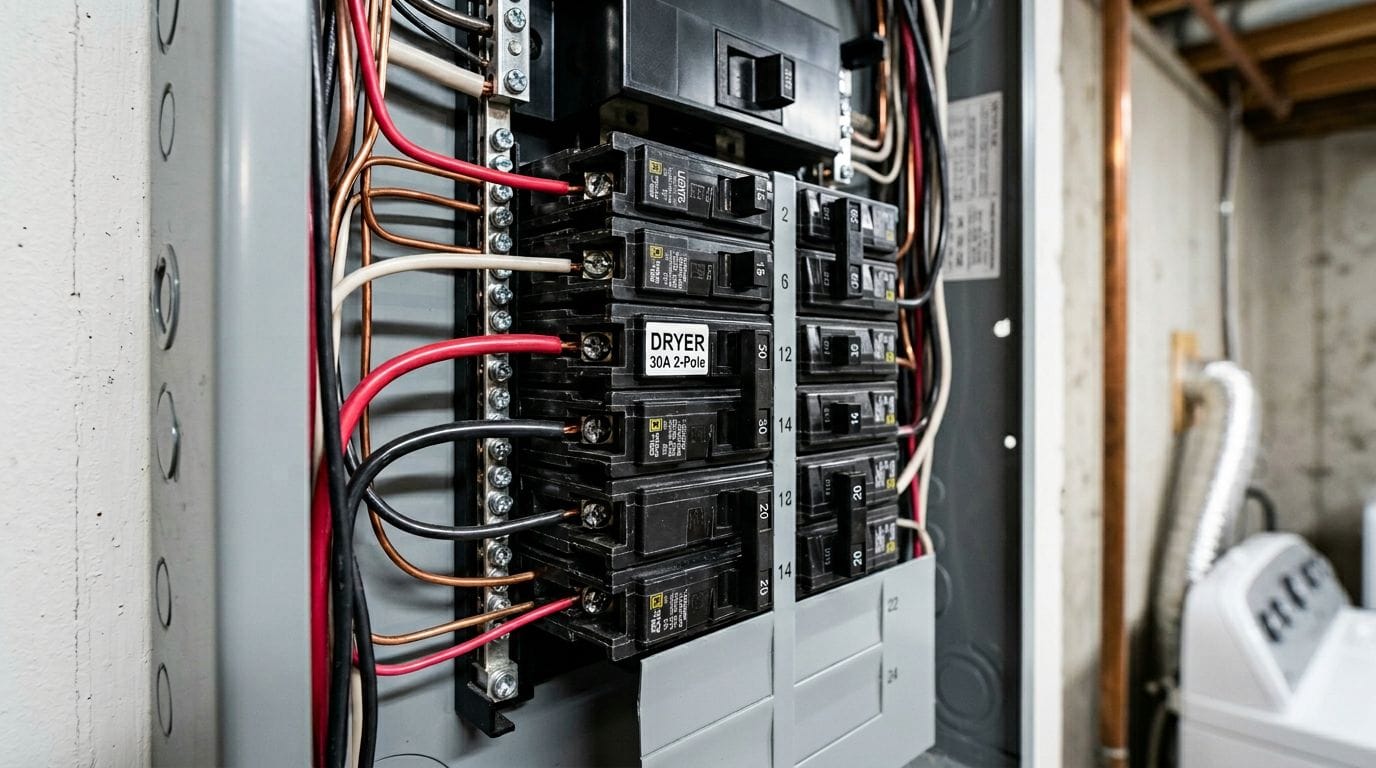 If the breaker looks fine, inspect the dryer’s power cord where it connects to the outlet. Arcing which shows up as dark burn marks or melted plastic around the plug is a serious sign that the connection has been running hot. This can damage both the cord and the outlet behind it. Don’t ignore visible burn marks. A damaged cord and outlet need to be replaced, and if you’re not comfortable doing that work yourself, call a licensed electrician. It’s a real fire risk if left alone. Older homes around Kitsilano and Renfrew-Collingwood can have outdated three-prong NEMA 10-30 outlets that are past their useful life. If yours is showing its age, an upgrade to a four-prong NEMA 14-30 outlet is worth discussing with an electrician while they’re there.
Internal components: heating element, thermal fuse, and thermostats
Once you’ve ruled out the simple stuff, attention turns to the internal components. These require opening the dryer, which means unplugging it first always. The heating element is a coiled wire or metal frame that glows red when it’s working correctly. Over time, the coil can develop cracks or burn through entirely. On most electric dryers, you can check it visually after removing the back panel: look for breaks, burns, or obvious physical damage. If you have a multimeter, set it to read ohms and test the element for continuity. A functional element reads around 15 ohms of resistance. A reading of zero or infinite resistance means the element is gone and needs to be replaced. 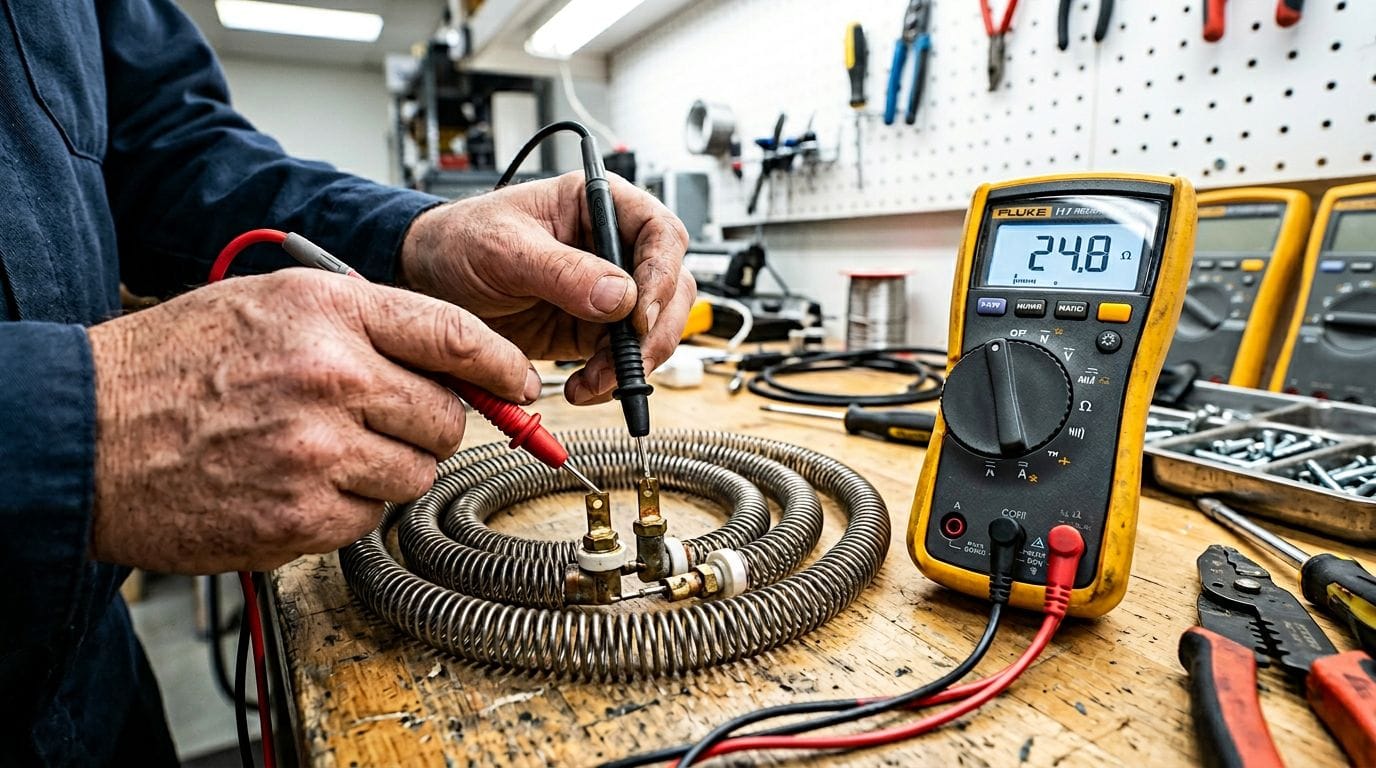 You can find more detail on how to use a multimeter for this kind of test at the U.S. Department of Energy’s appliance guidance pages. The thermal fuse is a small, inexpensive safety device that’s designed to blow if the dryer overheats. It’s a one-time-use part once it trips, it’s done. It cannot be reset. The fuse is typically located near the heating element or on the blower housing, and it looks like a small white rectangular component with two wires attached. Test it with a multimeter: no continuity means it’s blown and needs to be replaced. Here’s the part that matters: a blown thermal fuse is almost always caused by something else, usually a clogged vent. Replace the fuse without fixing the underlying airflow problem and you’ll blow another fuse within a few months. Dryers also have multiple thermostats that regulate temperature. The high-limit thermostat cuts power if temperatures get dangerously high. The cycling thermostat controls the normal heating cycle. Either one can fail and prevent heating. Both can be tested with a multimeter for continuity a reading near zero ohms means the part is good, no continuity means it needs to be replaced. The Consumer Reports appliance section covers general guidance on when dryer component repair makes financial sense versus replacement.
Gas dryers: a slightly different checklist
Gas dryers share most of the same thermostat and thermal fuse concerns as electric models, but the heat source is different, and so are a few of the failure points. Start at the gas supply. Locate the shutoff valve on the gas line running to the dryer the handle should be parallel to the pipe when it’s open. If it’s perpendicular, the gas is off. This sounds obvious, but it gets missed. If the valve is open and you still have no heat, you’re likely looking at the igniter, the flame sensor, or the gas valve coils. The igniter glows orange-red to light the gas when the dryer calls for heat. On many models, there’s a small sight plug on the lower front panel you can remove to peek inside and watch whether the igniter actually glows. If it glows but the burner never lights, the flame sensor or gas valve coils are the likely problem. If it doesn’t glow at all, the igniter itself may be cracked or failed. Gas valve coils are relatively inexpensive parts and are a common cause of intermittent heating on older gas dryers they fail when warm and test fine when cold, which can make diagnosis tricky. Any time a gas dryer repair involves the gas valve, burner assembly, or supply line, get a qualified technician to do the work. This isn’t about being overly cautious it’s just the right call. We see this fairly often with customers in East Vancouver who have older gas appliances in homes built in the 1960s and 70s. The appliances themselves are often serviceable, but the connections deserve a professional eye.
When the control board or timer is the problem
If you’ve checked everything above and the dryer still won’t heat, the issue may be in the control system. On older dryers, a mechanical timer controls when the heating element gets power. The contacts inside can corrode or wear out, cutting the signal to the heat circuit while the drum keeps running. Testing the timer with a multimeter is straightforward if you know where to probe there are good video tutorials for common Whirlpool, Kenmore, and Maytag models that walk through the process step by step. On newer dryers, the main control board does the same job electronically. Control board failures are less common than heating elements or thermal fuses, but they happen. The tricky part is that a bad control board can mimic almost any other symptom. Before spending money on a new board, make sure every other component has been tested and ruled out. A bad board on a 12-year-old dryer is often the tipping point where replacement starts to make more financial sense than repair.
Frequently asked questions
These are the questions we hear most often when homeowners in Vancouver are trying to figure out what’s wrong with their dryer before deciding whether to repair or replace.
Can a dryer dry clothes at all if there’s no heat?
Technically, yes but only in the way that hanging clothes on a drying rack works. The tumbling action removes lint and fluffs fabric, but without heat, moisture evaporation is so slow that most loads would need hours in the drum to approach “dry.” For practical purposes, a dryer without heat is a dryer that doesn’t work. If yours is running cold, don’t just keep running cycles hoping it improves. You’re wasting electricity and wear on the machine without getting anywhere.
How do I know if my heating element is bad?
The clearest sign is a dryer that runs but produces absolutely no warmth. Remove the back panel after unplugging the machine and look at the element: visible breaks in the coil, burn marks, or dark scorching around the housing are all signs of failure. Confirm it with a multimeter test for continuity across the element terminals. A good element reads around 15 ohms. Zero or no reading means it’s done. Replacing a heating element is a manageable DIY job for someone comfortable with basic disassembly, though it does require care and the right replacement part for your specific model.
Why does my dryer heat up but then stop mid-cycle?
This is usually a venting or thermostat issue. A partially blocked vent causes heat to build up inside the dryer, which triggers the high-limit thermostat to cut power to the heating element as a safety measure. The dryer cools down, the thermostat resets, heat comes back and the cycle repeats. You end up with clothes that are half-dry after a full cycle. Clean the vent first. If that doesn’t fix it, the cycling thermostat may be failing, or the high-limit thermostat may be tripping more easily than it should because of worn contacts. A heating element with a hairline crack can also behave this way it works when cold, expands slightly as it heats, and the crack opens enough to break the circuit.
Is it worth repairing a dryer that won’t heat, or should I just replace it?
It depends on the age of the machine and the cost of the repair. A common benchmark is the 50% rule: if the repair cost reaches 50% or more of what a comparable new dryer would cost, replacement is usually the better financial decision. Many heating repairs a thermal fuse, a heating element, a thermostat are relatively affordable, well under that threshold. But if your dryer is more than 15 years old and you’re looking at a control board failure or multiple components at once, a new machine with a warranty often makes more sense. Get a proper diagnosis before committing to either path.
Should I attempt dryer repair myself or call a technician?
Simple checks cleaning the vent, clearing the lint screen, resetting the breaker are absolutely DIY territory. Replacing a thermal fuse or heating element is within reach for a handy homeowner who’s comfortable following a step-by-step guide and working safely with unplugged appliances. Gas dryer repairs that touch the gas valve or burner assembly should always go to a qualified technician. Electrical repairs involving the outlet or home wiring should involve a licensed electrician if there’s any sign of arcing or damage. When in doubt, a professional diagnosis is almost always worth the cost it saves you from buying parts you don’t need.
Wrapping up
A dryer not heating is almost always fixable once you know where to look. Start with the free stuff: clean the lint screen, check the vent, reset the breaker. If that doesn’t sort it, work through the internal components in order thermal fuse, heating element, thermostats testing each with a multimeter before buying parts. Know when to hand it off: gas components and electrical damage at the outlet are not the place to improvise. At Vancouver Appliance Service Pros, we handle dryer repairs and appliance service across Vancouver and the surrounding area. If you’ve worked through the basics and still can’t find the problem, or you’d simply rather have someone diagnose it correctly the first time, give us a call and we’ll help you figure out the best path forward.